Last Updated: 2021-08-14
Welcome
In this tutorial, you will get an overview of the chaos experimentation flow using the LitmusChaos framework. Before we get started, let us take a look at what you'll learn while you walk yourself through this tutorial.
What you will learn
- How to install LitmusChaos
- How to set up a chaos project on the ChaosCenter
- How to execute a predefined chaos scenario
- How to visualize the chaos experiment progress
- How to view and analyze the results of the chaos experiment
In this tutorial, we will inject a pod-delete fault against a sample microservices application called podtato-head and verify if the service continues to be available through the chaos duration.
Pre-Requisites
- Kubernetes 1.18 or later. Recommended sizing of at least: 2 vCPUs, 8GB memory, 10GB of disk space (for persistent volume creation)
- A Persistent volume: Recommend to have a Persistent volume(PV) of 20GB, You can start with 1GB for test purposes as well. This PV is used as persistent storage to store the chaos config and chaos-metrics in the Portal. By default, litmus install would use the default storage class to allocate the PV. If your cluster don't have storage-class then use the local PV for example you can use this.
- Review the resource/sizing requirements: Make sure you have resource available for deploying control plane and execution plane with some buffer.
- Helm3 or Kubectl
- Access to the internet from Cluster
Installation of Litmus can be done using either of below methods
- Helm
- Kubectl
Install Litmus using Helm
1.Create a Litmus namespace in Kubernetes
kubectl create ns litmus
2.Add the Litmus Helm Repo
helm repo add litmuschaos https://litmuschaos.github.io/litmus-helm/
3.Install Litmus
helm install litmuschaos --namespace litmus litmuschaos/litmus
Install Litmus using Kubectl
1.Create a Litmus namespace in Kubernetes
kubectl create ns litmus
2.Install Litmus from the manifest
kubectl apply -f https://litmuschaos.github.io/litmus/2.12.0/litmus-2.12.0.yaml
Verify your Litmus Installation
Check whether the Litmus control plane components comprising the Web-UI (frontend), GraphQL server & MongoDB pods are created and running successfully.
kubectl get pods -n litmus
NAME                                        READY   STATUS    RESTARTS   AGE
litmusportal-auth-server-7594bf7c46-td8jv   1/1     Running   0          47m
litmusportal-frontend-5fb5bb84f7-tcf95      1/1     Running   0          47m
litmusportal-server-858584d5b9-r8kkn        1/1     Running   0          47m
mongo-0                                     1/1     Running   0          47m
Note: It might take a couple of minutes for the components to enter the running state.
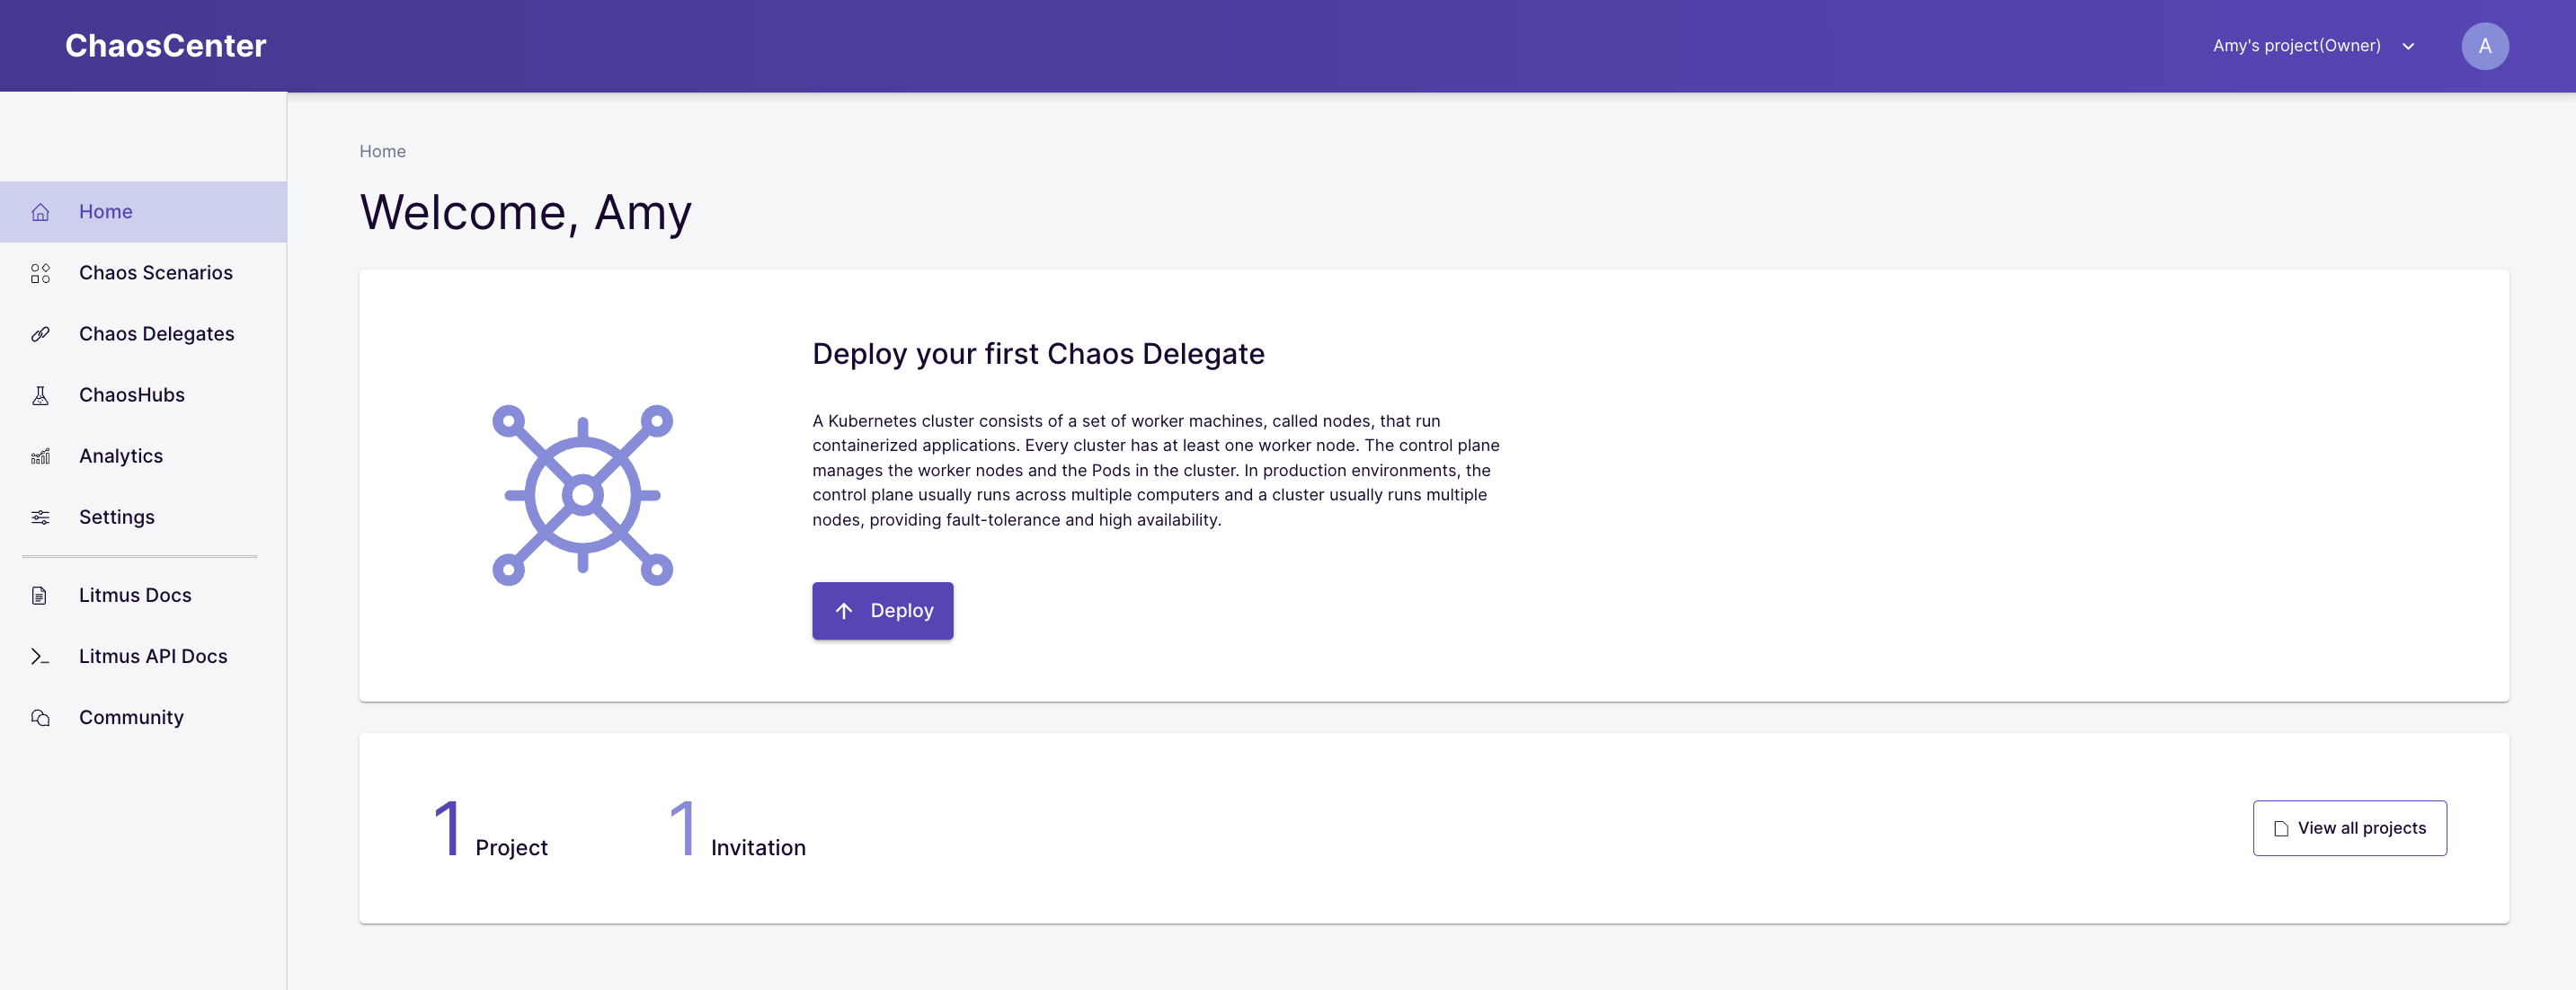
In this section, we will use the ChaosCenter dashboard to set up your first chaos project, verify the installation of chaos delegate services on the cluster and prepare for chaos scenario execution.
Access and Login to ChaosCenter Dashboard
Obtain the service endpoint of the litmus-frontend service, either via nodePort or LoadBalancer URL and open on your preferred browser. In case of the former, use the external IP of any one of the cluster nodes with the assigned nodePort.
kubectl get svc -n litmus
NAME                               TYPE           CLUSTER-IP     EXTERNAL-IP      PORT(S)                         AGE
litmusportal-auth-server-service   NodePort       10.76.20.219   <none>           9003:31241/TCP,3030:31248/TCP   49m
litmusportal-frontend-service      LoadBalancer   10.76.21.27    34.136.203.195   9091:32733/TCP                  49m
litmusportal-server-service        NodePort       10.76.23.74    <none>           9002:30707/TCP,8000:30327/TCP   49m
mongo-headless-service             ClusterIP      None           <none>           27017/TCP                       49m
mongo-service                      ClusterIP      10.76.26.27    <none>           27017/TCP                       49m
Use the default credentials to login.
Username: admin
Password: litmus
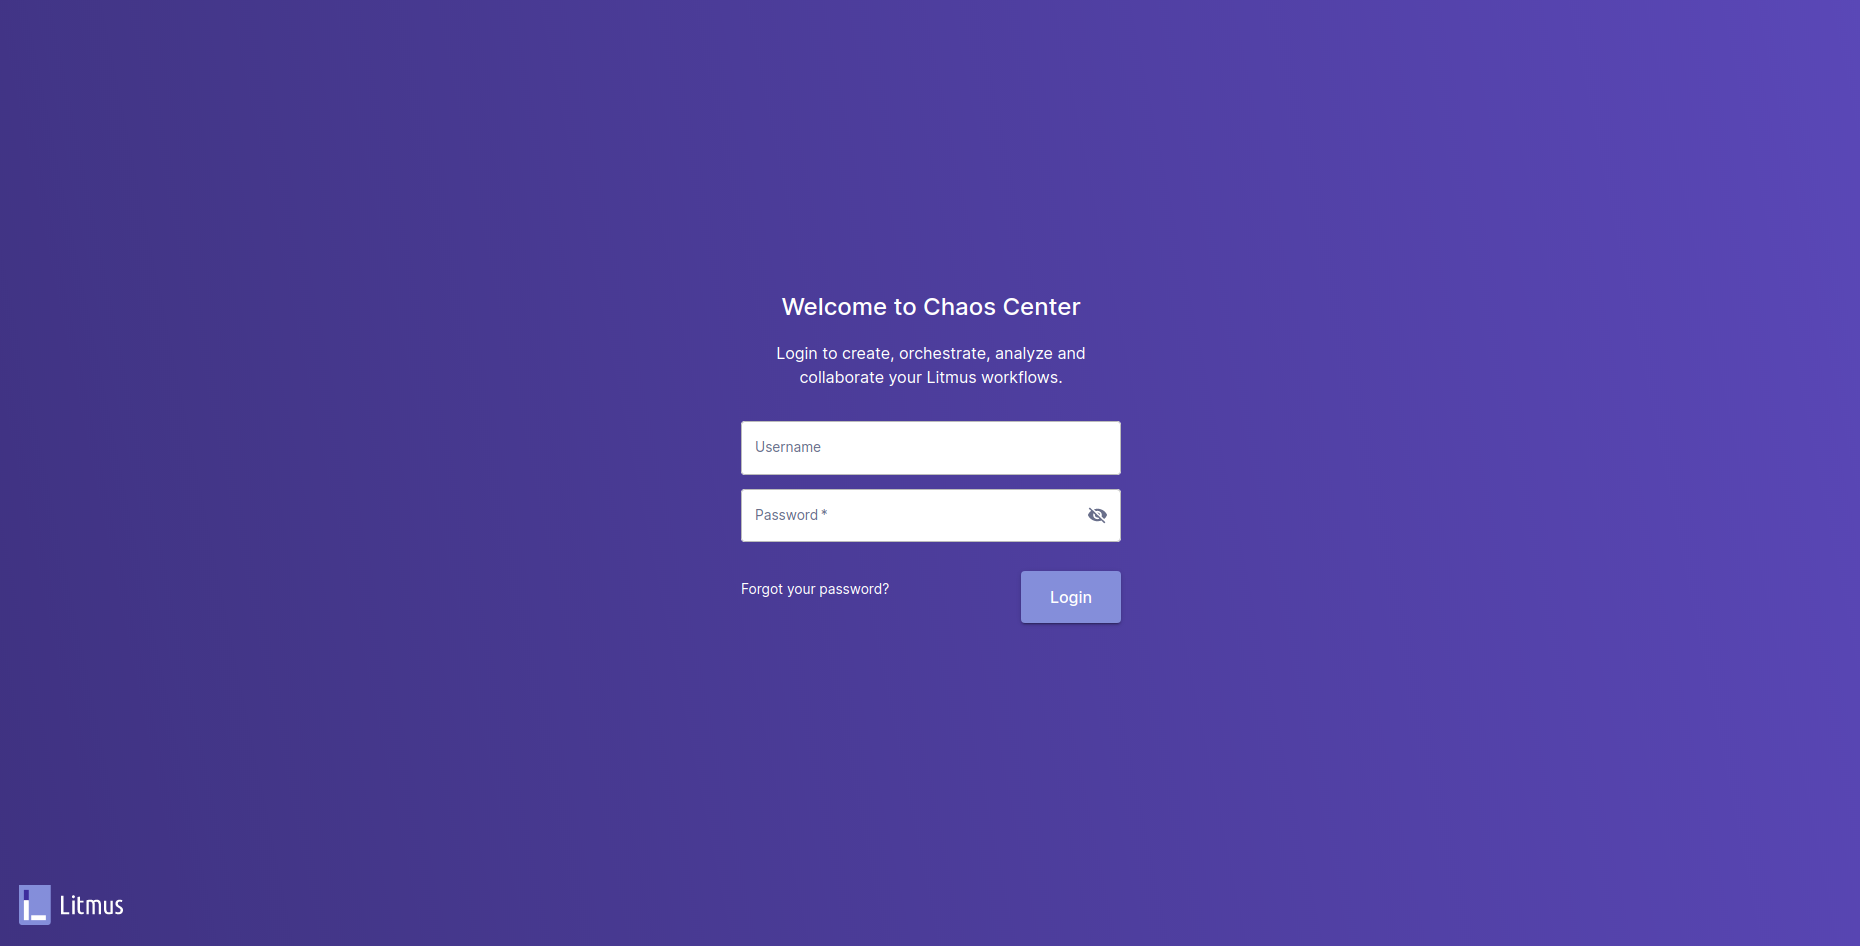
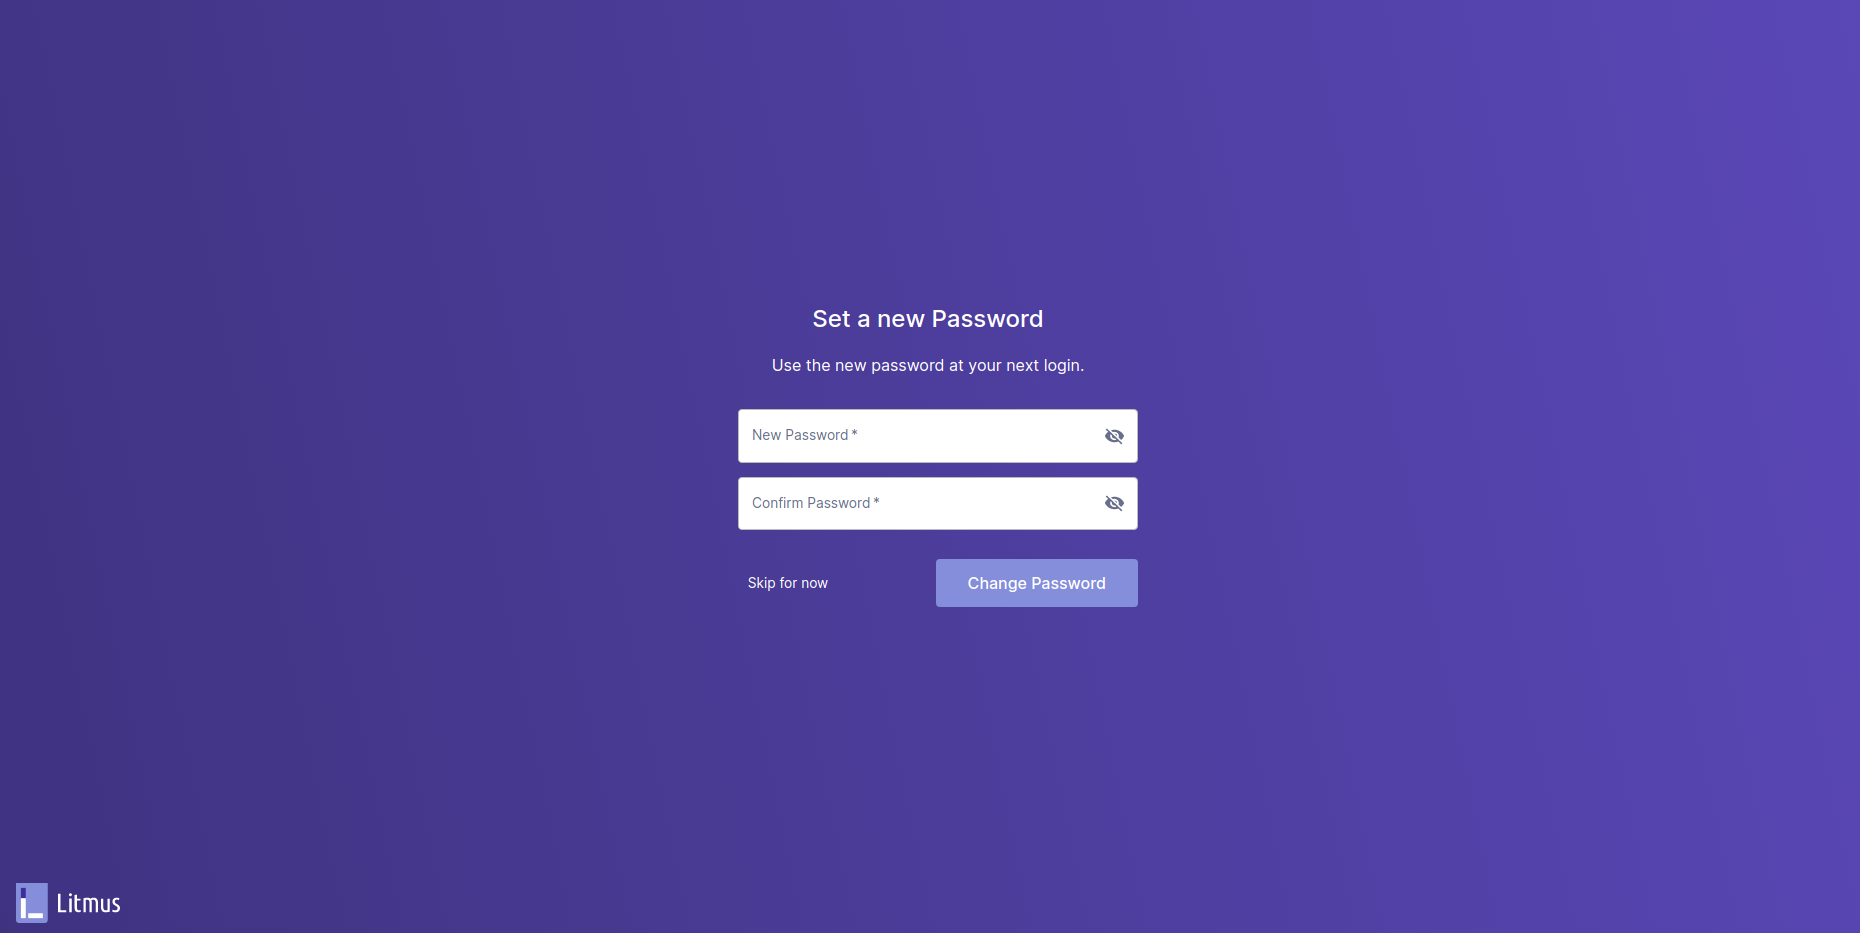
Configure a new password for your use.
You have been assigned a default project with Owner permissions
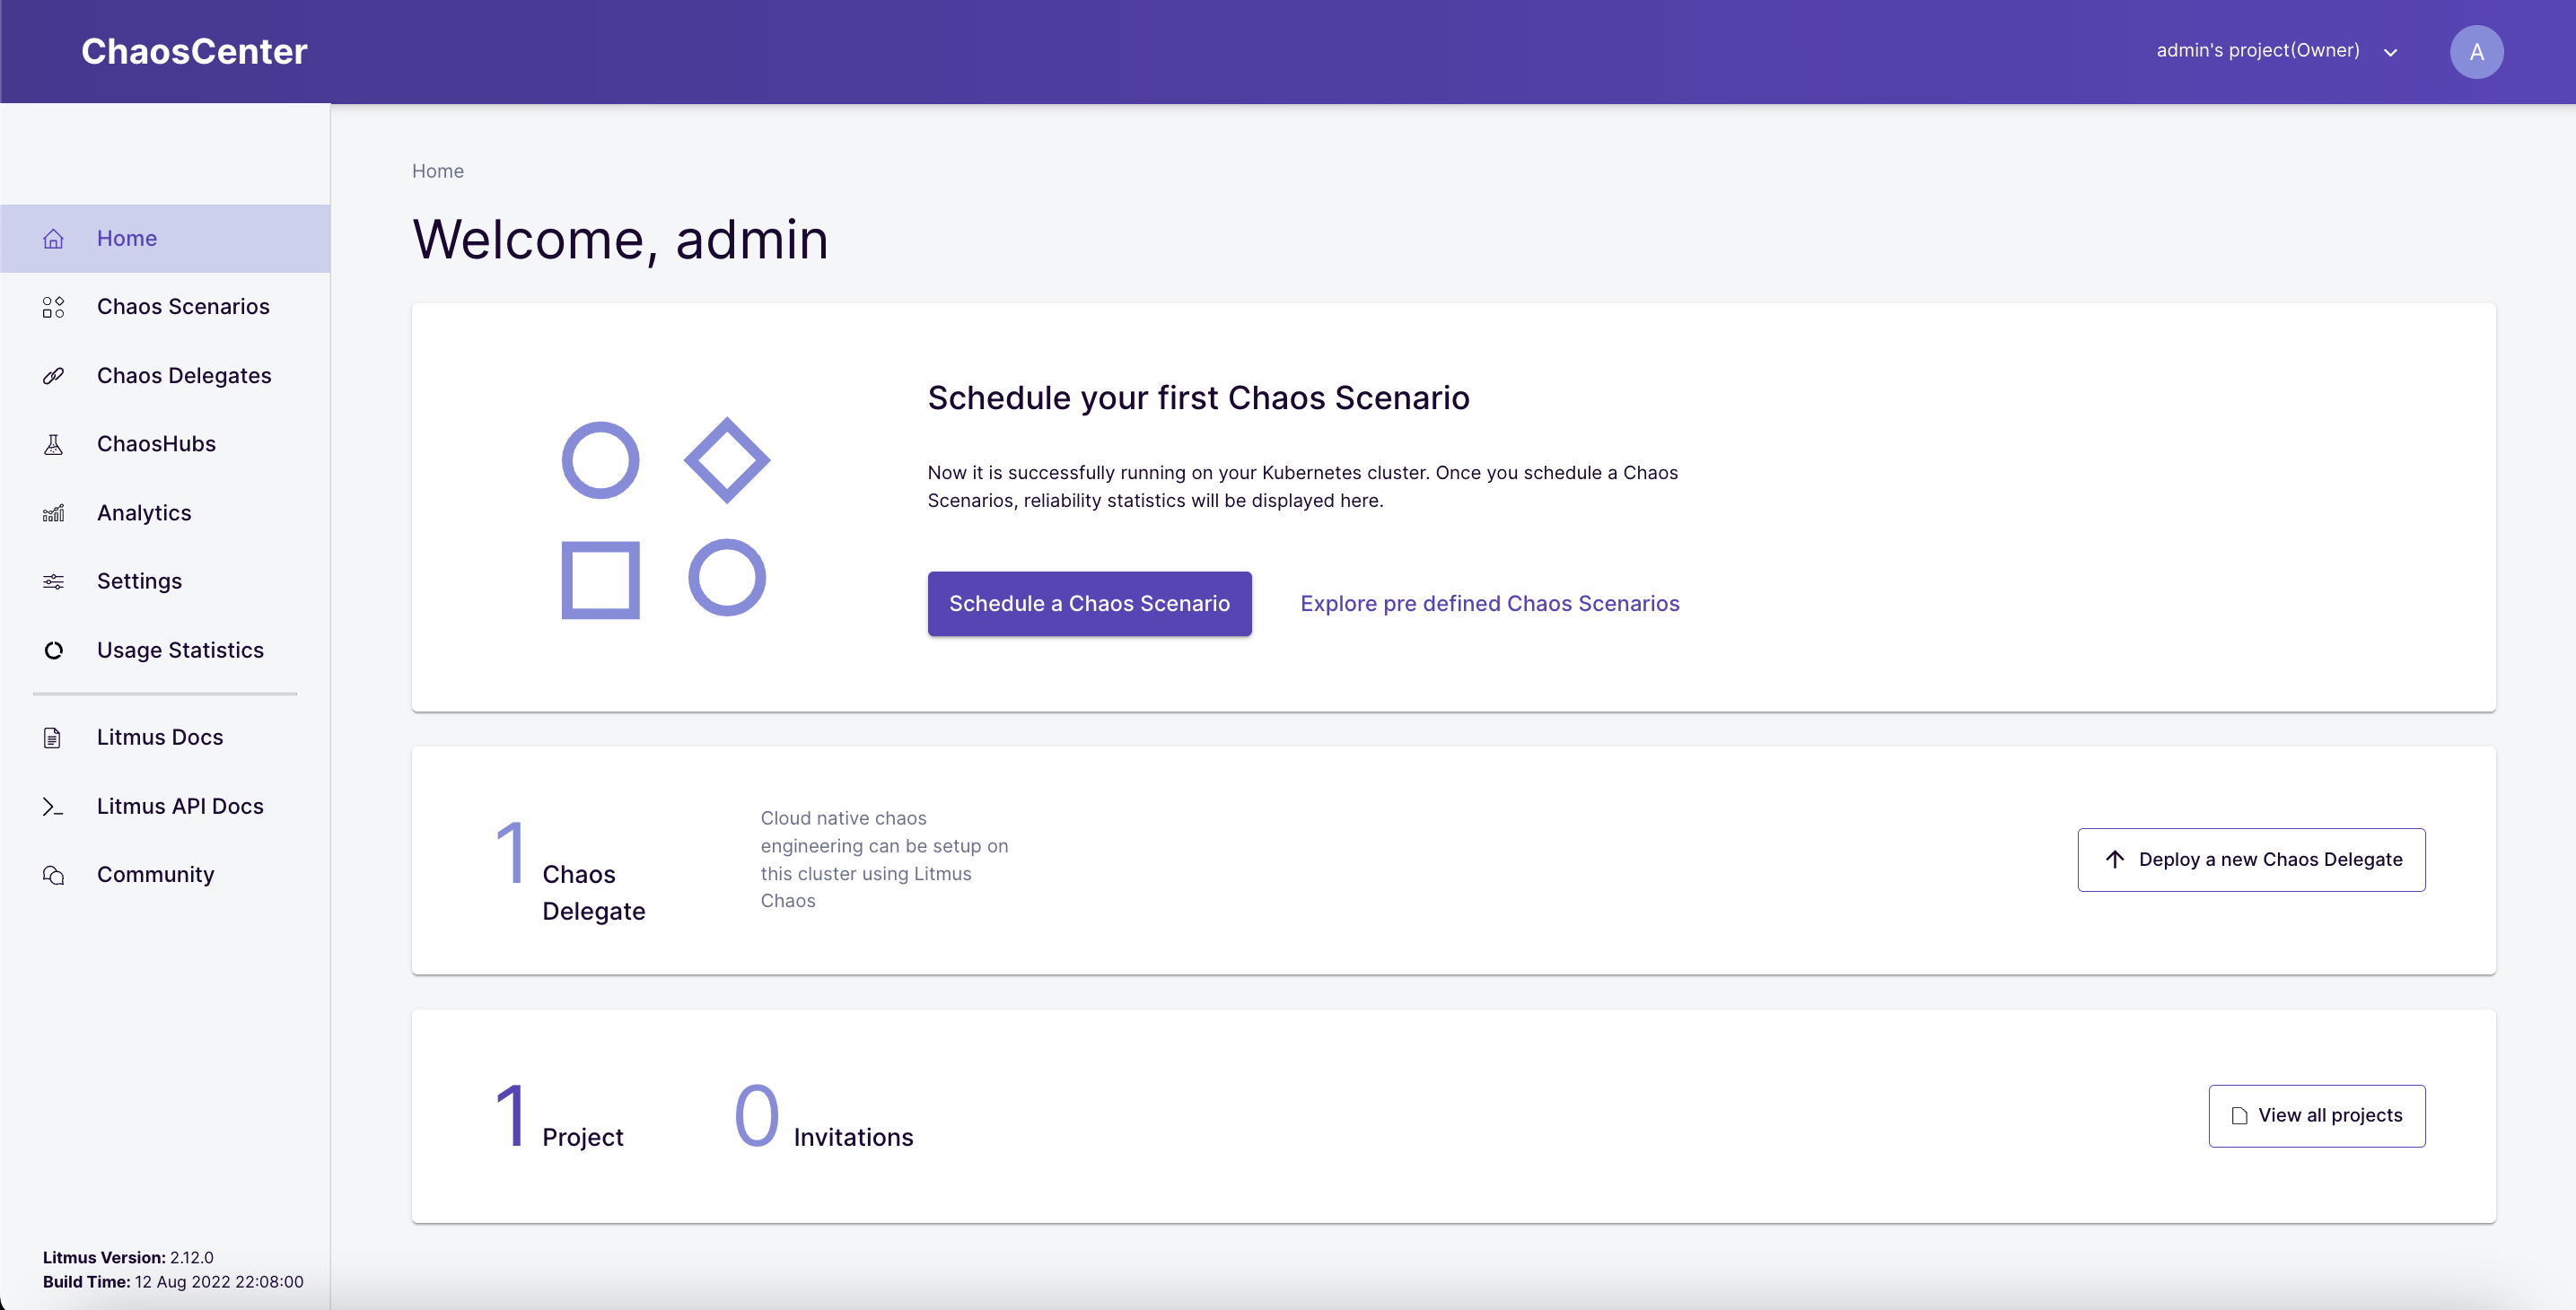
Verify Successful Registration of the Self Chaos Delegate
Once the project is created, the cluster is automagically registered as a chaos target via installation of Chaos Delegate. This is represented as "Self-Agent " in the Delegate console of the ChaosCenter Dashboard.
kubectl get pods -n litmus
NAME                                        READY   STATUS    RESTARTS   AGE
chaos-exporter-567c7cc8b-96pkf              1/1     Running   0          36m
chaos-operator-ce-89b4475f6-smnnl           1/1     Running   0          36m
event-tracker-64566957b7-ks5pm              1/1     Running   0          36m
litmusportal-auth-server-7594bf7c46-td8jv   1/1     Running   0          47m
litmusportal-frontend-5fb5bb84f7-tcf95      1/1     Running   0          47m
litmusportal-server-858584d5b9-r8kkn        1/1     Running   0          47m
mongo-0                                     1/1     Running   0          47m
subscriber-7b7c598677-d2lf9                 1/1     Running   0          36m
workflow-controller-5c7fc6fcdd-st7n4        1/1     Running   0          36m

At this point, we are ready to run chaos experiments!
In this section, we will execute a pre-defined chaos scenario to inject a pod-delete/kill fault on a sample microservices application. The chaos scenario is configured to perform the following actions:
- Install the podtato-head hello service application
- Inject the pod-kill fault
- Verify the availability of the service through the chaos duration using probes
- (Optional) Clean up the chaos resources at the end of the experiment
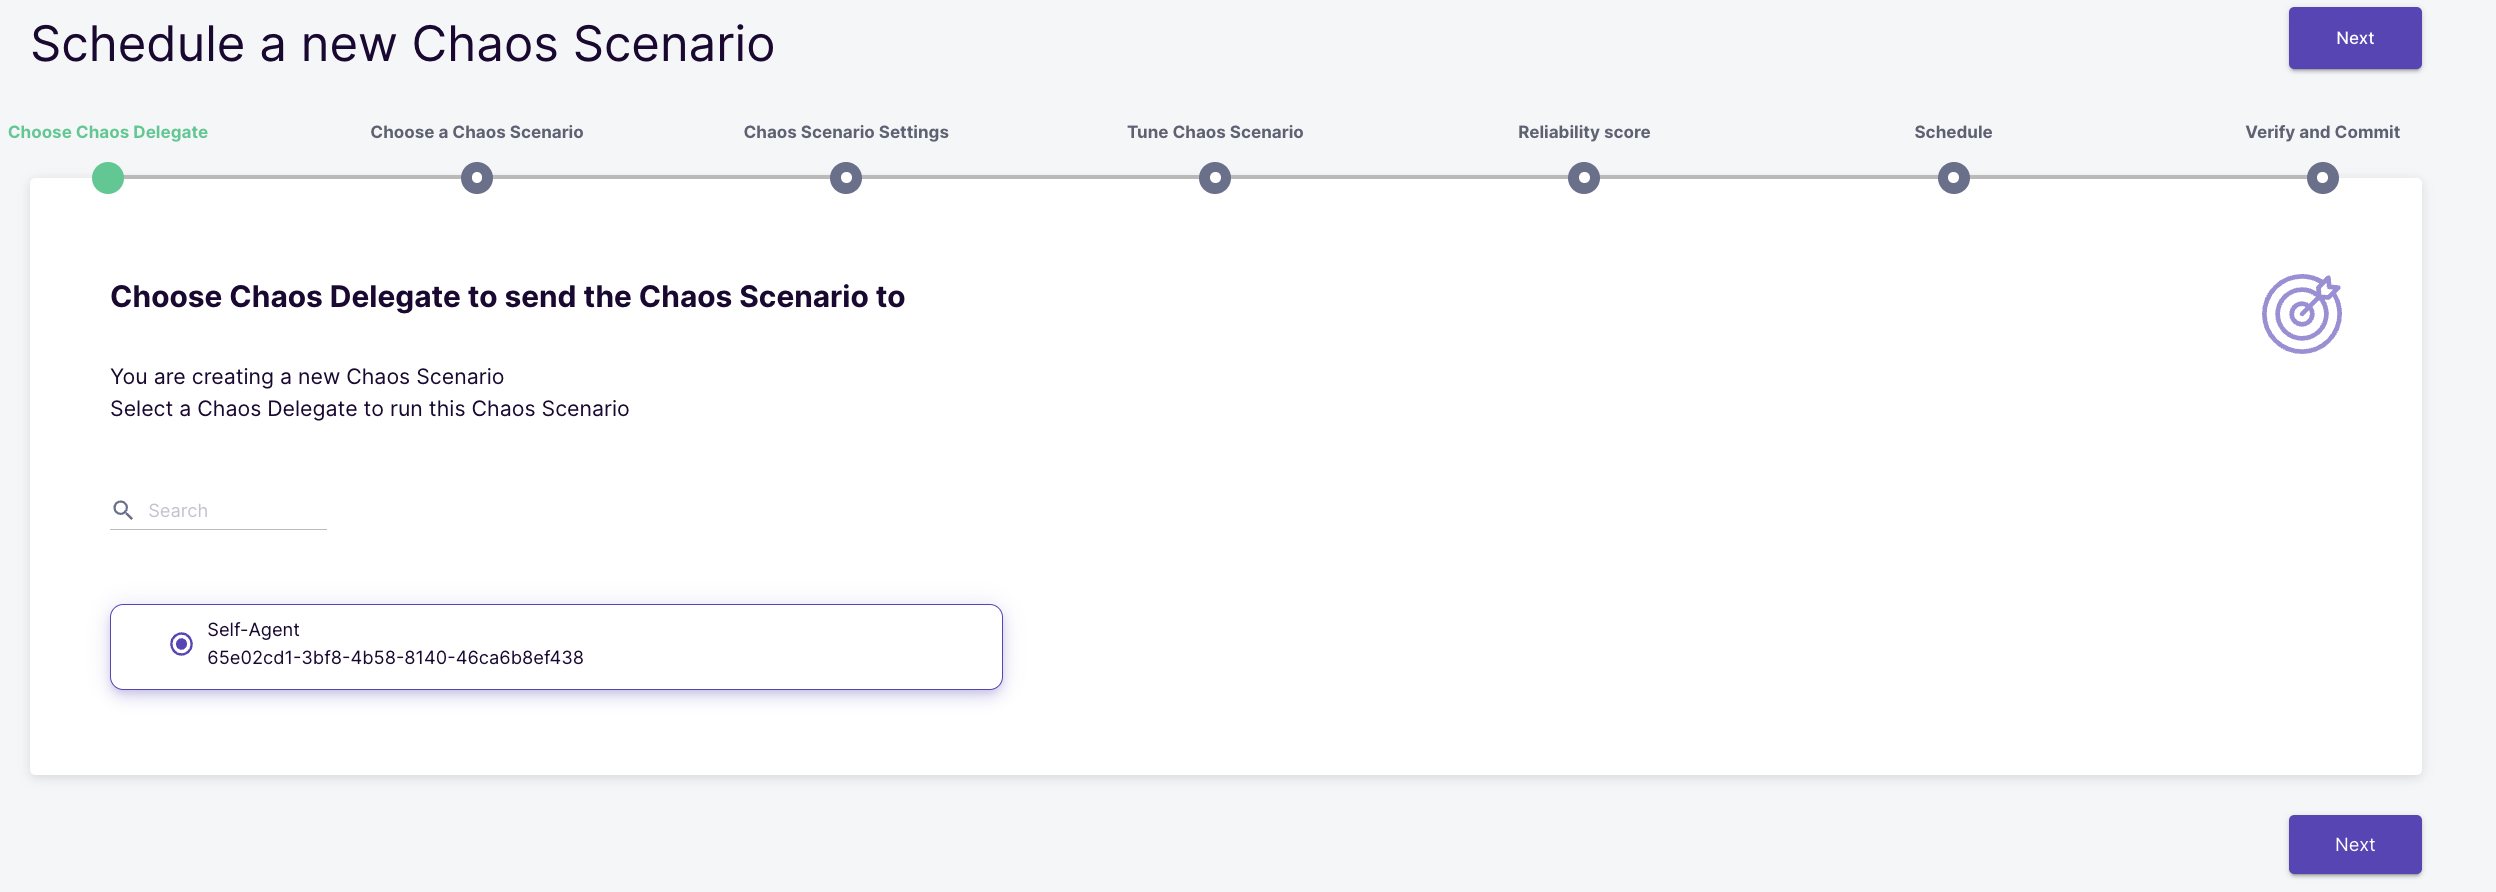
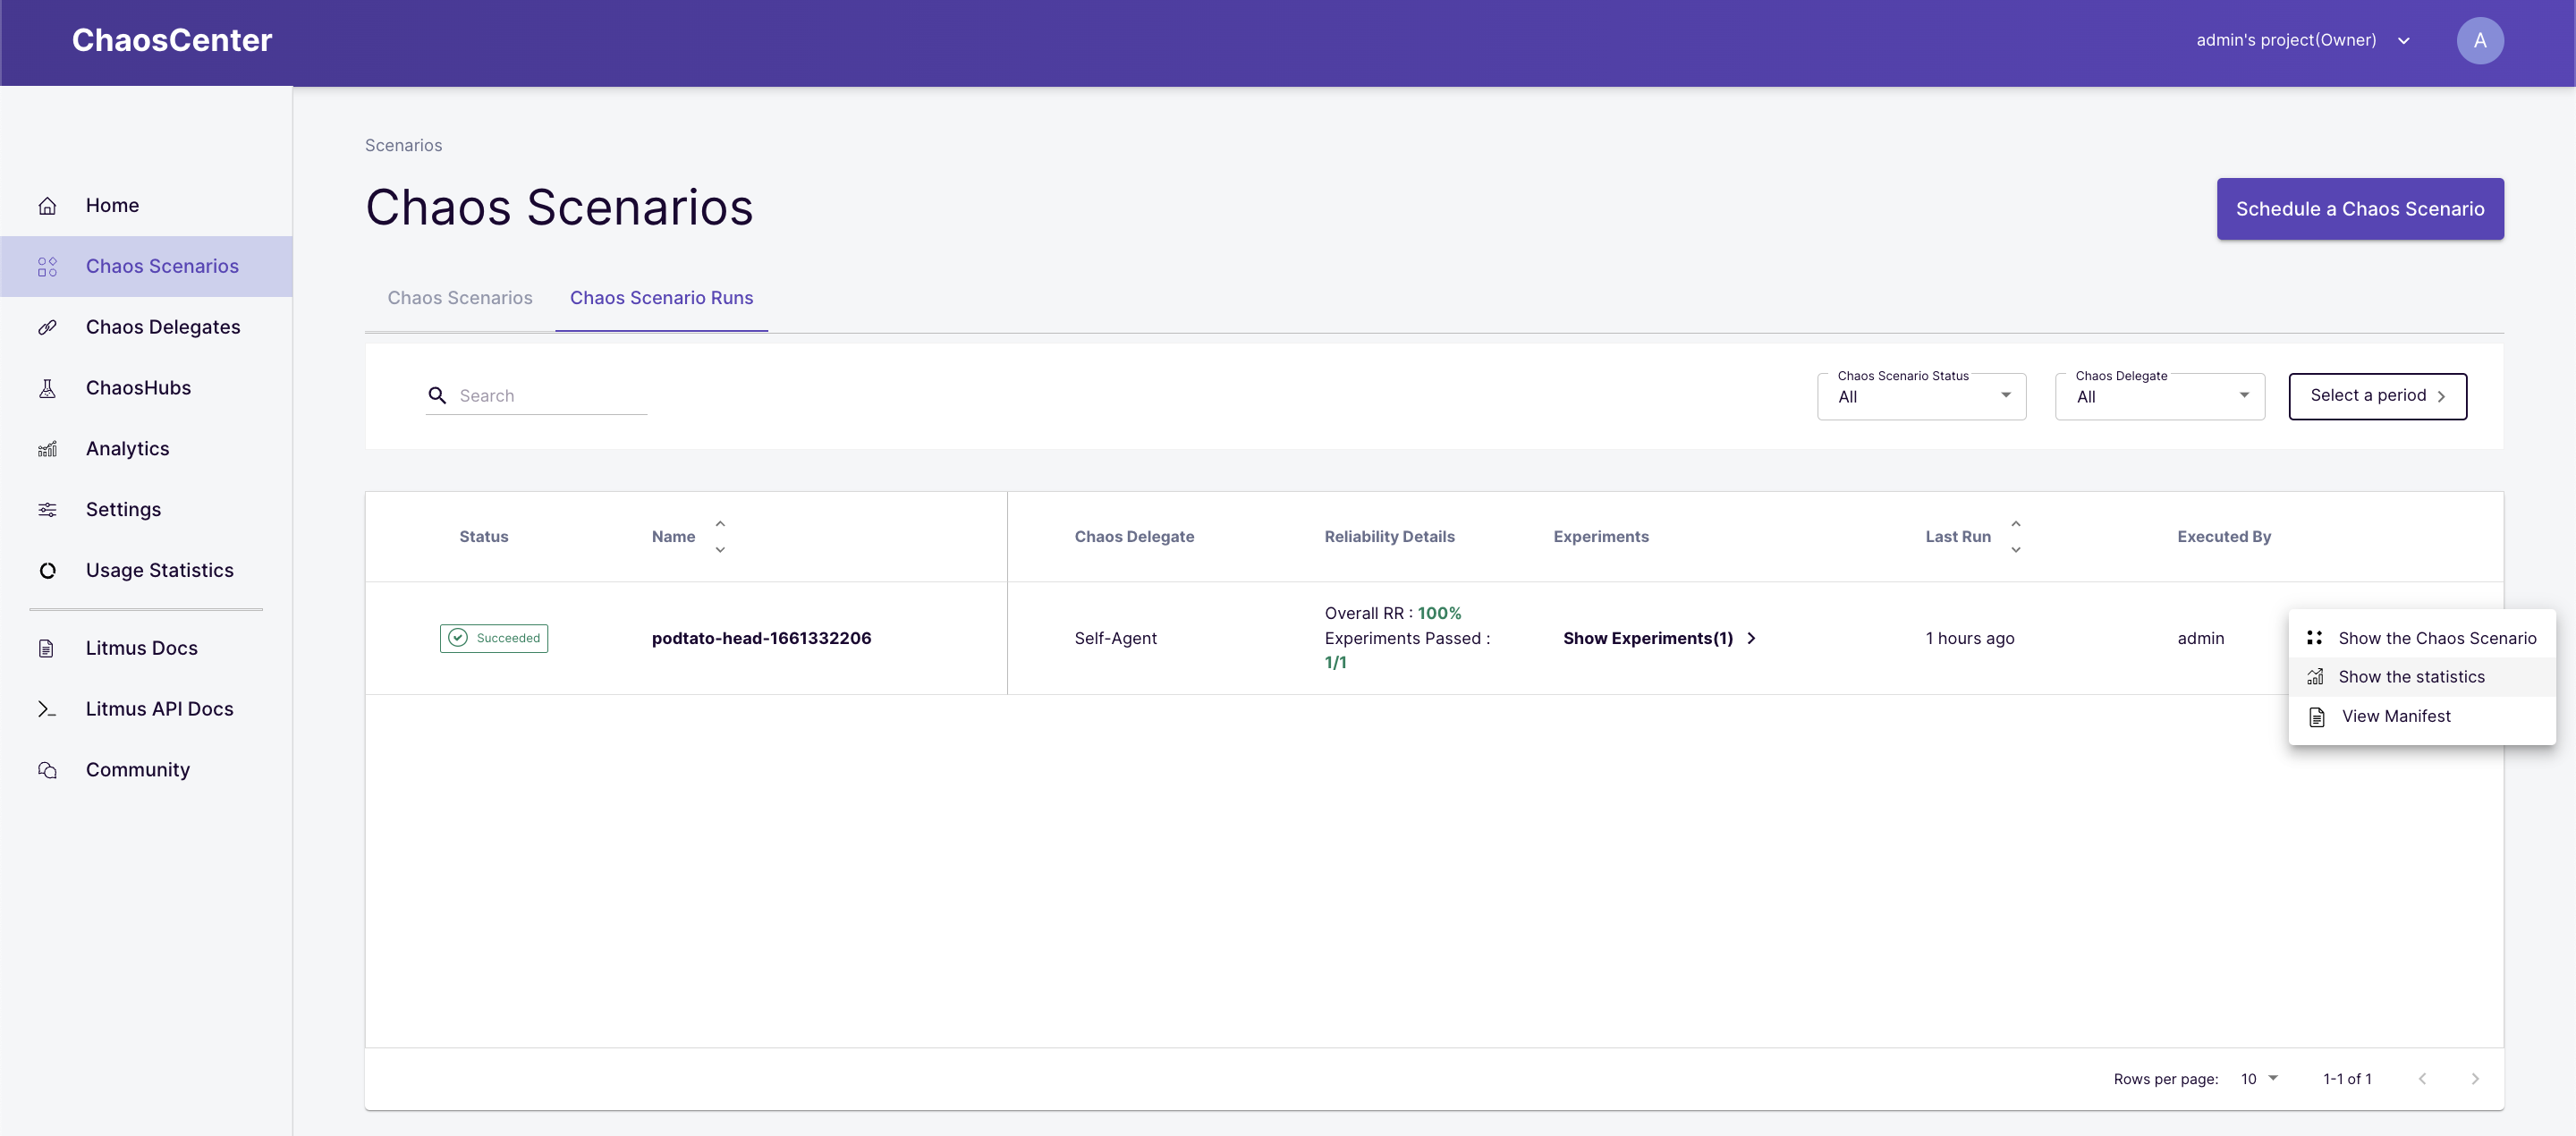
Select predefined chaos scenario
Click the "Schedule Chaos Scenario" on the ChaosCenter home page to get started:
Select the "Self-Agent" as the target cluster for chaos execution
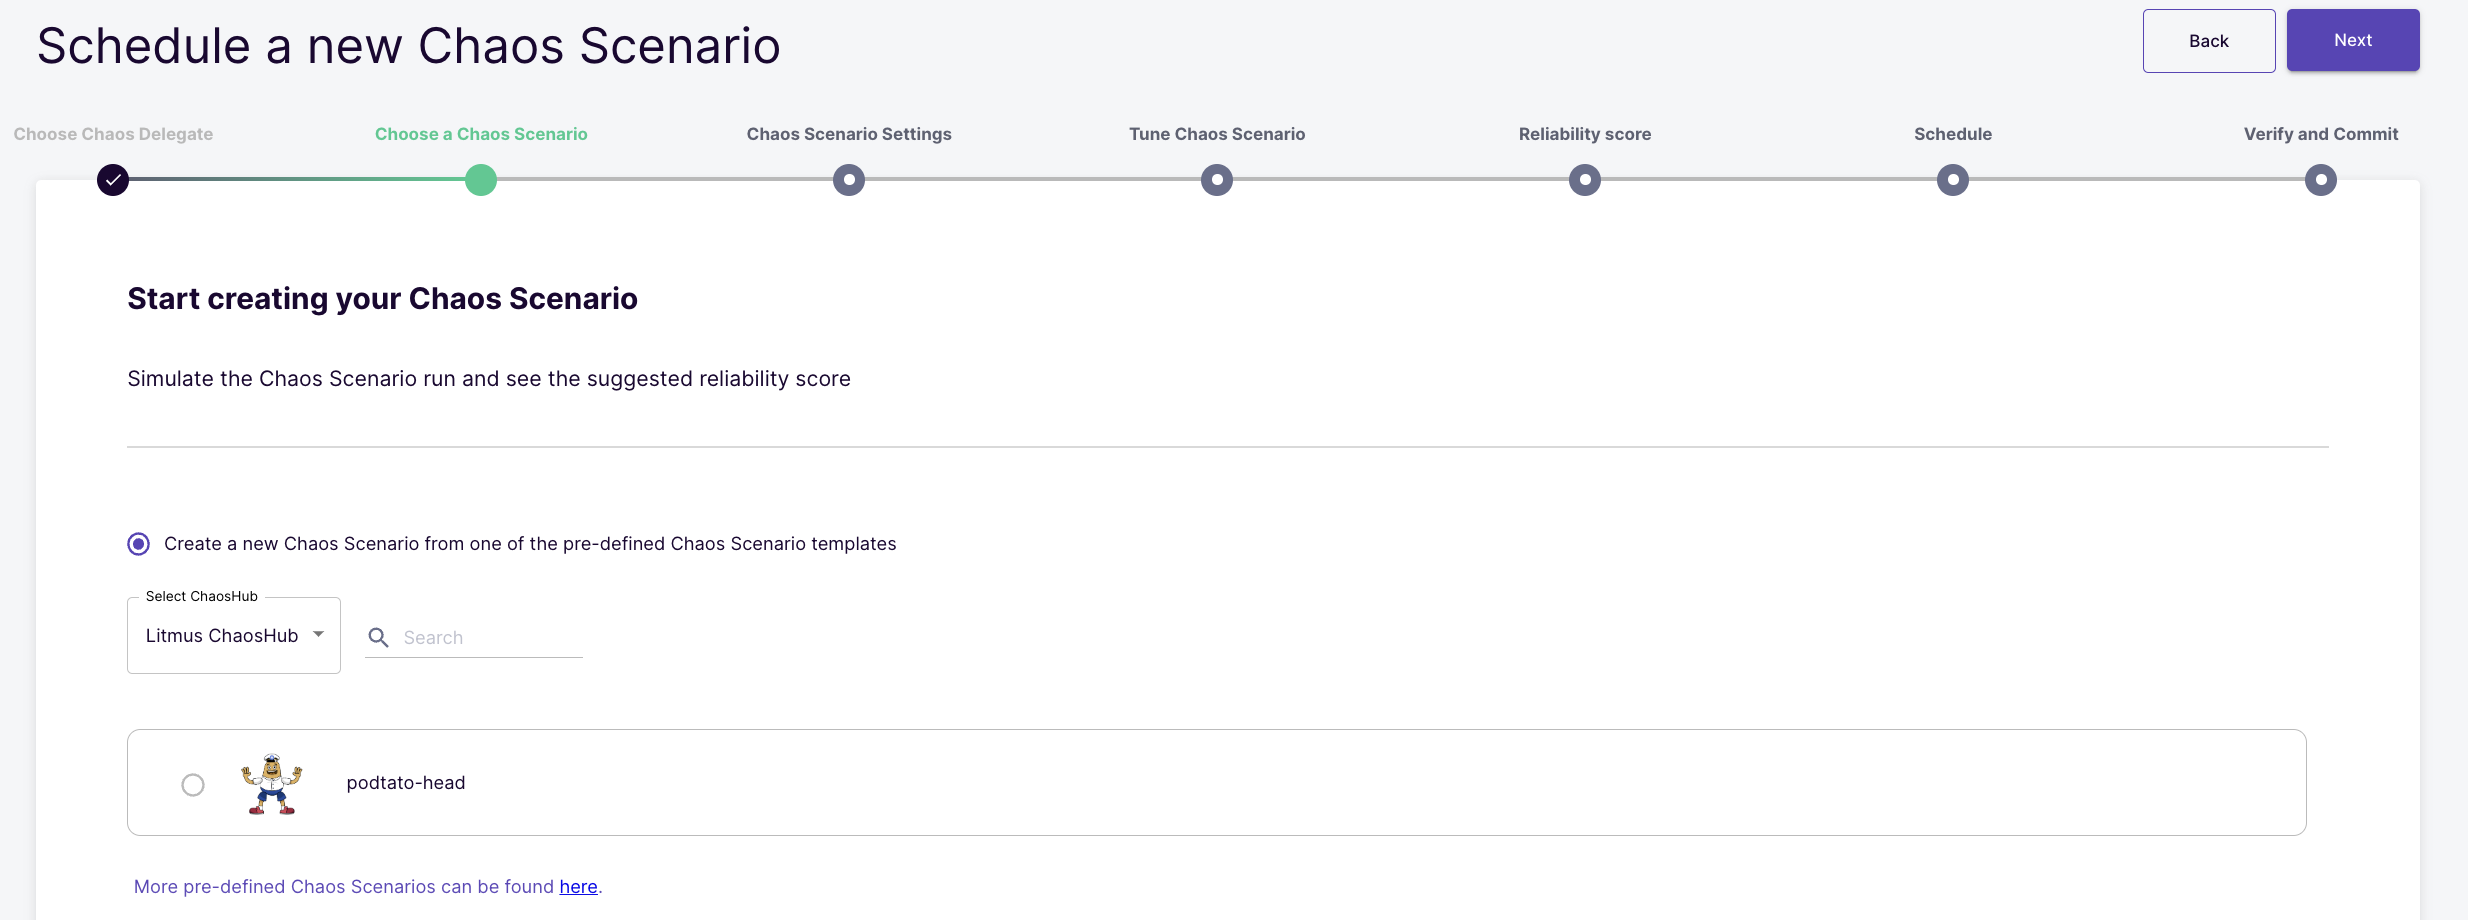
Select the option to create a new chaos scenario from pre-defined chaos scenario templates. Amongst the available templates, select the "podtato-head" option.
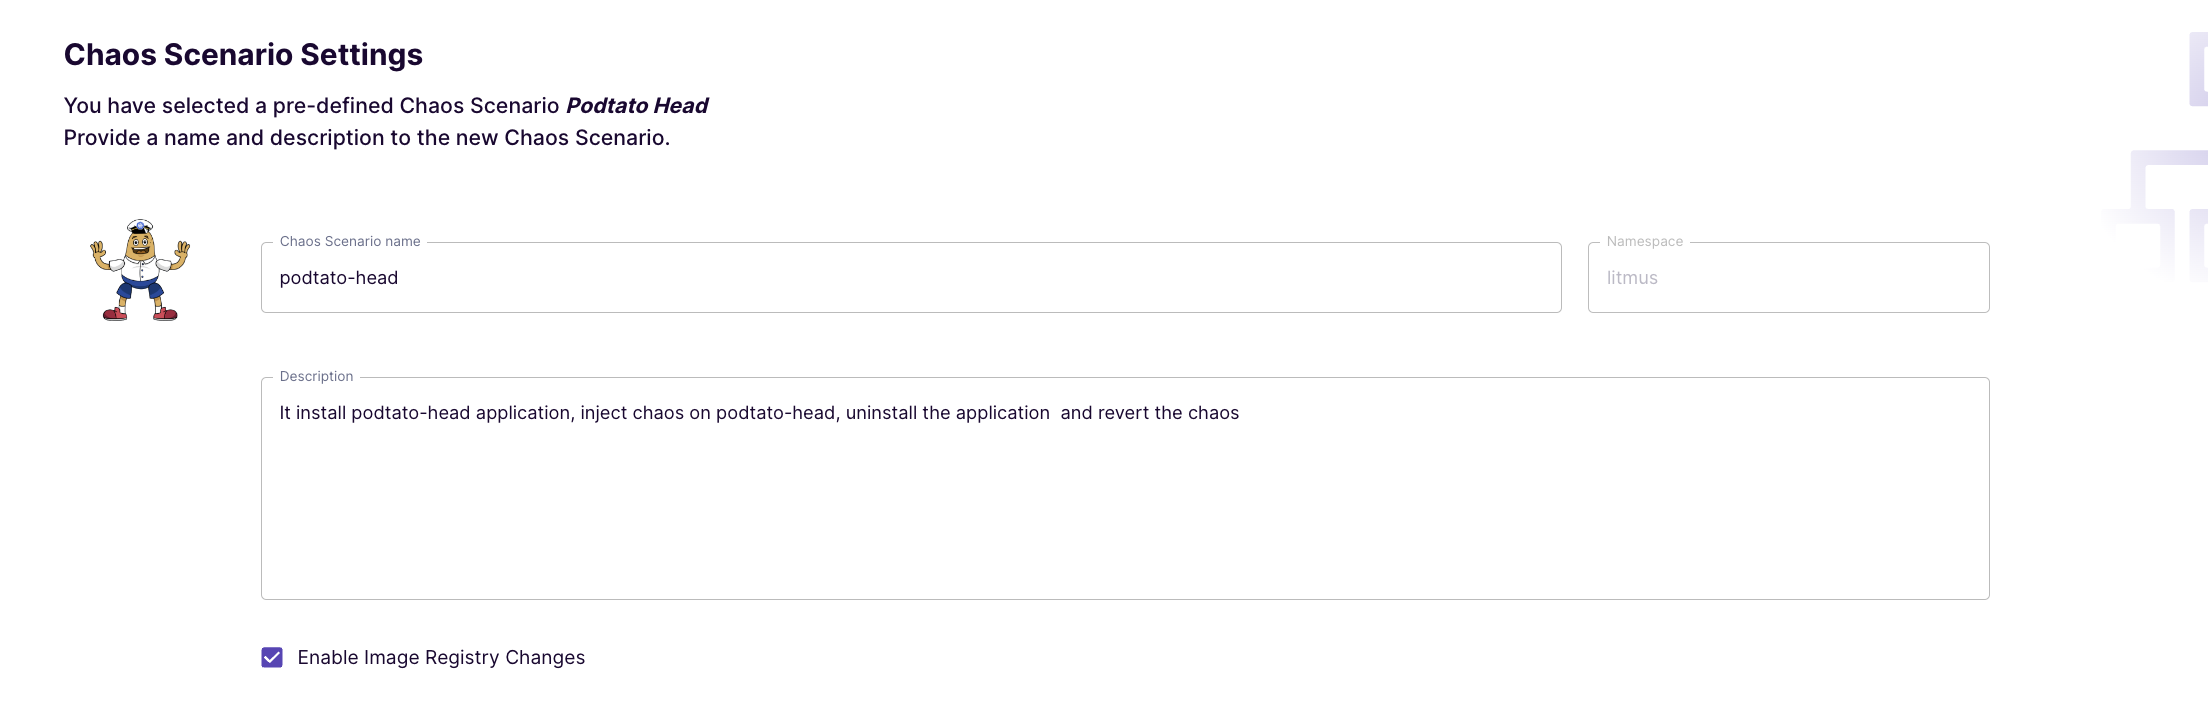
View the description of the chaos scenario
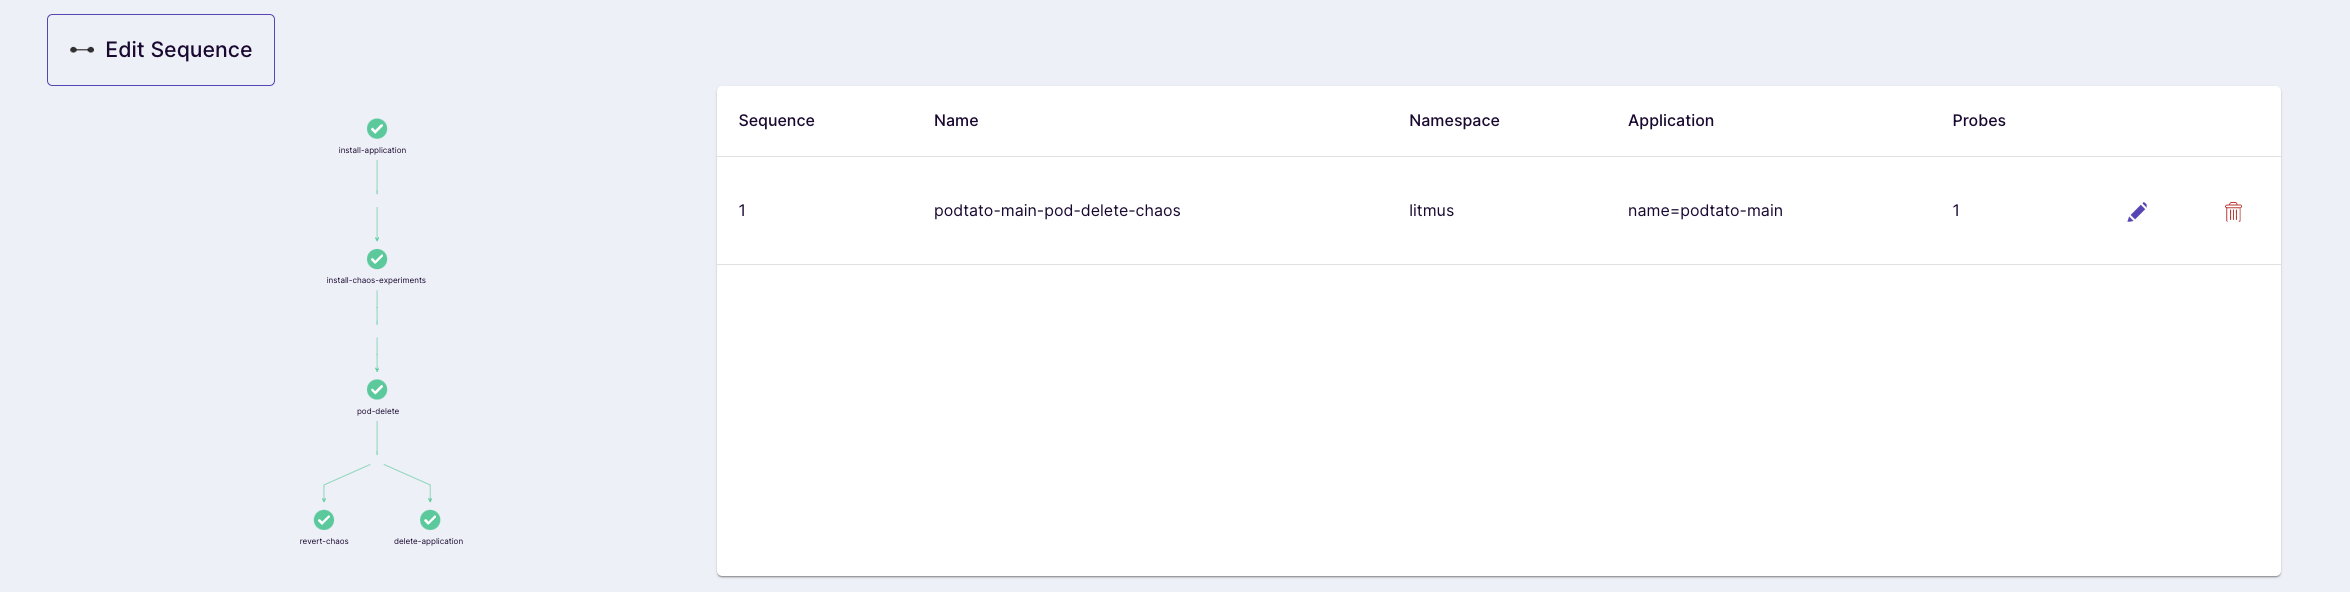
Preview the Chaos Scenario Steps
View the preview of the chaos scenario.
(Optional) You could also edit the chaos scenario YAML depending upon your need at this stage
(Optional) You could also add the steady-state hypothesis for the chaos scenario
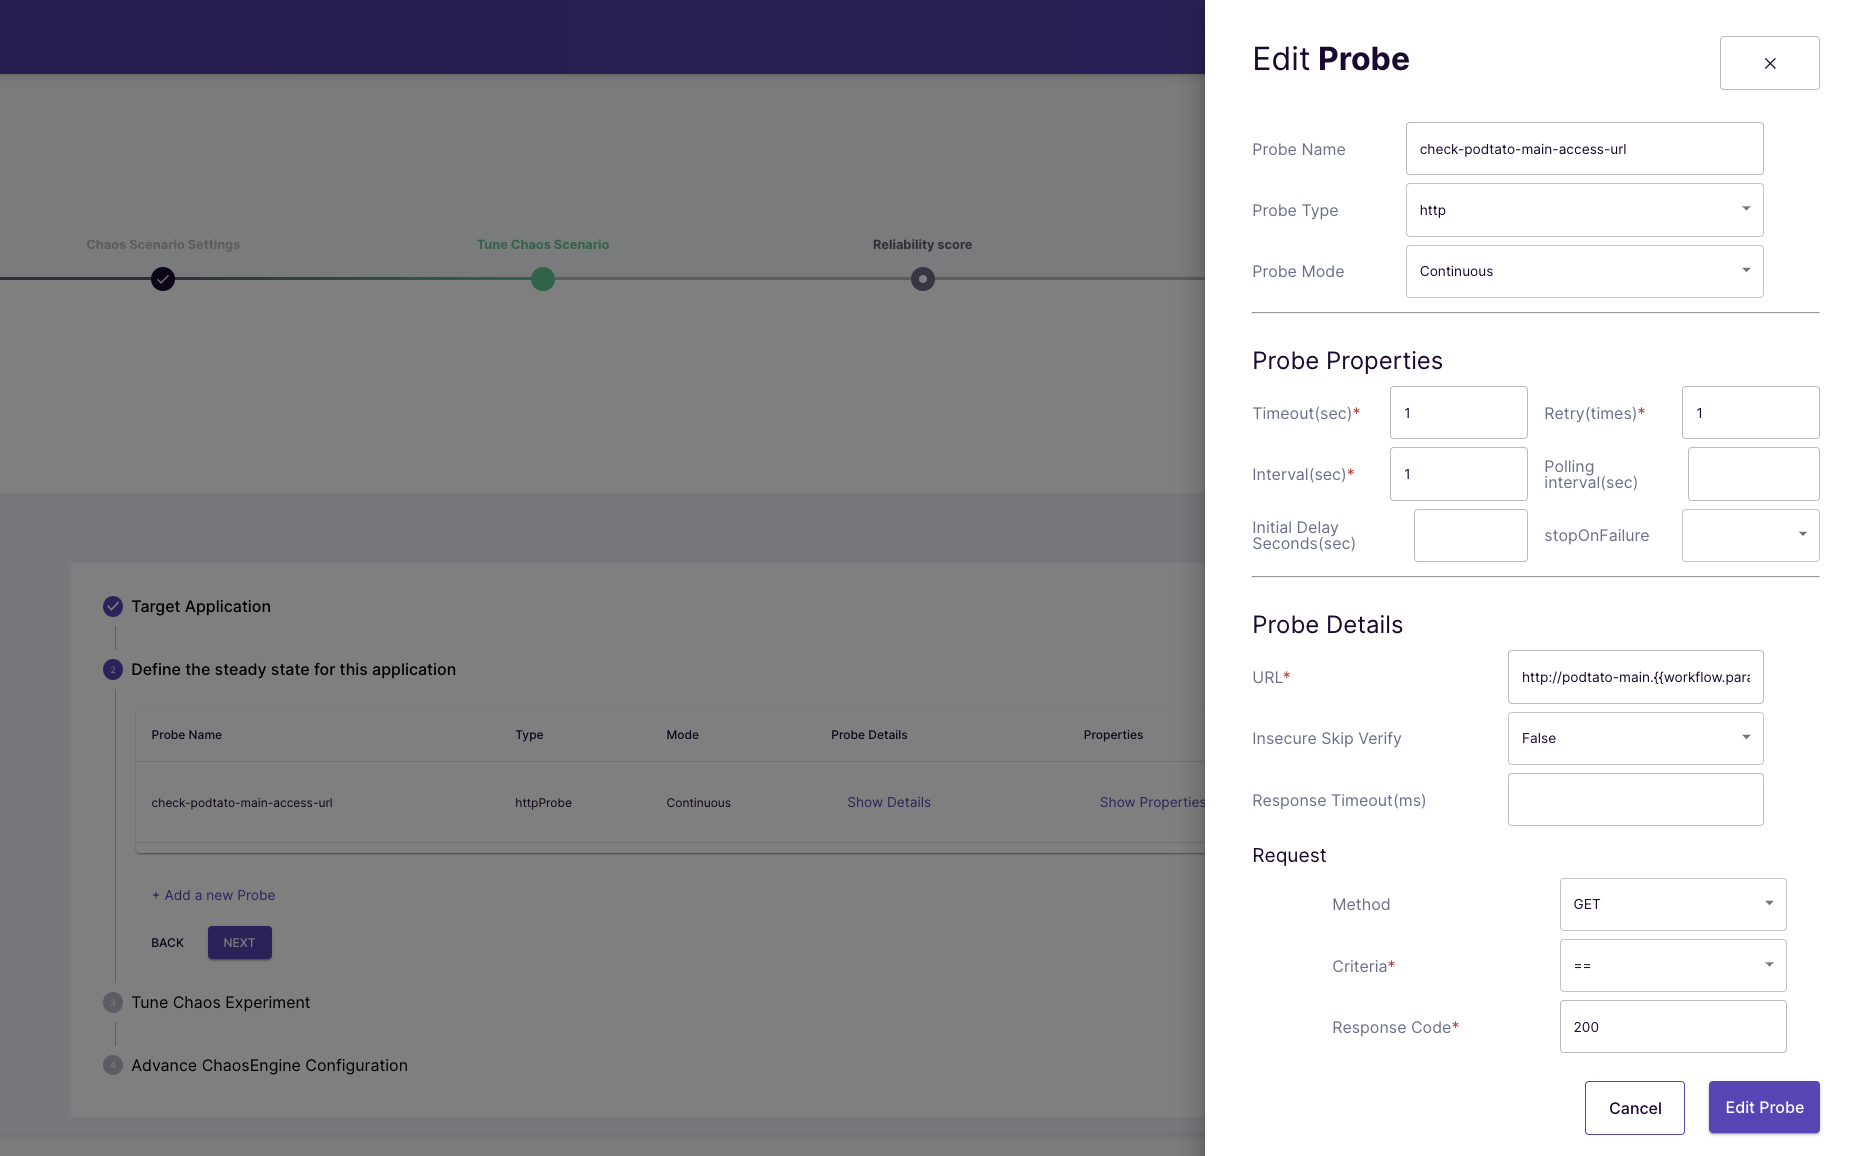
(Optional) Verify the hypothesis for the chaos scenario
(Optional) Preview the Chaos Scenario Steps
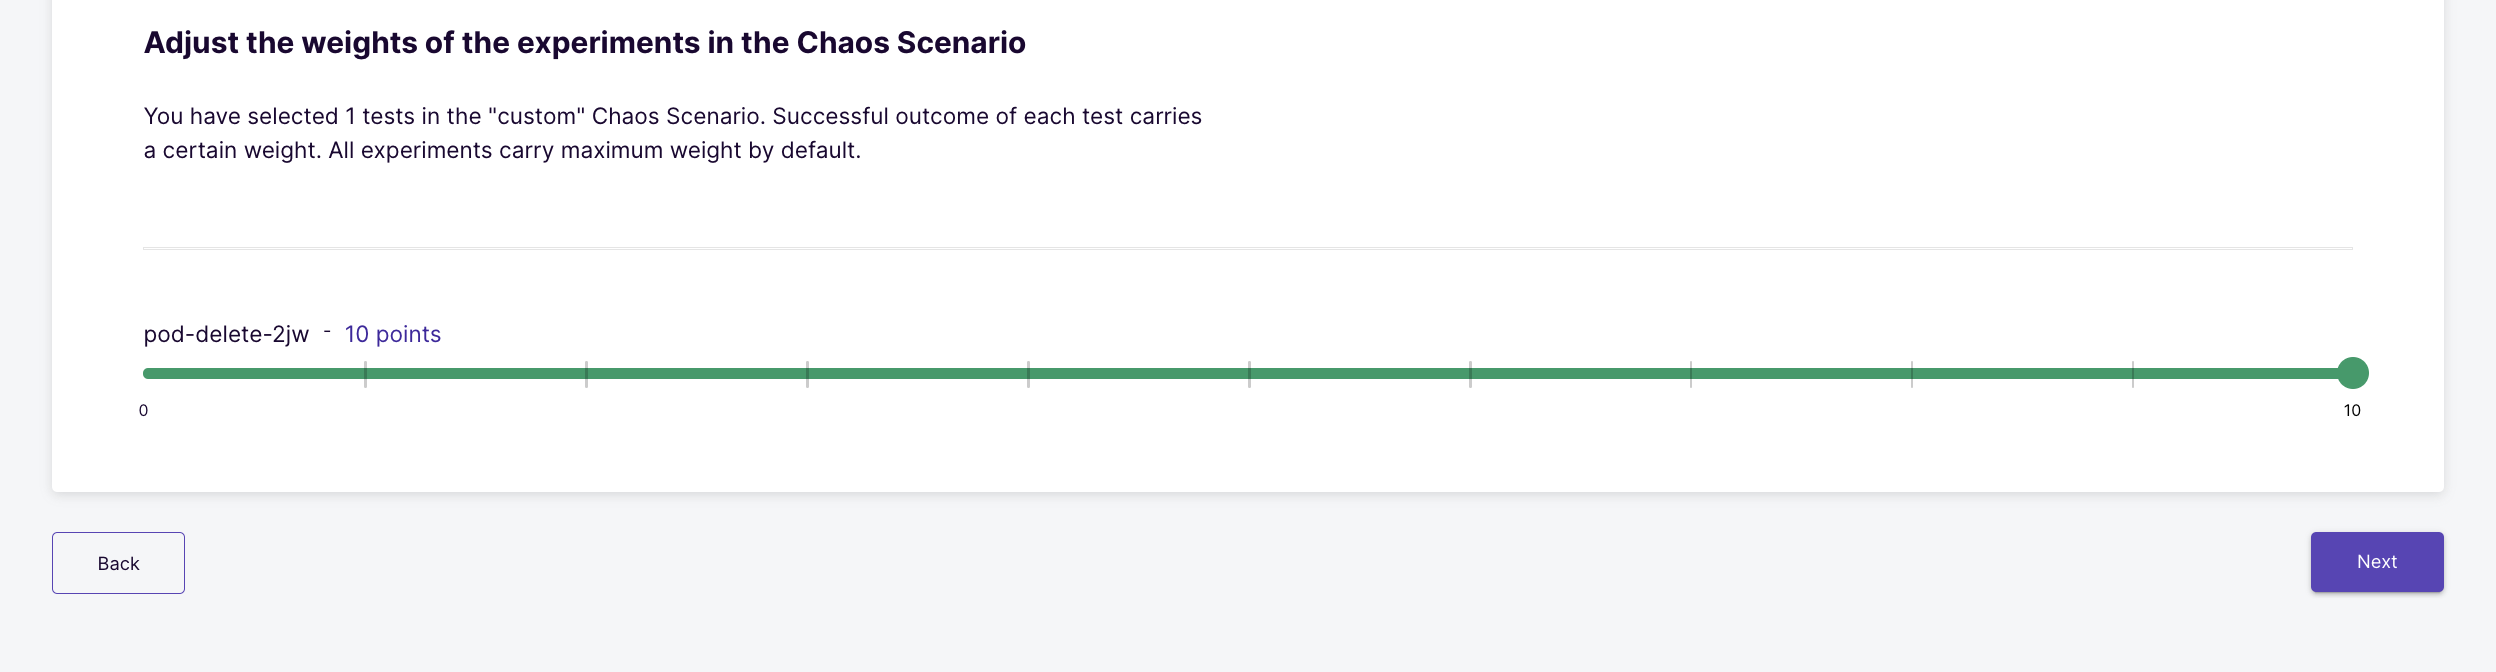
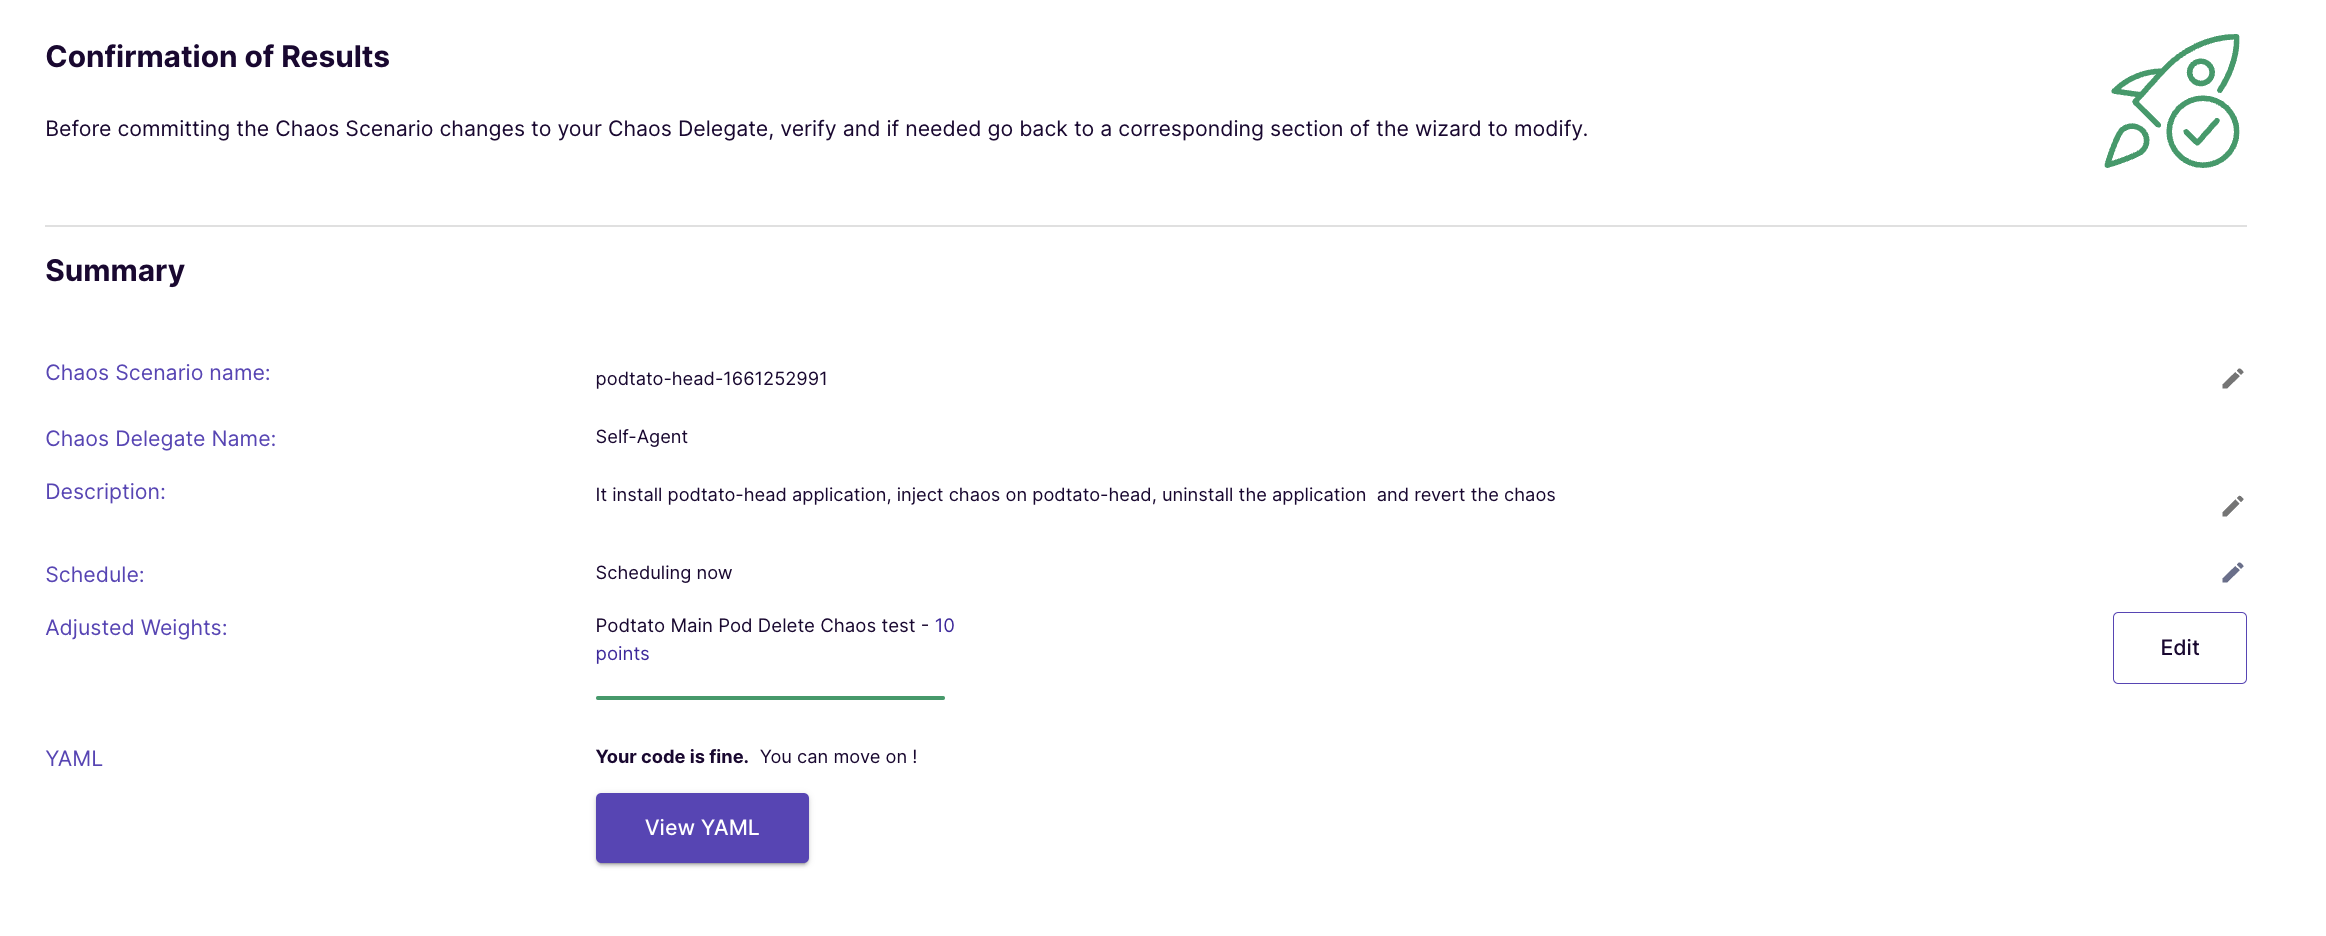
Assign weights to the chaos experiments that are part of the chaos scenario using the slider. This is useful when there are multiple experiments in the chaos scenario. These weights influence the "Resilience Score" calculation for the chaos scenario.
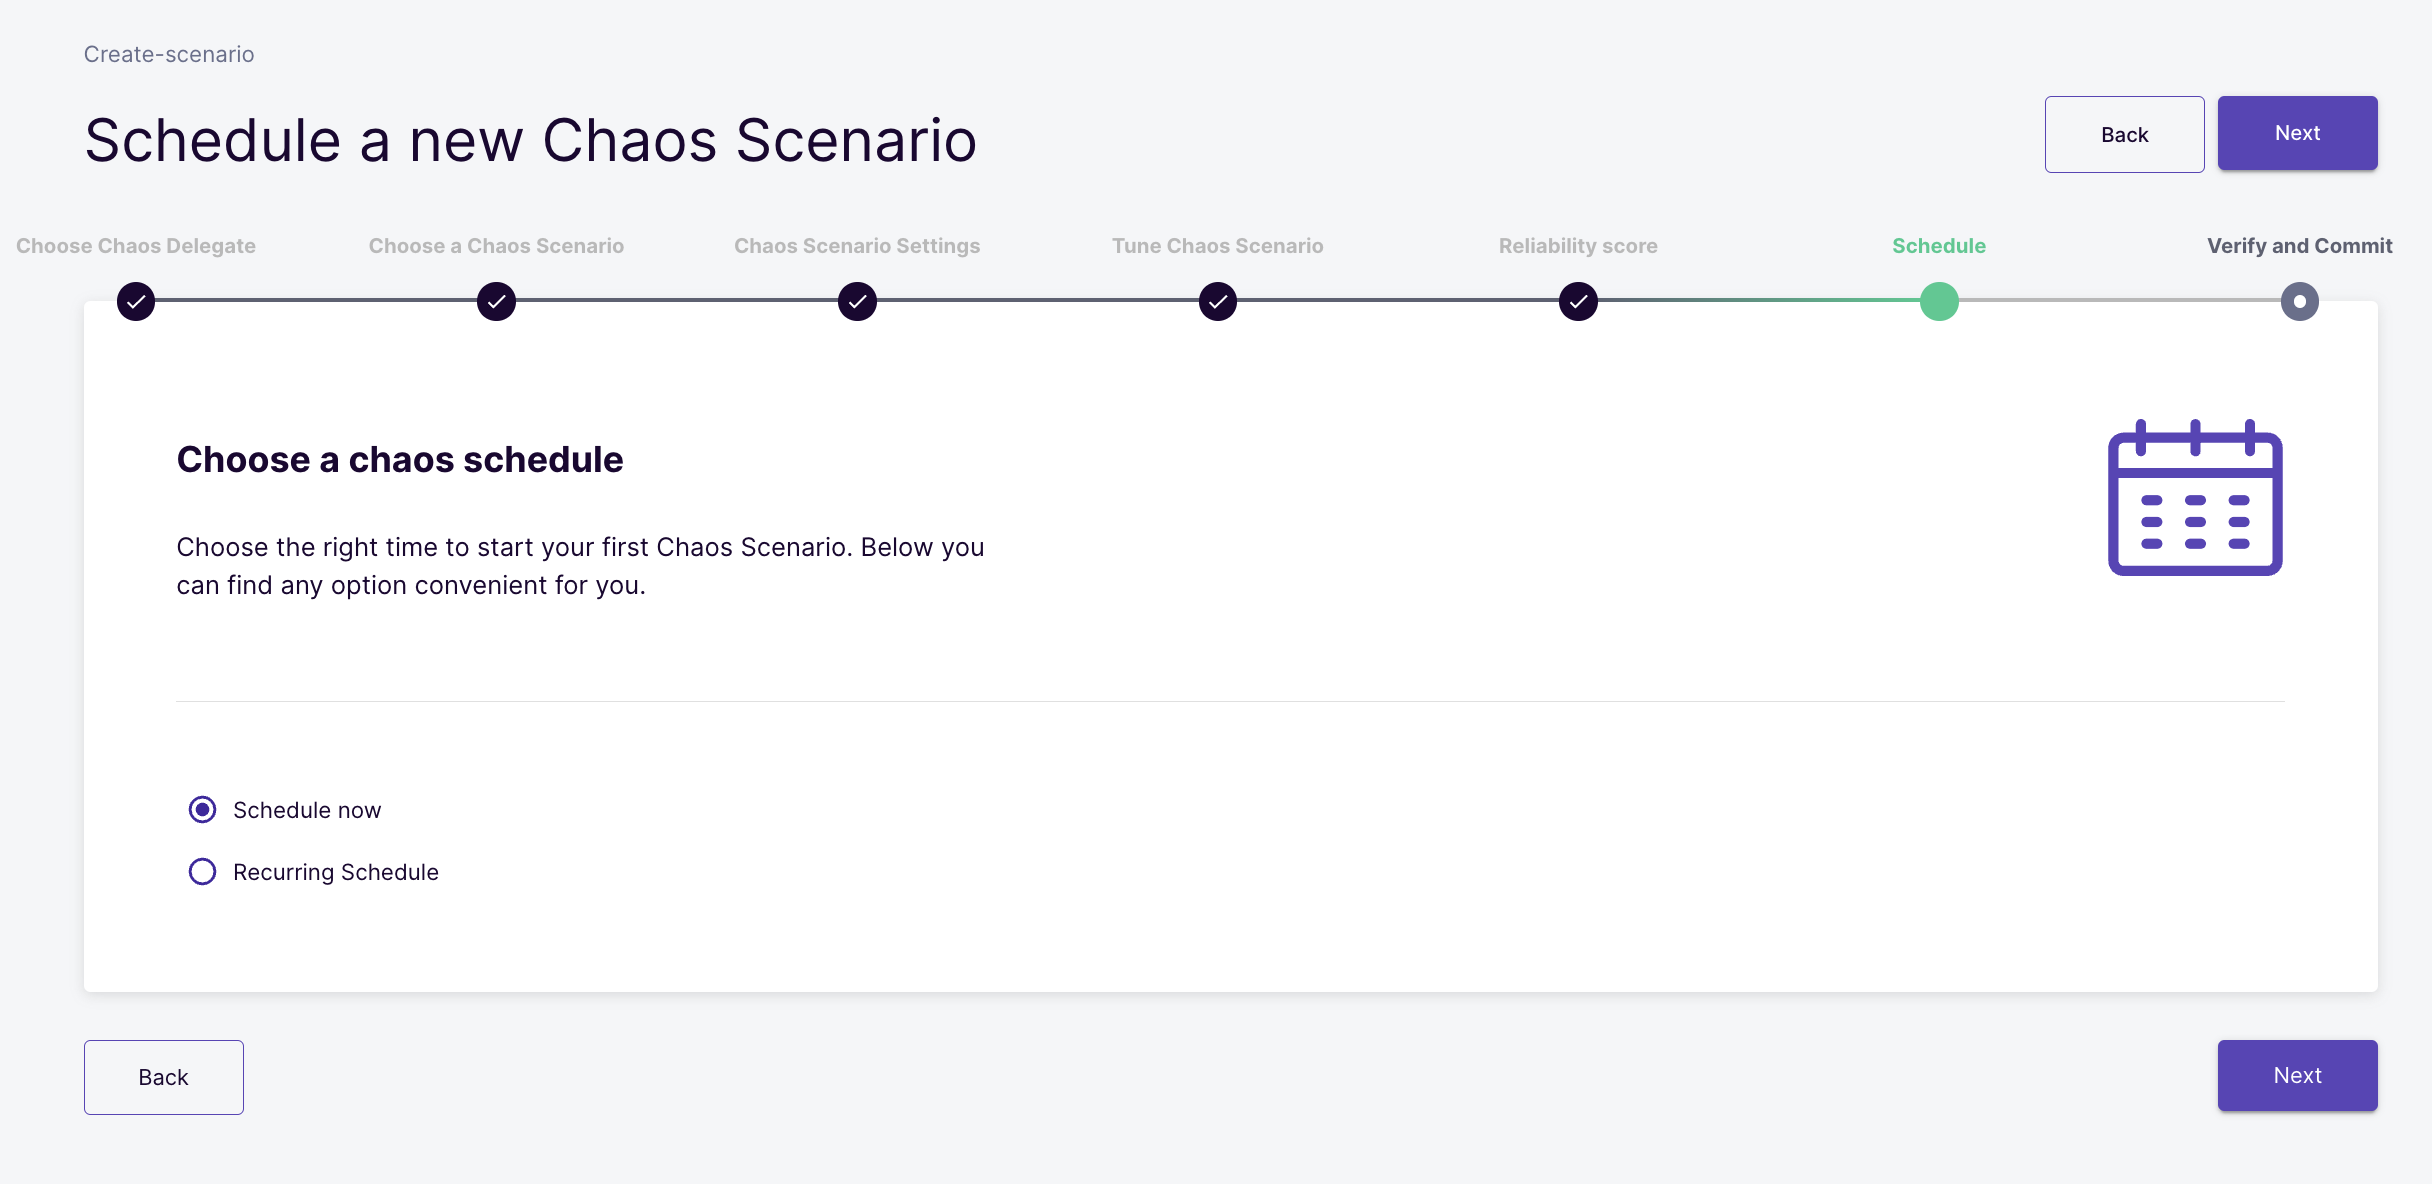
Schedule the Chaos Scenario
Schedule the chaos scenario for immediate and one-time execution
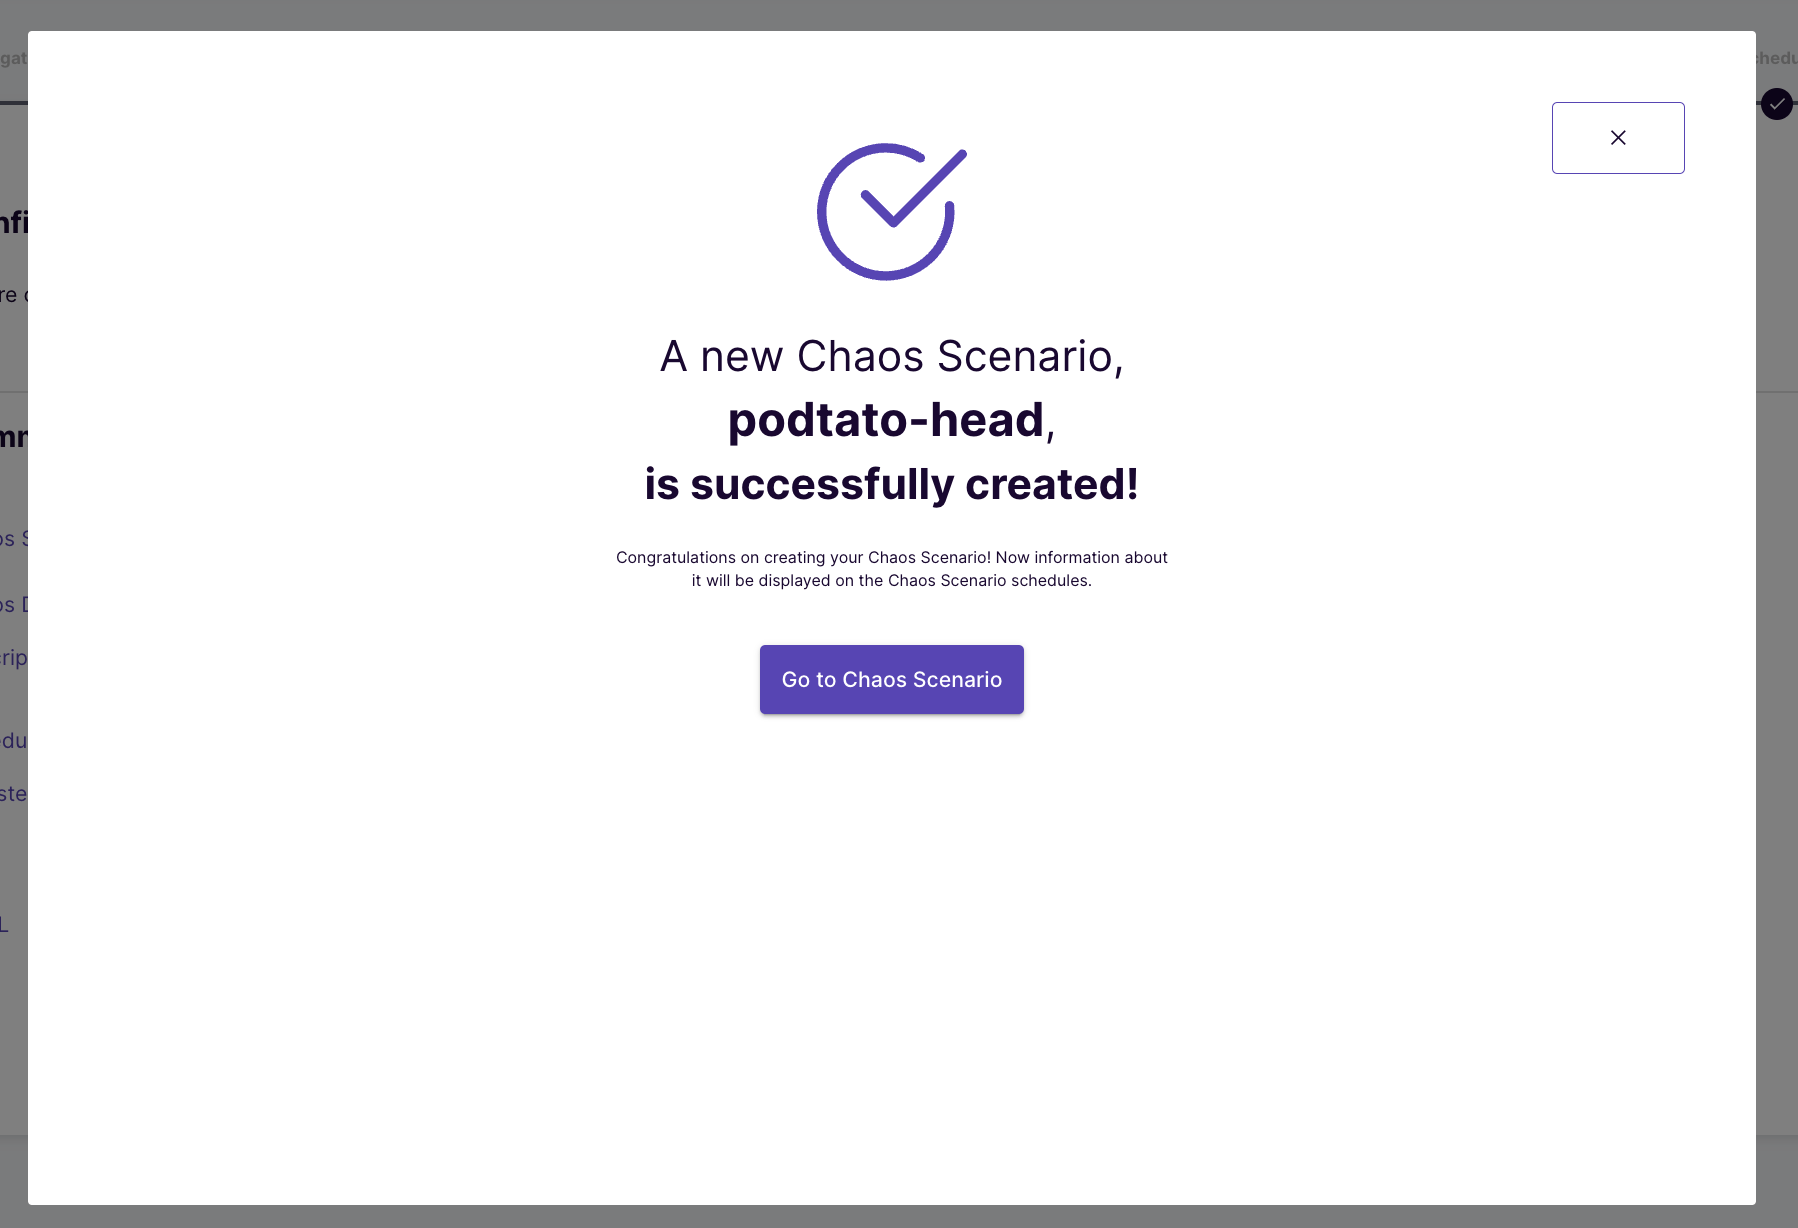
Click on "Finish" to launch the Chaos Scenario.
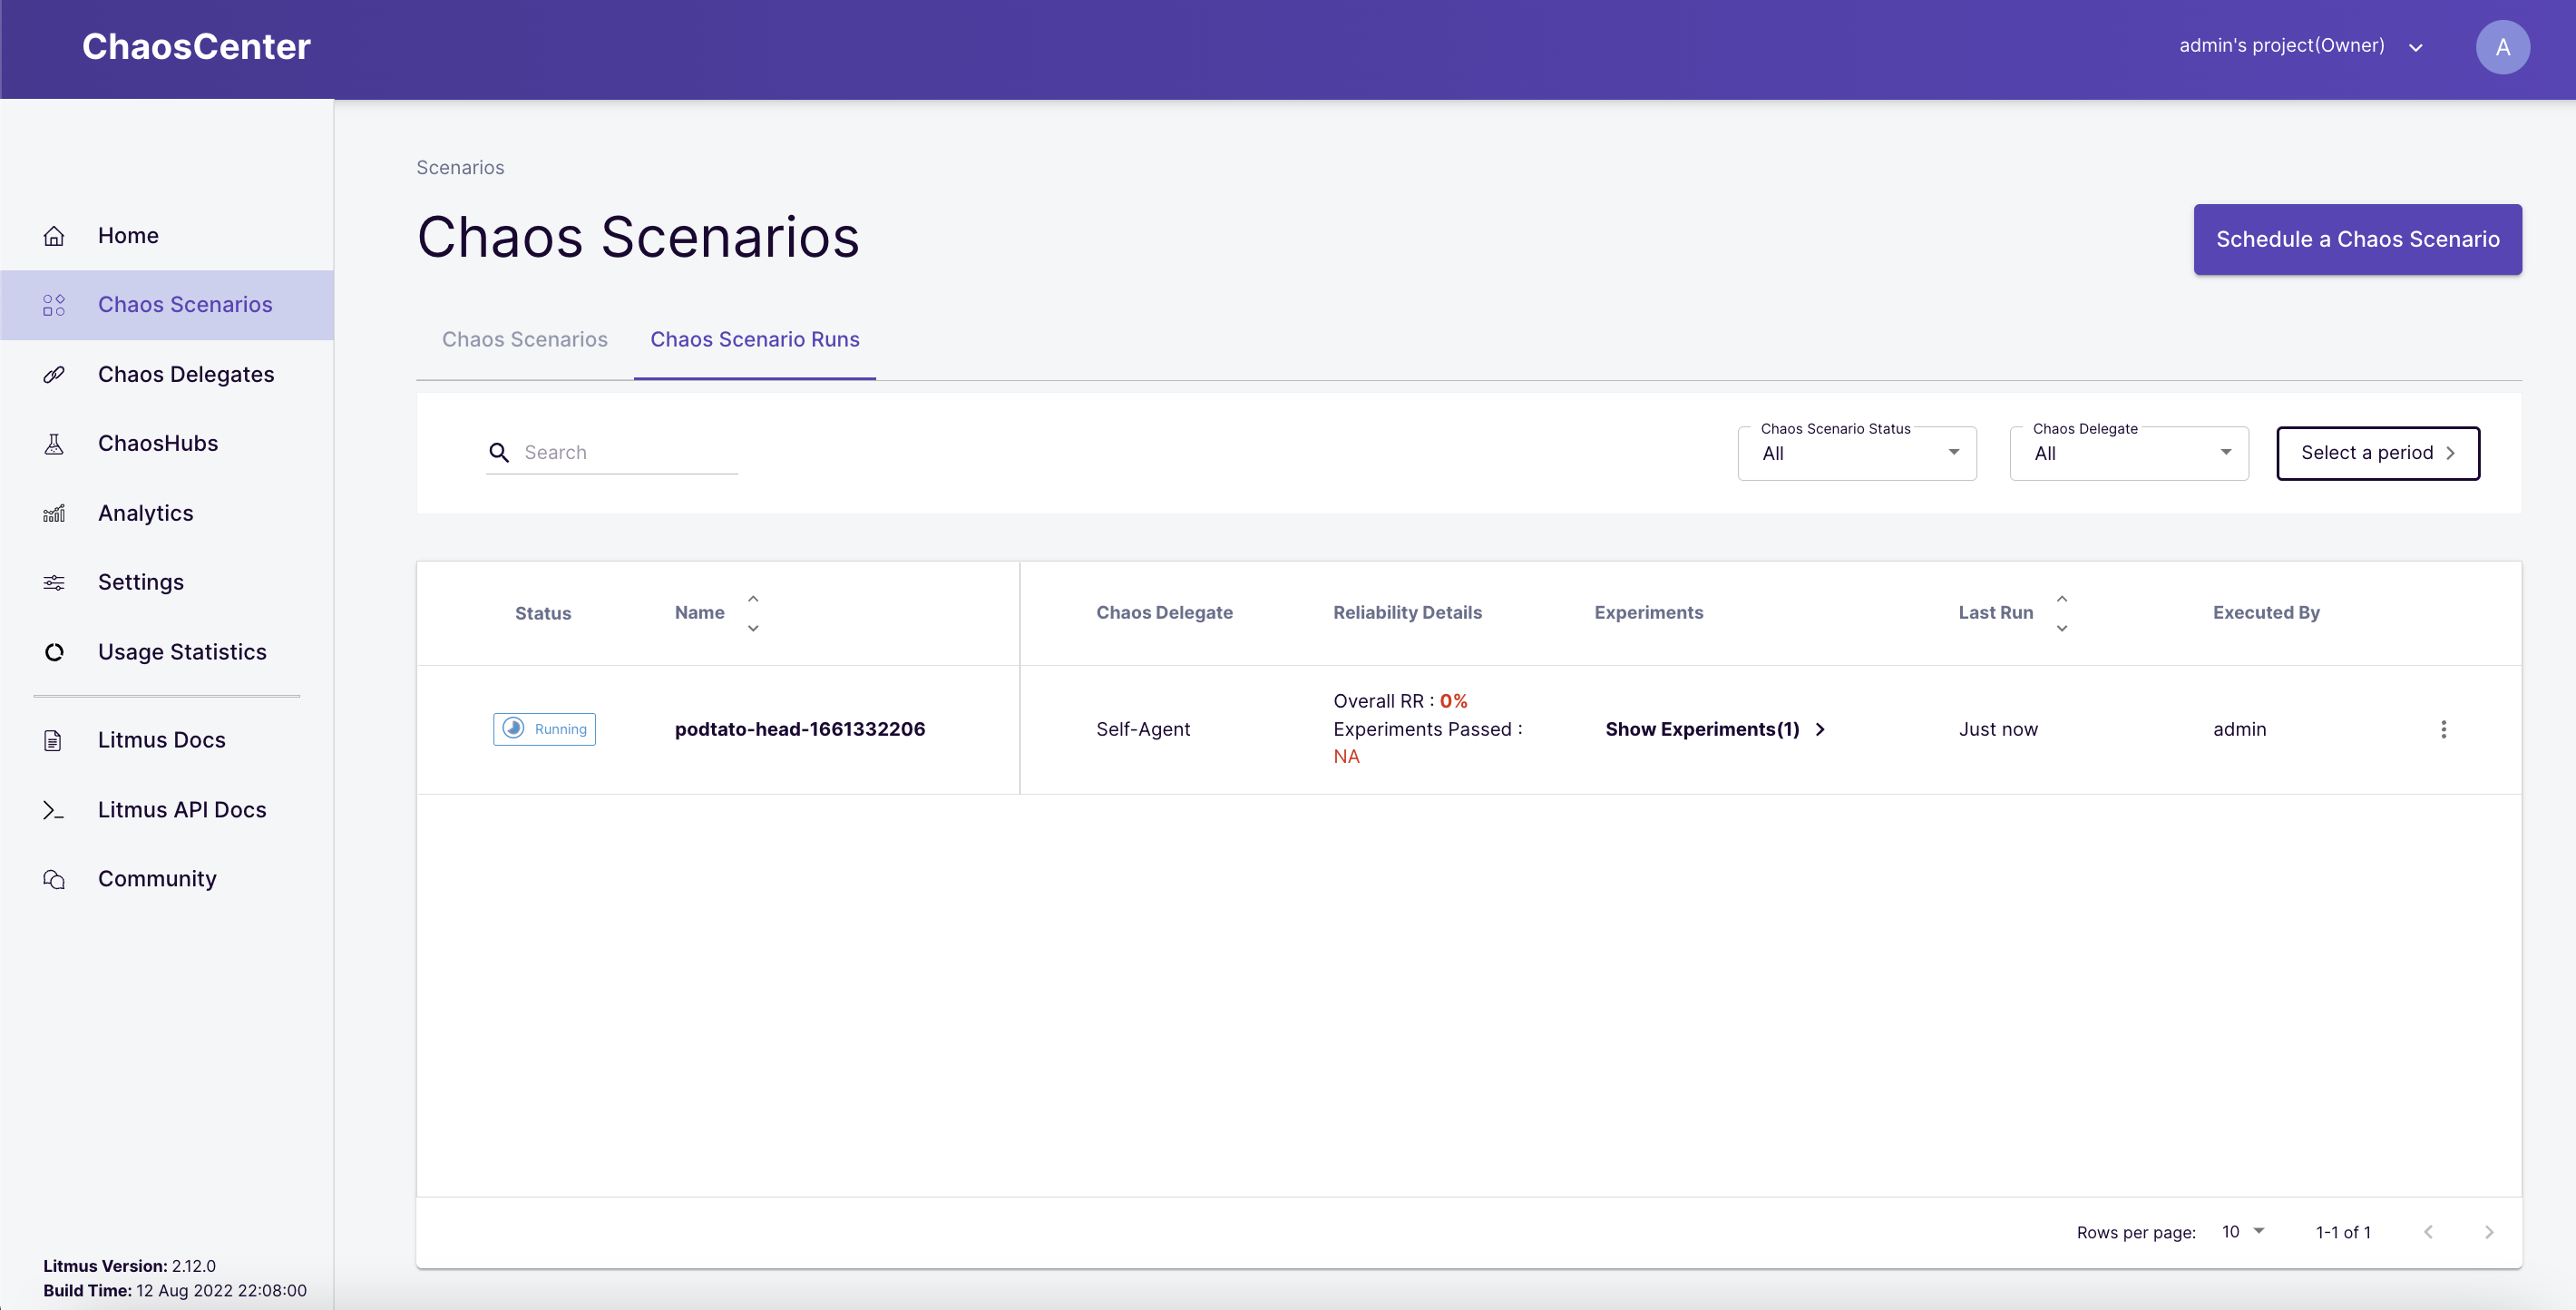
The chaos scenario has started running now
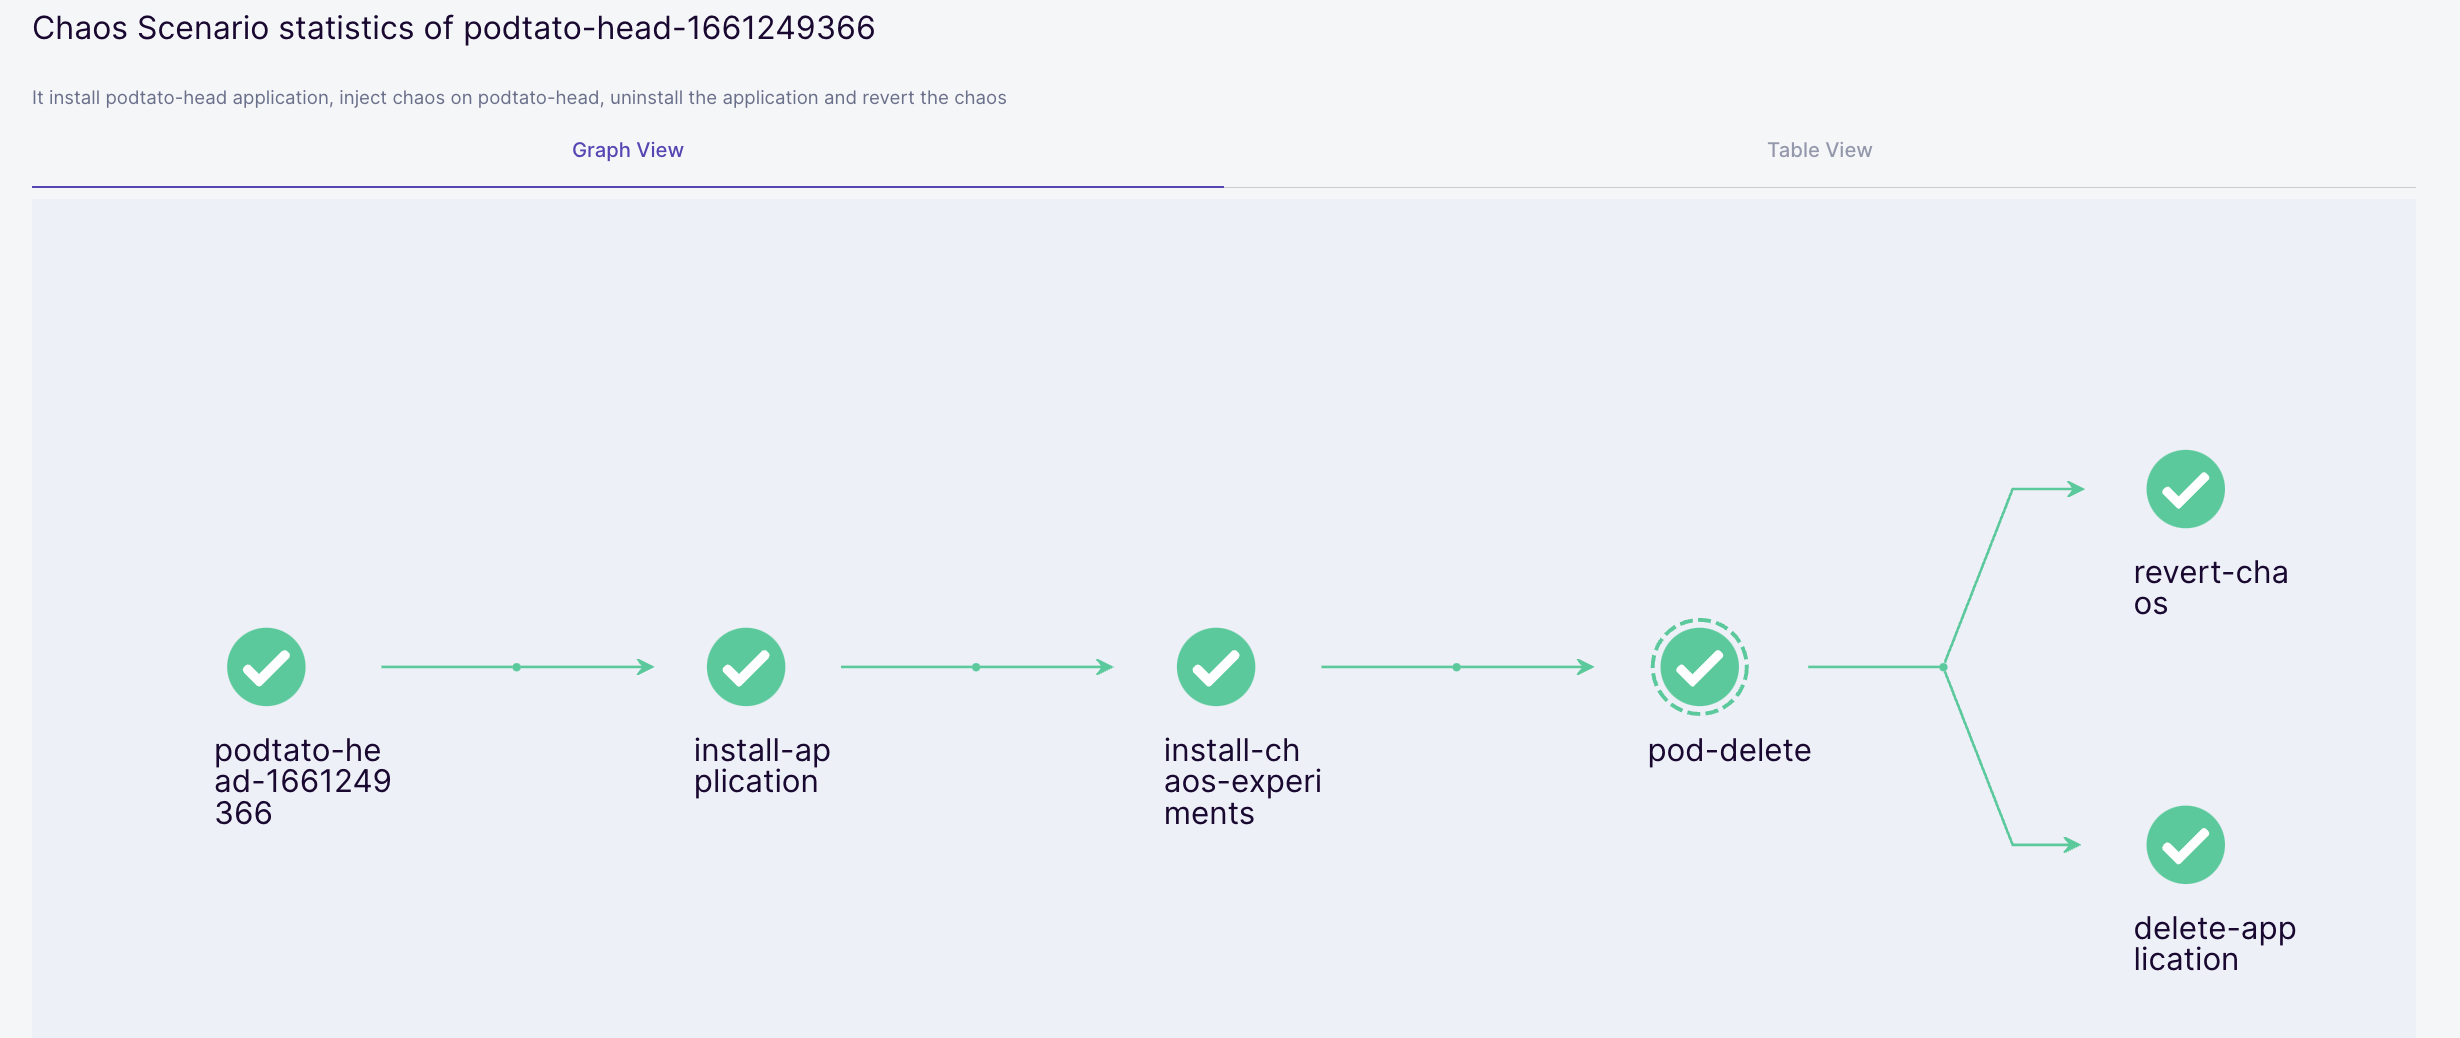
Check the Chaos Scenario Progress
Click on "Show the chaos scenario" graph to check the progress of the chaos scenario steps.

Each chaos scenario consists of a set of well-defined steps. The most common amongst them involve installing the ChaosExperiment template (consisting of low-level details of the fault to be executed) and ChaosEngine custom resource (maps a given application instance to the fault along with the specification of steady-state hypothesis). The latter triggers the creation of chaos pods.
In the current example, litmus deploys a sample multi-replica hello-service application before going on to pull the pod-delete ChaosExperiment template. In the next step, it creates the ChaosEngine to launch the chaos injection via dedicated pods.
The ChaosEngine spec embedded into the chaos scenario spec looks like this:
apiVersion: litmuschaos.io/v1alpha1
kind: ChaosEngine
metadata:
  name: podtato-head-pod-delete-chaos
  namespace: litmus
  labels:
    instance_id: b9d98f68-ac25-4690-adf3-6b83cc7febce
    context: litmus_podtato-head
    workflow_name: podtato-head-1628954811
spec:
  appinfo:
    appns: litmus
    app_label: 'app=podtato-head'
    appkind: 'deployment'
  annotationCheck: 'false'
  engineState: 'active'
  chaosServiceAccount: litmus-admin
  jobCleanUpPolicy: 'retain'
  components:
    runner:
      imagePullPolicy: Always
      experiments:
        - name: pod-delete
          spec:
           probe:
           - name: "check-podtato-head-access-url"
             type: "httpProbe"
             httpProbe/inputs:
               url: "http://podtato.litmus.svc.cluster.local:9000"
               insecureSkipVerify: false
               method:
                 get:
                   criteria: "=="
                   responseCode: "200"
             mode: "Continuous"
             runProperties:
               probeTimeout: 1
               interval: 1
               retry: 1
           components:
             env:
               - name: TOTAL_CHAOS_DURATION
                 value: '30'
               # set chaos interval (in sec) as desired
               - name: CHAOS_INTERVAL
                 value: '10'
               # pod failures without '--force' & default terminationGracePeriodSeconds
               - name: FORCE
                 value: 'false'
Watch the action on the cluster where the podtato-head application replica is killed
kubectl get pods -n litmus
NAME                                        READY   STATUS              RESTARTS   AGE
chaos-exporter-6bb94bc74f-wkbmw             1/1     Running             0          40m
chaos-operator-ce-6bc9c65776-642gl          1/1     Running             0          40m
event-tracker-c8c7cdfb5-tkmqd               1/1     Running             0          40m
litmusportal-frontend-5c96c9468c-84bb8      1/1     Running             0          40m
litmusportal-auth-server-7594bf7c46-td8jv   1/1     Running             0          47m
litmusportal-server-6cb8456cb-lh2s9         2/2     Running             0          40m
mongo-0                                     1/1     Running             0          40m
pod-delete-fgnx23-zvght                     1/1     Running             0          26s
podtato-hats-5f6c4d9ff-v7ckw                1/1     Running             0          11m
podtato-hats-new-787797c7fd-fgfg2           1/1     Running             0          11m
podtato-head-1628954811-1662063892          2/2     Running             0          33s
podtato-head-1628954811-693279641           0/2     Completed           0          77s
podtato-head-1628954811-740786171           0/2     Completed           0          71s
podtato-left-arm-647c44c49f-kz9wm           1/1     Running             0          11m
podtato-left-leg-5544c7c88c-kxgxf           1/1     Running             0          11m
podtato-main-7bcb959bd8-4trlh               1/1     Running             0          9m28s
podtato-main-7bcb959bd8-clj8t               1/1     Terminating         0          18s
podtato-main-7bcb959bd8-nqdqg               0/1     ContainerCreating   0          0s
podtato-main-pod-delete-chaos9wxpv-runner   1/1     Running             0          29s
podtato-right-arm-98bdff545-jst9f           1/1     Running             0          11m
podtato-right-leg-68bb97548f-j2p26          1/1     Running             0          11m
subscriber-75bd7565cf-shl7t                 1/1     Running             1          40m
workflow-controller-78dbff5b5d-xcthg        1/1     Running             0          40m
Once the experiment completes, the chaos resources (ChaosEngine CR & accompanying chaos pods) are removed as part of a "revert-chaos" step. The sample application is also removed from the cluster.
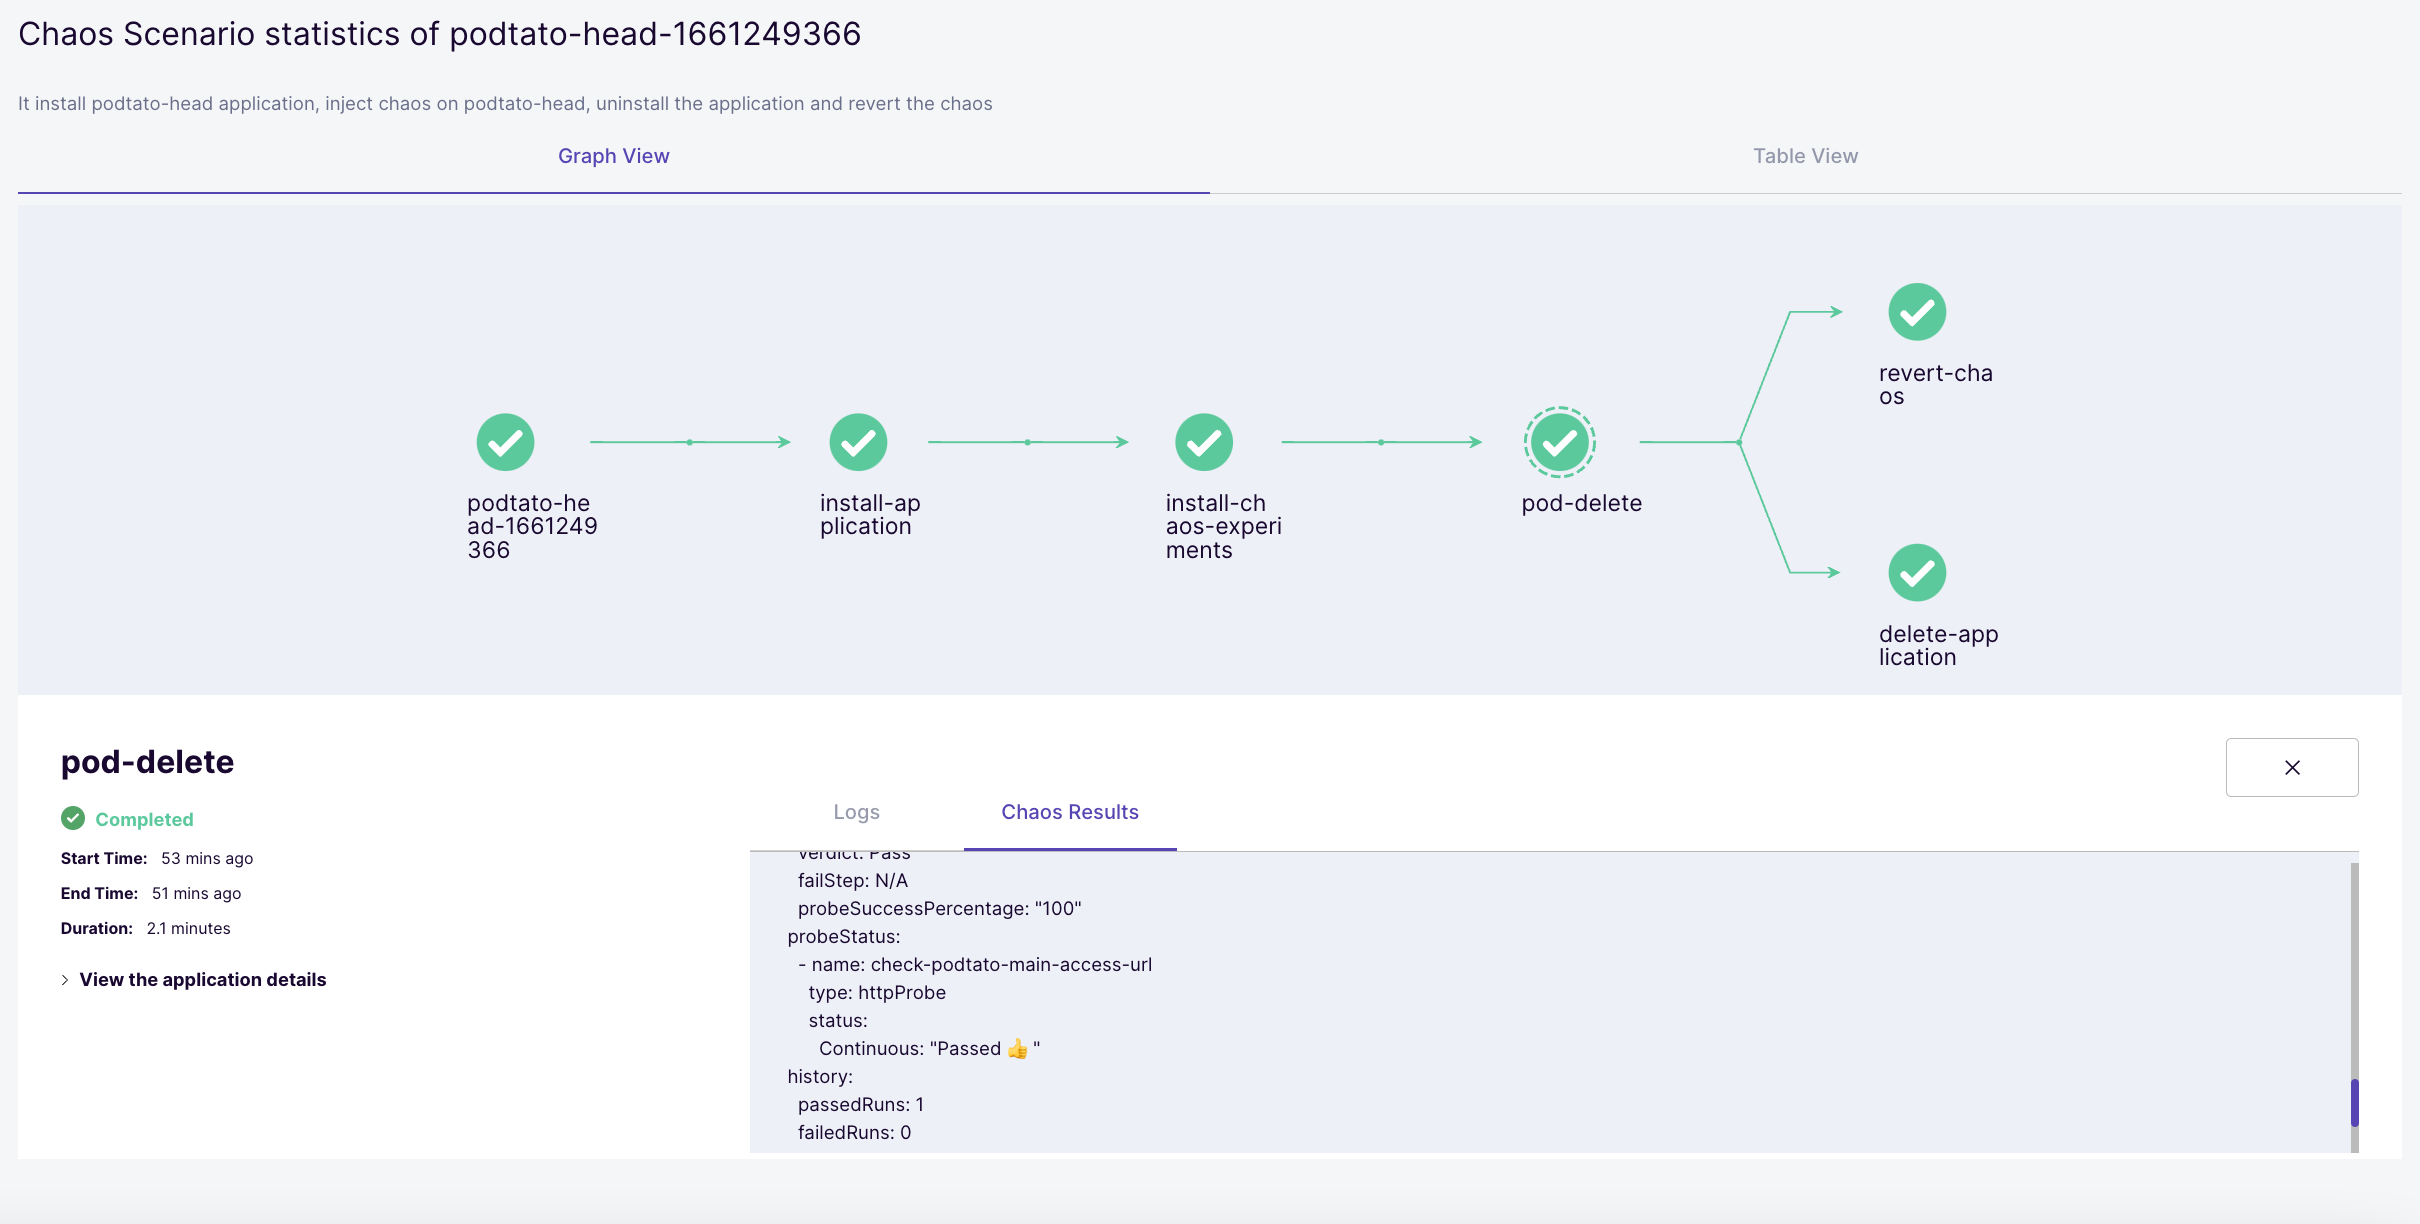
View the Experiment Results
The scenario dashboard can be used to view the results of the chaos experiment. Click on the "pod-delete" node on the graph to launch a results console. Click on the "Chaos Results" tab to view the details around success/failure of the steady-state hypothesis constraints (podtato-head website availability through pod deletion period) and the experiment verdict.
Check the Resilience Score achieved for the chaos scenario by clicking on "Show the statistics".
Now click for the drop-down " Show Statistics".
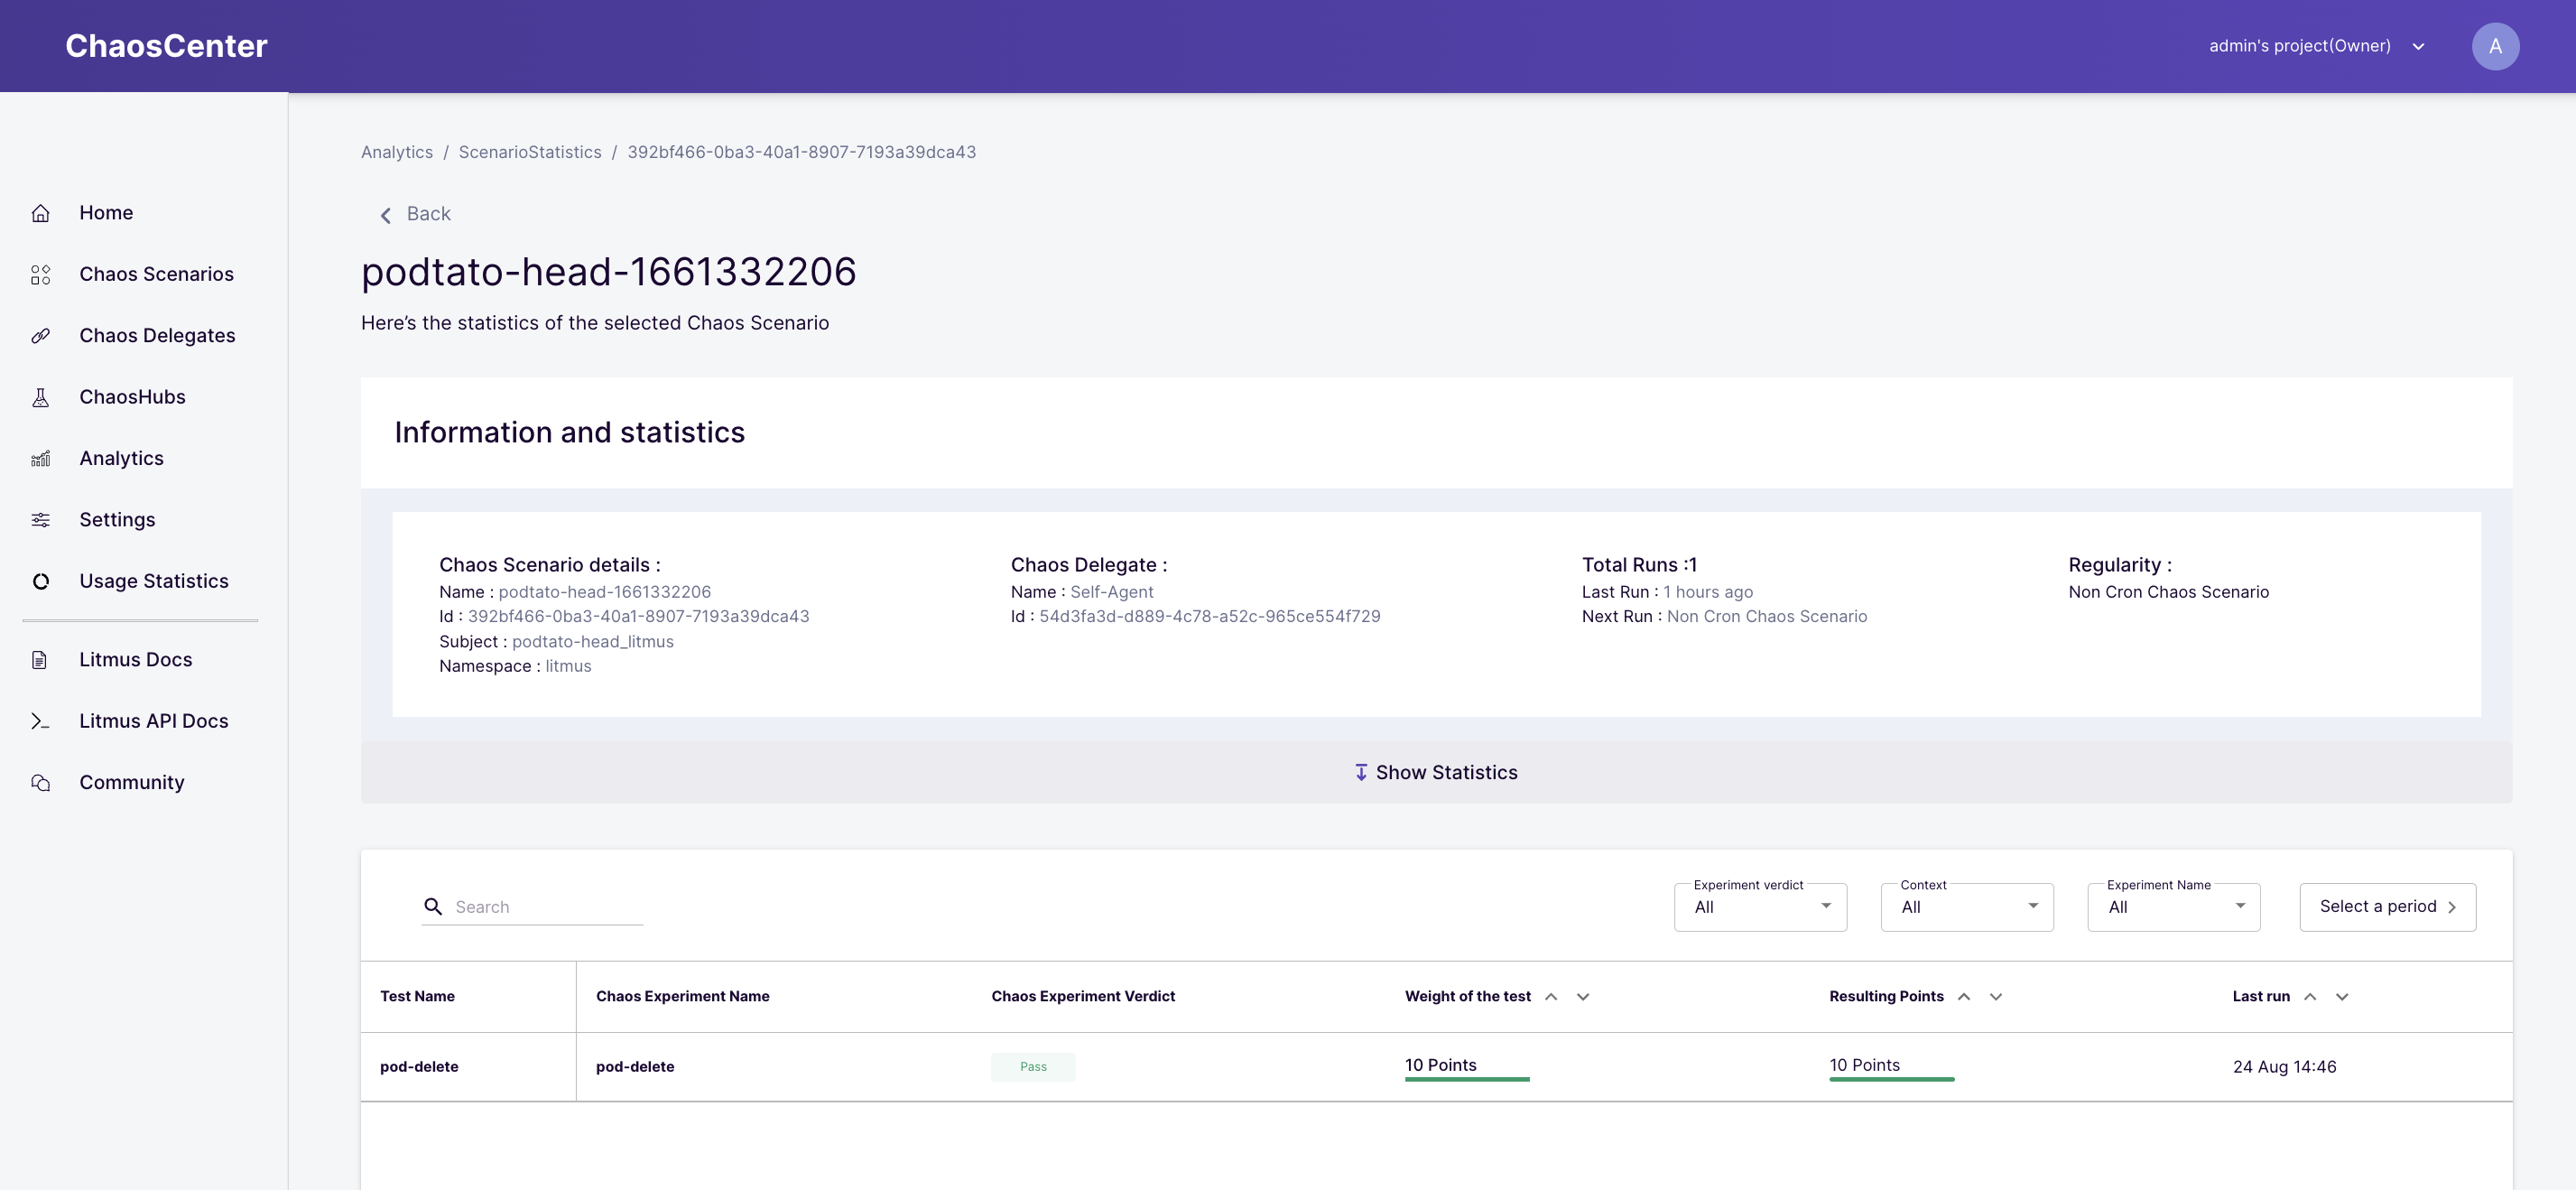
Check the Experiment Statistics and resilience score of the scenario.

In this tutorial, we have covered the steps involved in installation/setup of LitmusChaos and execution of a sample chaos experiment. Refer to Litmus Documentation to learn more about the platform.
Please visit us on our Litmus Slack Channel (in Kubernetes workspace) and tell us how you like LitmusChaos and this tutorial! We are happy to hear your thoughts & suggestions!
Also, make sure to follow us on Twitter to get the latest news on LitmusChaos, our tutorials and newest releases!