Chaos Scenarios cannot only be scheduled on your default cluster, Litmus allows you to schedule chaos scenario on a remote cluster.
In this tutorial, you will learn how to create Chaos Scenarios on a remote cluster.
First, you will learn to deploy a remote cluster on GKE(Google Kubernetes Engine), then you will install a CLI tool called litmusctl. Next, you will use litmusctl to register this cluster as a target chaos delegate in ChaosCenter. Finally, you will schedule a predefined chaos scenario on this remote cluster.
What you will learn
- How to deploy a remote cluster to GKE
- Litmusctl
- How to connect to an external Chaos Delegate
- How to schedule a chaos scenario on a remote cluster
Prerequisites
- Minikube 1.2.0 or later. Recommended sizing of at least: 2 vCPUs, 8GB memory, 10GB of disk space (for persistent volume creation)
- Helm3 or Kubectl
- Access to Internet from Cluster
- Have Litmus 2.x.x installed.
- A Google Cloud Account
- A GCP project with privileges to access GKE.
Google Kubernetes Engine(GKE) is a managed production-ready environment for running containerized applications.
In this section, we will deploy a Kubernetes cluster on GKE. After that, you will install Litmus on this cluster and expose it to the public using an external IP.
Enable the Kubernetes Engine API
Once you have a GCP account setup, head on to https://console.cloud.google.com/kubernetes to enable the Kubernetes Engine API.
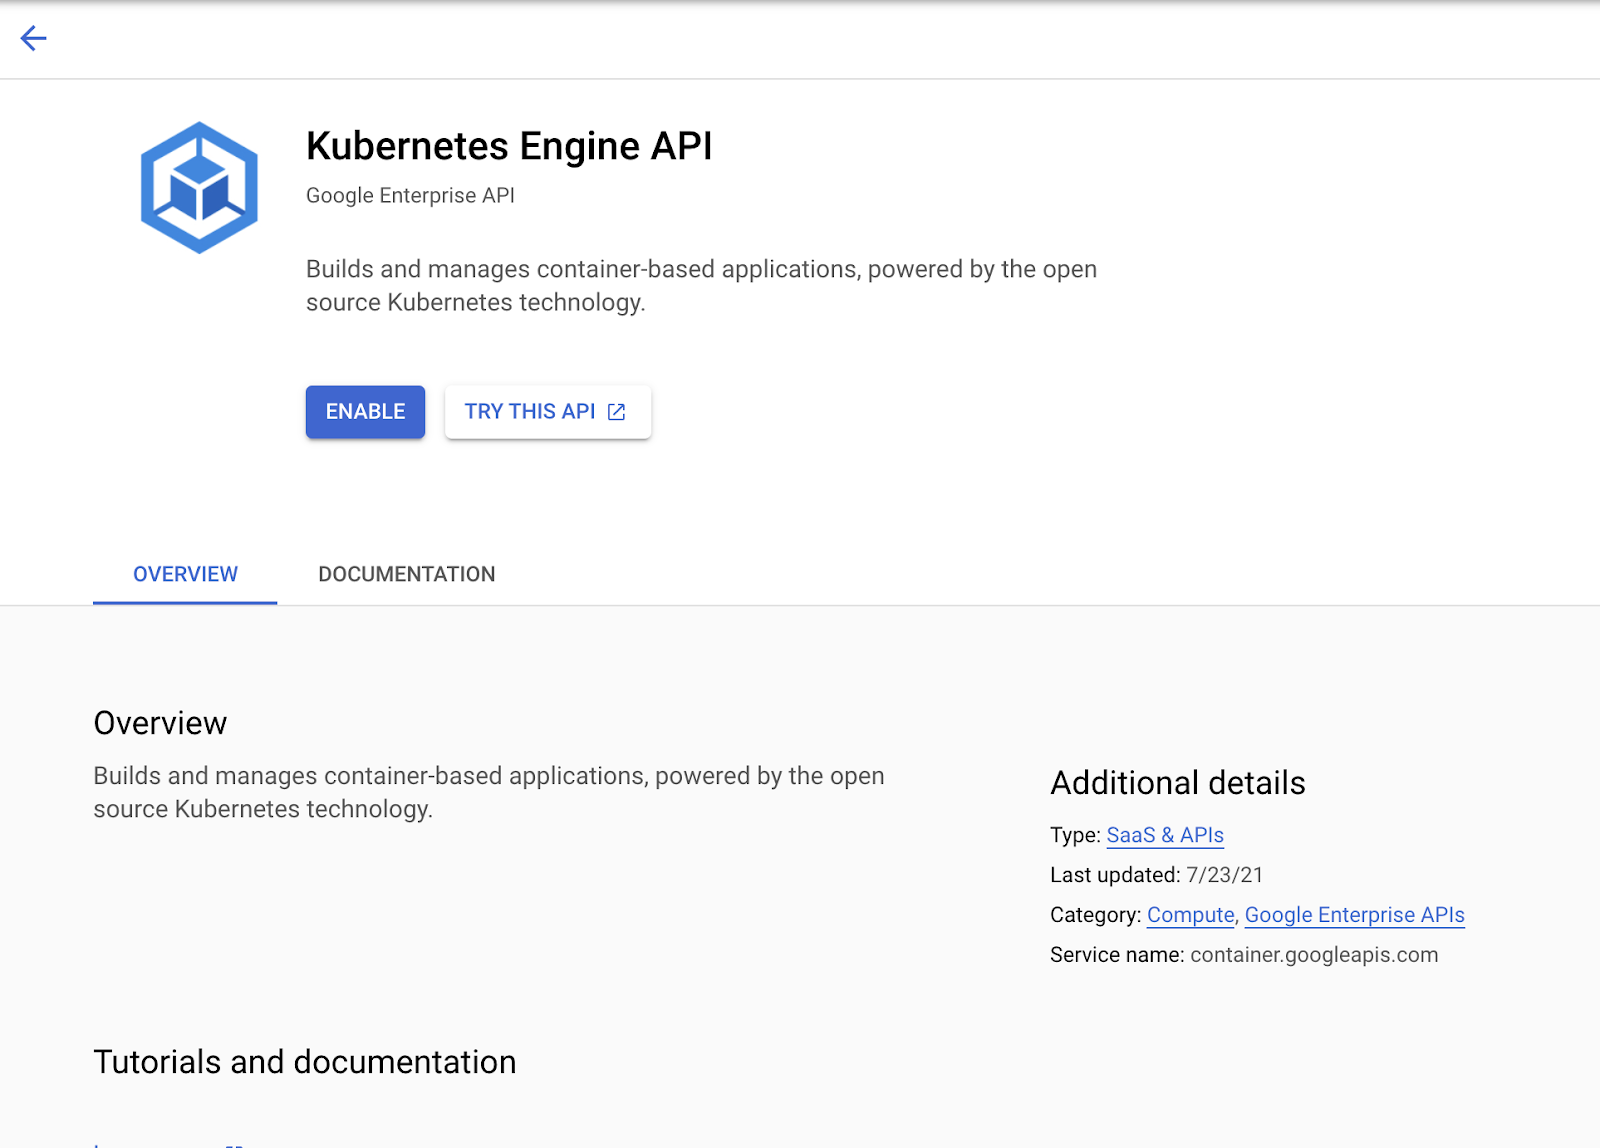
If you haven't already, you will be prompted to enable billing to proceed.
Once the Kubernetes Engine API is enabled, you can create a cluster on GKE.
Create the cluster
Click the Create button at the top navigation bar.

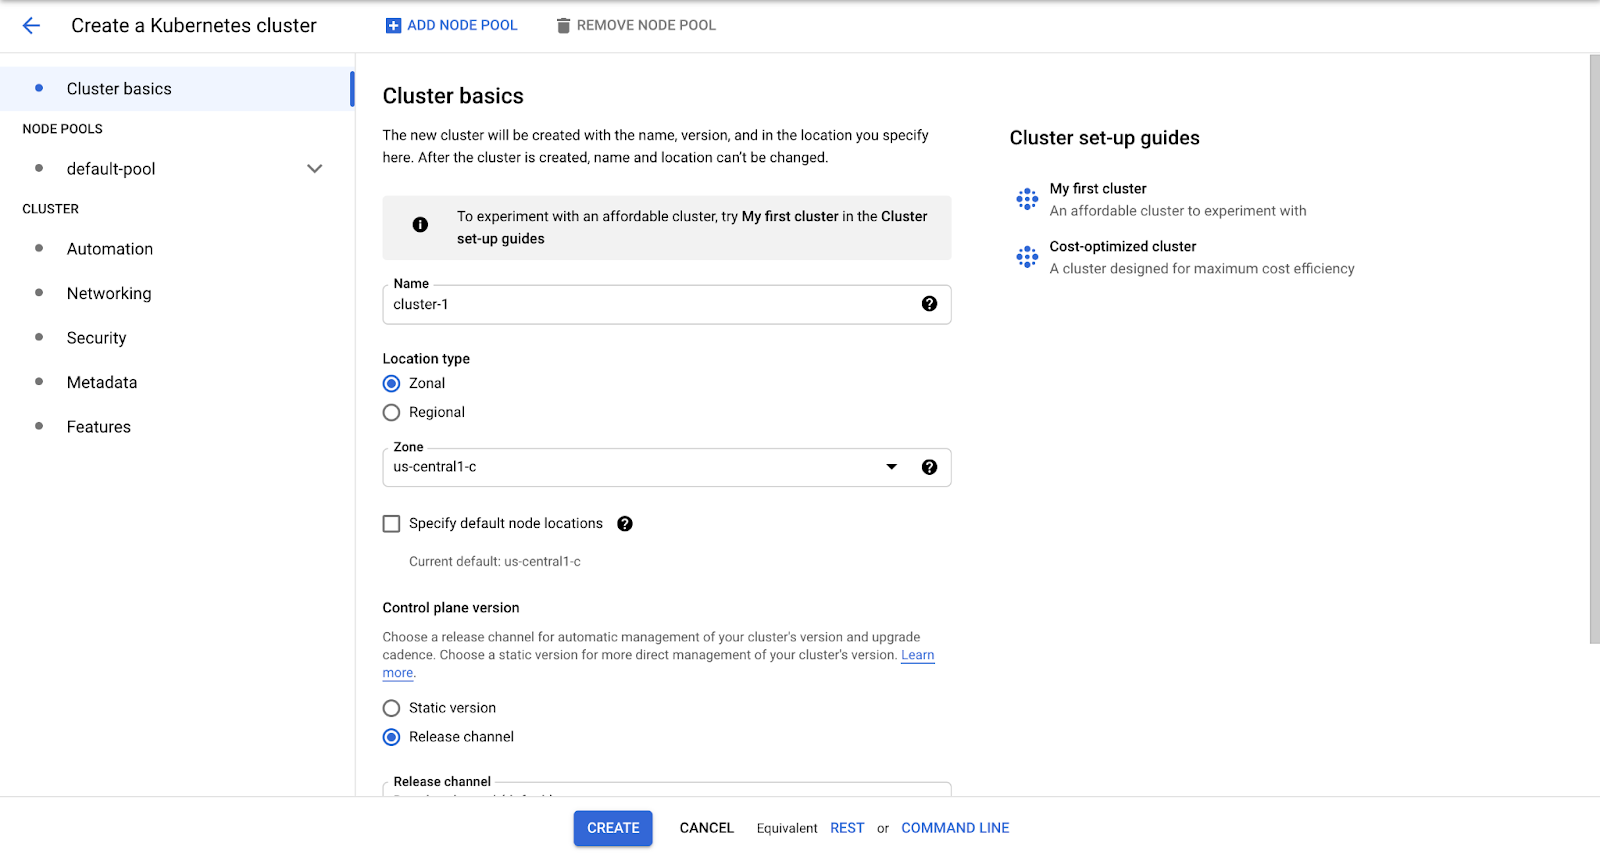
Next, choose the Standard Cluster by clicking the Configure button next to that option.
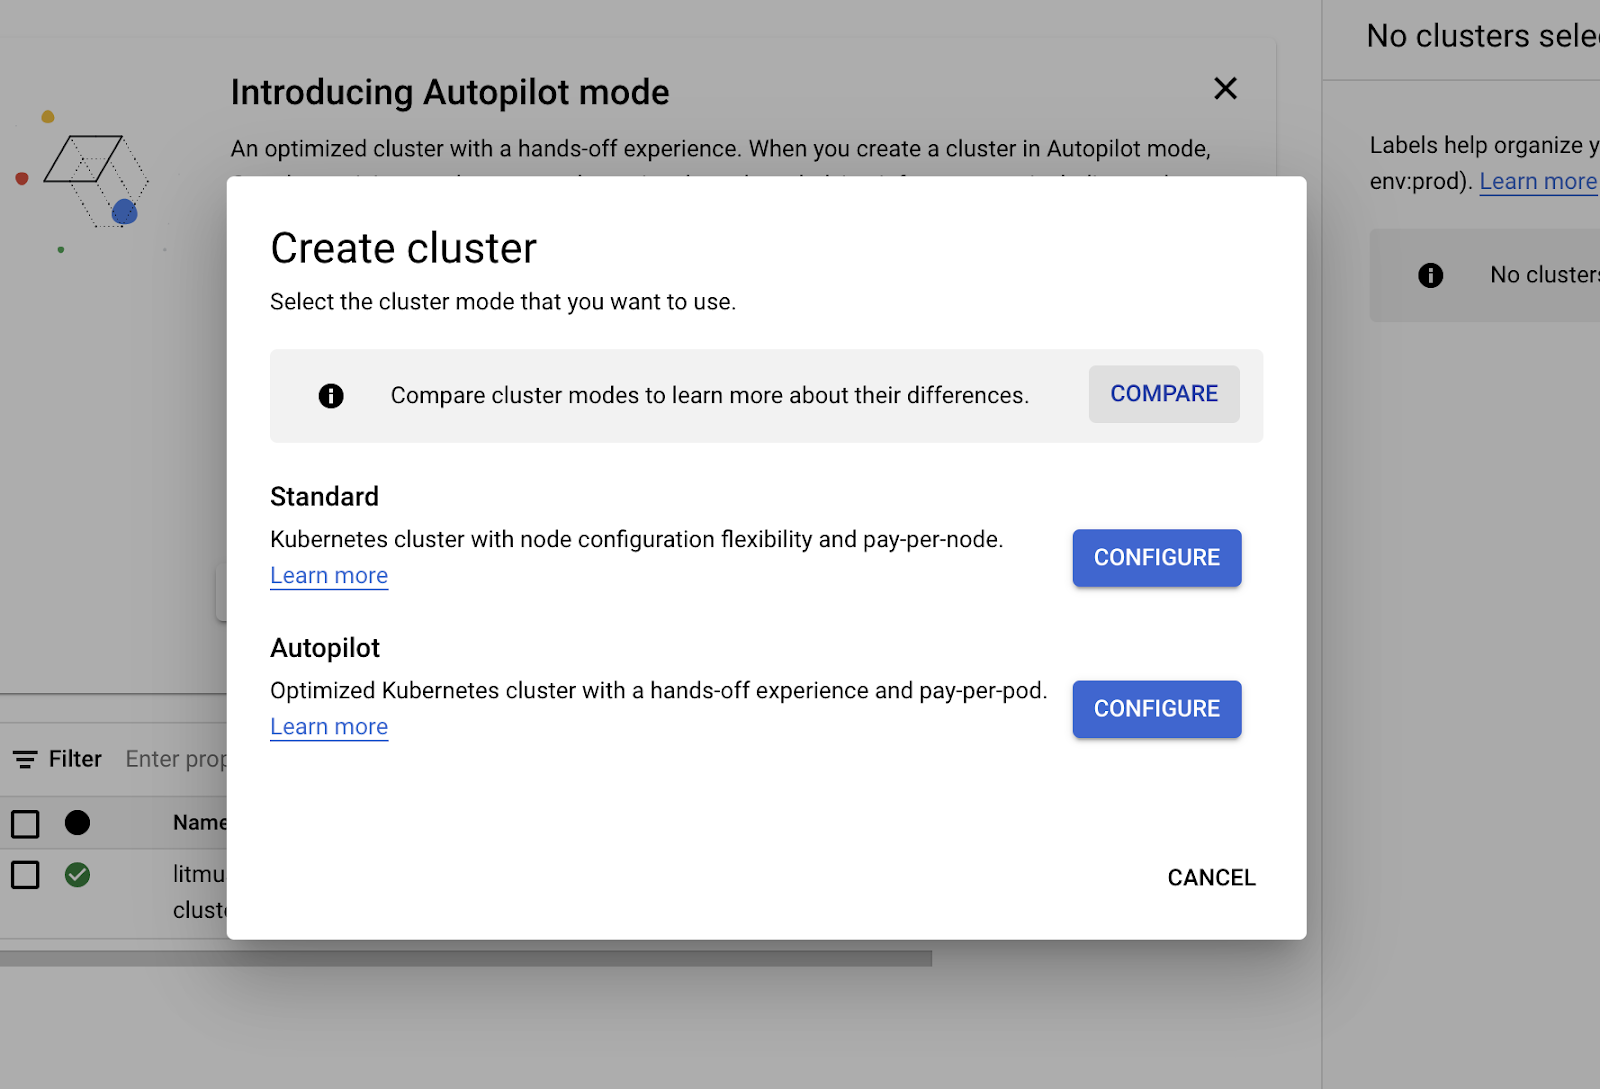
Here, you will see all the options you need to configure your Kubernetes cluster. You can choose to configure your cluster if you're familiar with it or select the My first cluster option by the rightmost navigation.
The cluster might take a while to create as it is trying to create the necessary resources for your cluster while undergoing a health check.
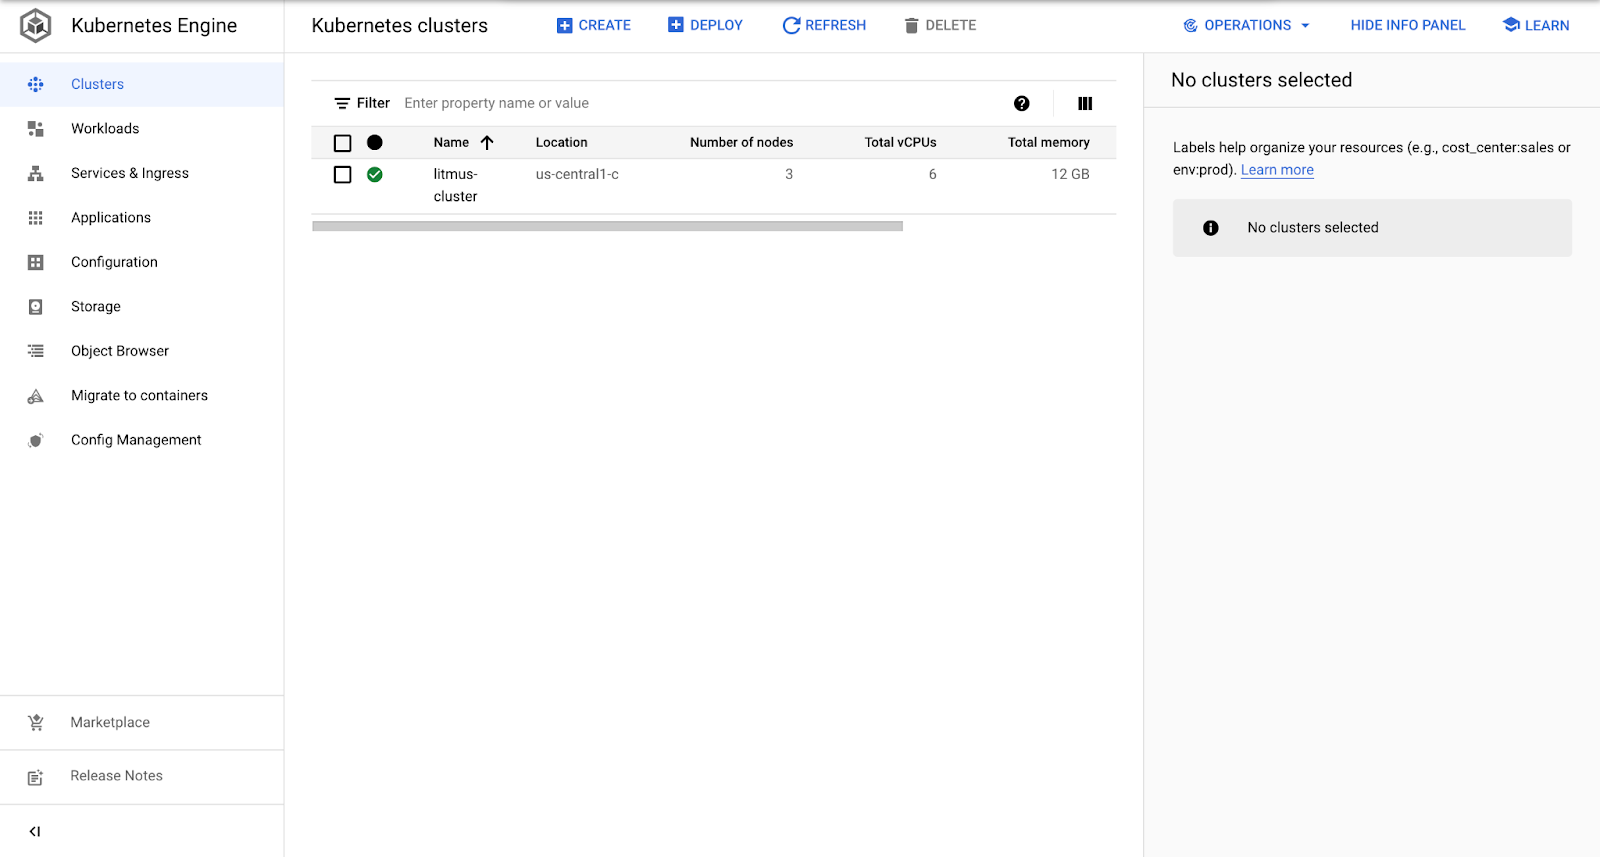
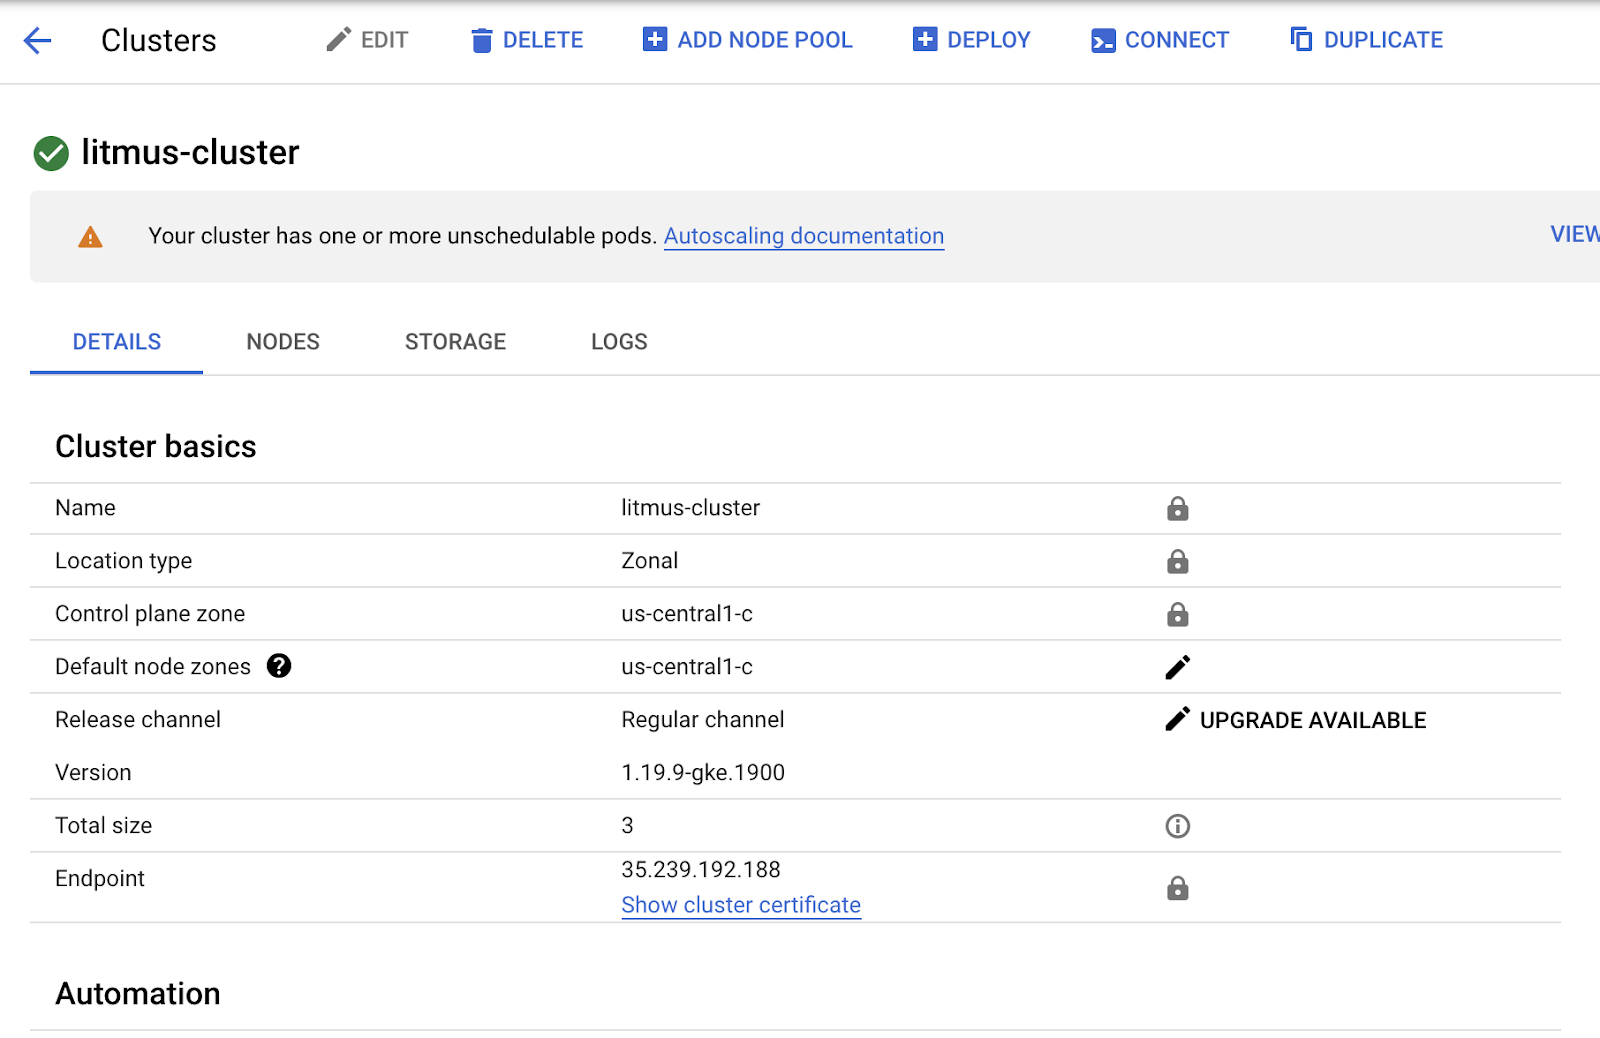
Now that your cluster has been created, you can proceed to install litmus.
First, you need to connect to your cluster and access its shell. Click on the name of the cluster to proceed.
Click on the connect shell button at the top, then click on the RUN IN CLOUD SHELL button.
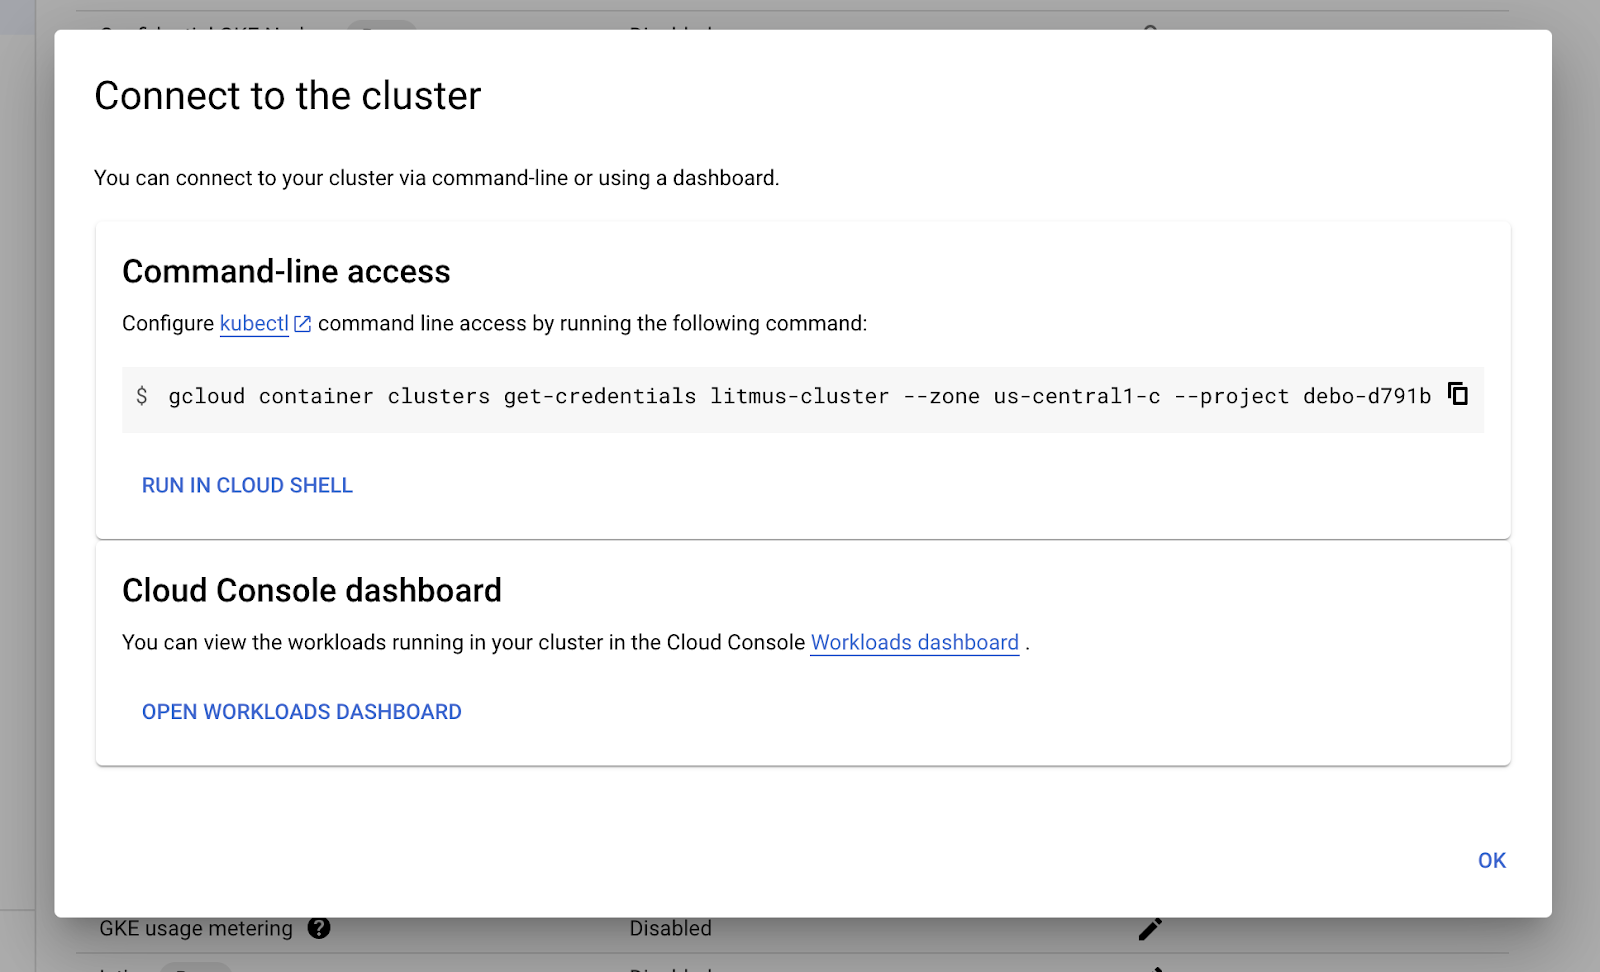
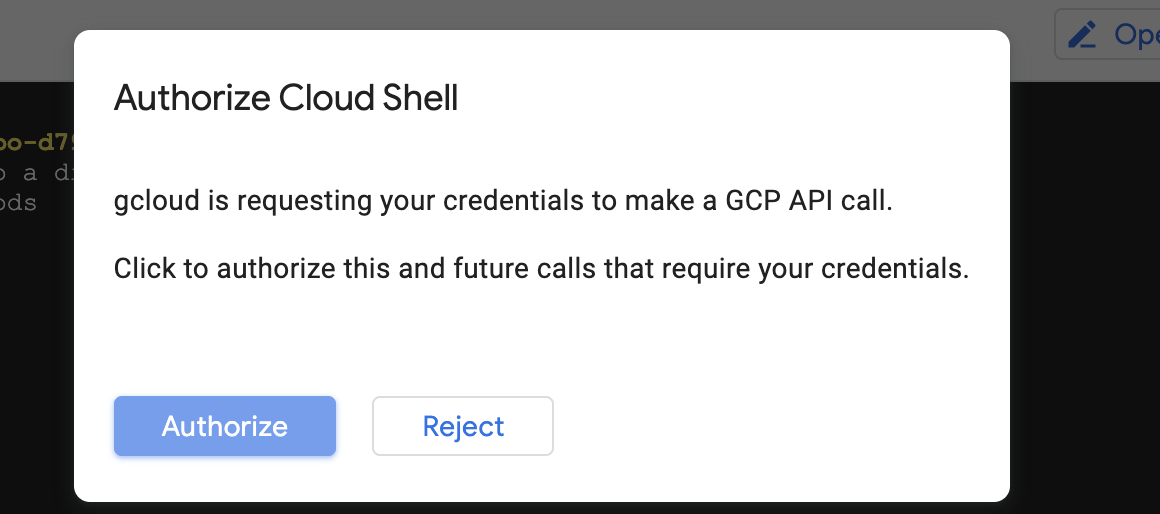
This will open a cloud shell terminal in your console and, a cloud SDK command will run in your terminal. This command will configure the Kubectl to configure itself for the cluster you just created. If prompted to Authorize, you should accept.
Install Litmus
Here, we will be following the steps given in this tutorial. Specifically, we would be installing Litmus using kubectl.
Create a namespace
kubectl create ns litmusInstall Litmus
kubectl apply -f https://raw.githubusercontent.com/litmuschaos/litmus/master/mkdocs/docs/2.12.0/litmus-2.12.0.yamlCheck if the Litmus control plane components comprising the Web-UI (frontend), GraphQL server & MongoDB pods are created and running successfully.
Verify Installation
kubectl get pods -n litmusNAME READY STATUS RESTARTS AGE
litmusportal-auth-server-7594bf7c46-td8jv 1/1 Running 0 47m
litmusportal-frontend-5fb5bb84f7-tcf95 1/1 Running 0 47m
litmusportal-server-858584d5b9-r8kkn 1/1 Running 0 47m
mongo-0 1/1 Running 0 47mIt might take a few minutes for all the pods to have a running state. Give it some time.
Access the ChaosCenter
To access the litmus frontend, we need to know what service exposes this frontend. To get a list of running services in the litmus namespace, run the below command.
kubectl get svc -n litmusNAME TYPE CLUSTER-IP EXTERNAL-IP PORT(S) AGE
litmusportal-auth-server-service NodePort 10.76.20.219 <none> 9003:31241/TCP,3030:31248/TCP 49m
litmusportal-frontend-service LoadBalancer 10.76.21.27 34.136.203.195 9091:32733/TCP 49m
litmusportal-server-service NodePort 10.76.23.74 <none> 9002:30707/TCP,8000:30327/TCP 49m
mongo-headless-service ClusterIP None <none> 27017/TCP 49m
mongo-service ClusterIP 10.76.26.27 <none> 27017/TCP 49m
From the above, we can see that the frontend is exposed via a NodePort service and it has the name of litmusportal-frontend-service. It exposes this service on a TCP port that looks something like 9091:xxxxx/TCP where xxxxx is the corresponding node port of the service.
To access the ChaosCenter, we need to expose this port by using a firewall rule. We can do this by running this command:
Expose the node port
gcloud compute firewall-rules create frontend-service-rule --allow tcp:<NODE_PORT>Replace the NODE_PORT in the command above with your service's node port. You should expose the firewall for both the litmusportal-frontend-service and the litmusportal-server-service.
You can now access the ChaosCenter, but first, you need to get the external IPs of your node.
Get node external IPs
kubectl get nodes -o wideINER-RUNTIME
gke-litmus-cluster-default-pool-12e7a198-19wl Ready <none> 8h v1.19.9-gke.1900 10.128.0.3 35.223.4.212 Container-Optimized OS from Google 5.4.89+ containerd://1.4.3
gke-litmus-cluster-default-pool-12e7a198-b53p Ready <none> 8h v1.19.9-gke.1900 10.128.0.4 35.193.229.195 Container-Optimized OS from Google 5.4.89+ containerd://1.4.3
gke-litmus-cluster-default-pool-12e7a198-s13l Ready <none> 8h v1.19.9-gke.1900 10.128.0.2 35.223.250.205 Container-Optimized OS from Google 5.4.89+ containerd://1.4.3Copy the external IP of any of the above nodes and paste it into your browser's URL, followed by a :xxxxx where xxxxx corresponds to your node port. You will be presented with a screen showing the ChaosCenter's homepage.
What is litmusctl?
Litmusctl is a LitmusChaos command-line tool that allows you to manage litmuschaos's chaos delegate plane. Litmusctl can be used to create chaos delegates, project, and manage multiple litmuschaos accounts.
Litmusctl has the following requirements:
- kubeconfig - litmusctl needs the kubeconfig of the k8s cluster where we need to connect litmus chaos delegates. The CLI currently uses the default path of kubeconfig.
- kubectl - litmusctl is using kubectl under the hood to apply the manifest. To install kubectl, follow: kubectl
Note that the above are corresponding to the target cluster and not the GKE cluster where the control plane is situated.
Download the litmusctl binary corresponding to your OS from the table below:
| Platforms | 0.12.0 | v0.11.0 | v0.10.0 | v0.9.0 | v0.8.0 | v0.7.0 | master(Unreleased) |
|---|---|---|---|---|---|---|---|
| litmusctl-darwin-amd64 (MacOS) | Click here | Click here | Click here | Click here | Click here | Click here | Click here |
| litmusctl-linux-386 | Click here | Click here | Click here | Click here | Click here | Click here | Click here |
| litmusctl-linux-amd64 | Click here | Click here | Click here | Click here | Click here | Click here | Click here |
| litmusctl-linux-arm | Click here | Click here | Click here | Click here | Click here | Click here | Click here |
| litmusctl-linux-arm64 | Click here | Click here | Click here | Click here | Click here | Click here | Click here |
| litmusctl-windows-386 | Click here | Click here | Click here | Click here | Click here | Click here | Click here |
| litmusctl-windows-amd64 | Click here | Click here | Click here | Click here | Click here | Click here | Click here |
| litmusctl-windows-arm | Click here | Click here | Click here | Click here | Click here | Click here | Click here |
Linux/MacOS
Extract the binary
tar -zxvf litmusctl-<OS>-<ARCH>-<VERSION>.tar.gzProvide necessary permissions
chmod +x litmusctlMove the litmus binary to /usr/local/bin/litmusctl.
Note: Do this using root privileges
sudo mv litmusctl /usr/local/bin/litmusctlWindows
Extract the binary
litmusctl.exe <command> <subcommand> <subcommand> [options and parameters]Check the litmusctl version
litmusctl versionThe external chaos delegate can be setup using either the interactive mode or the non-interactive mode. Here, we will be using the non-interactive mode of setup.
We can now use Litmusctl to create an external chaos delegate on the remote cluster. Open your terminal on your local Machine and run the following command. Give the ChaosCenter URL (including the port, if present) for endpoint, and your account username and password accordingly.
litmusctl config set-account --endpoint="" --username="" --password=""Then, we can create an chaos delegate in a cluster mode.
Note: To get project-id, you can refer to your project in the ChaosCenter navbar and obtain its ID or use "litmusctl get projects" command.
litmusctl connect chaos-delegate --name="" --project-id="" --non-interactive
🏃 Running prerequisites check....
🔑 clusterrole ✅
🔑 clusterrolebinding ✅
🌟 Sufficient permissions. Installing the Chaos Delegate...
📌 Summary
Agent Name: chaos-delegate-01
Agent Description: ---
Agent SSL/TLS Skip: false
Platform Name: Others
Namespace: litmus (new)
Service Account: litmus (new)
Installation Mode: cluster
Applying YAML:
http://25.184.70.242:9091/api/file/eyJhbGciOiJIUzI1NiIsInR5cCI6IkpXVCJ9.eyJjbHVzdGVyX2lkIjoiZWQ2ZDhhM2ItZDIyMS00ZDI1LTgwMGQtYjBiNzljMjQxMzJkIn0.eYIY4I-WuVp1FZvRcP6yBLL4JY-IFV42r0dB5AjkHV4.yaml
namespace/litmus created
serviceaccount/litmus created
serviceaccount/litmus-admin created
clusterrole.rbac.authorization.k8s.io/litmus-admin unchanged
clusterrolebinding.rbac.authorization.k8s.io/litmus-admin unchanged
serviceaccount/argo-chaos created
clusterrole.rbac.authorization.k8s.io/chaos-cluster-role unchanged
clusterrolebinding.rbac.authorization.k8s.io/chaos-cluster-role-binding unchanged
clusterrole.rbac.authorization.k8s.io/subscriber-cluster-role unchanged
clusterrolebinding.rbac.authorization.k8s.io/subscriber-cluster-role-binding unchanged
serviceaccount/event-tracker-sa created
clusterrole.rbac.authorization.k8s.io/event-tracker-cluster-role unchanged
clusterrolebinding.rbac.authorization.k8s.io/event-tracker-clusterole-binding unchanged
deployment.apps/chaos-operator-ce created
deployment.apps/chaos-exporter created
service/chaos-exporter created
configmap/chaos delegate-config created
secret/chaos delegate-secret created
deployment.apps/subscriber created
deployment.apps/event-tracker created
service/chaos scenario-controller-metrics created
deployment.apps/chaos scenario-controller created
serviceaccount/litmus-cluster-scope created
clusterrole.rbac.authorization.k8s.io/litmus-cluster-scope unchanged
clusterrolebinding.rbac.authorization.k8s.io/litmus-cluster-scope unchanged
customresourcedefinition.apiextensions.k8s.io/clusterworkflowtemplates.argoproj.io unchanged
customresourcedefinition.apiextensions.k8s.io/cronworkflows.argoproj.io unchanged
customresourcedefinition.apiextensions.k8s.io/chaos scenarios.argoproj.io unchanged
customresourcedefinition.apiextensions.k8s.io/workflowtemplates.argoproj.io unchanged
customresourcedefinition.apiextensions.k8s.io/workflowtasksets.argoproj.io unchanged
serviceaccount/argo created
clusterrole.rbac.authorization.k8s.io/argo-cluster-role unchanged
clusterrolebinding.rbac.authorization.k8s.io/argo-binding unchanged
configmap/chaos scenario-controller-configmap created
customresourcedefinition.apiextensions.k8s.io/chaosengines.litmuschaos.io configured
customresourcedefinition.apiextensions.k8s.io/chaosexperiments.litmuschaos.io configured
customresourcedefinition.apiextensions.k8s.io/chaosresults.litmuschaos.io unchanged
customresourcedefinition.apiextensions.k8s.io/eventtrackerpolicies.eventtracker.litmuschaos.io configured
💡 Connecting chaos delegate to Litmus Portal.
🏃 Agents are running!!
🚀 Chaos Delegate Connection Successful!! 🎉
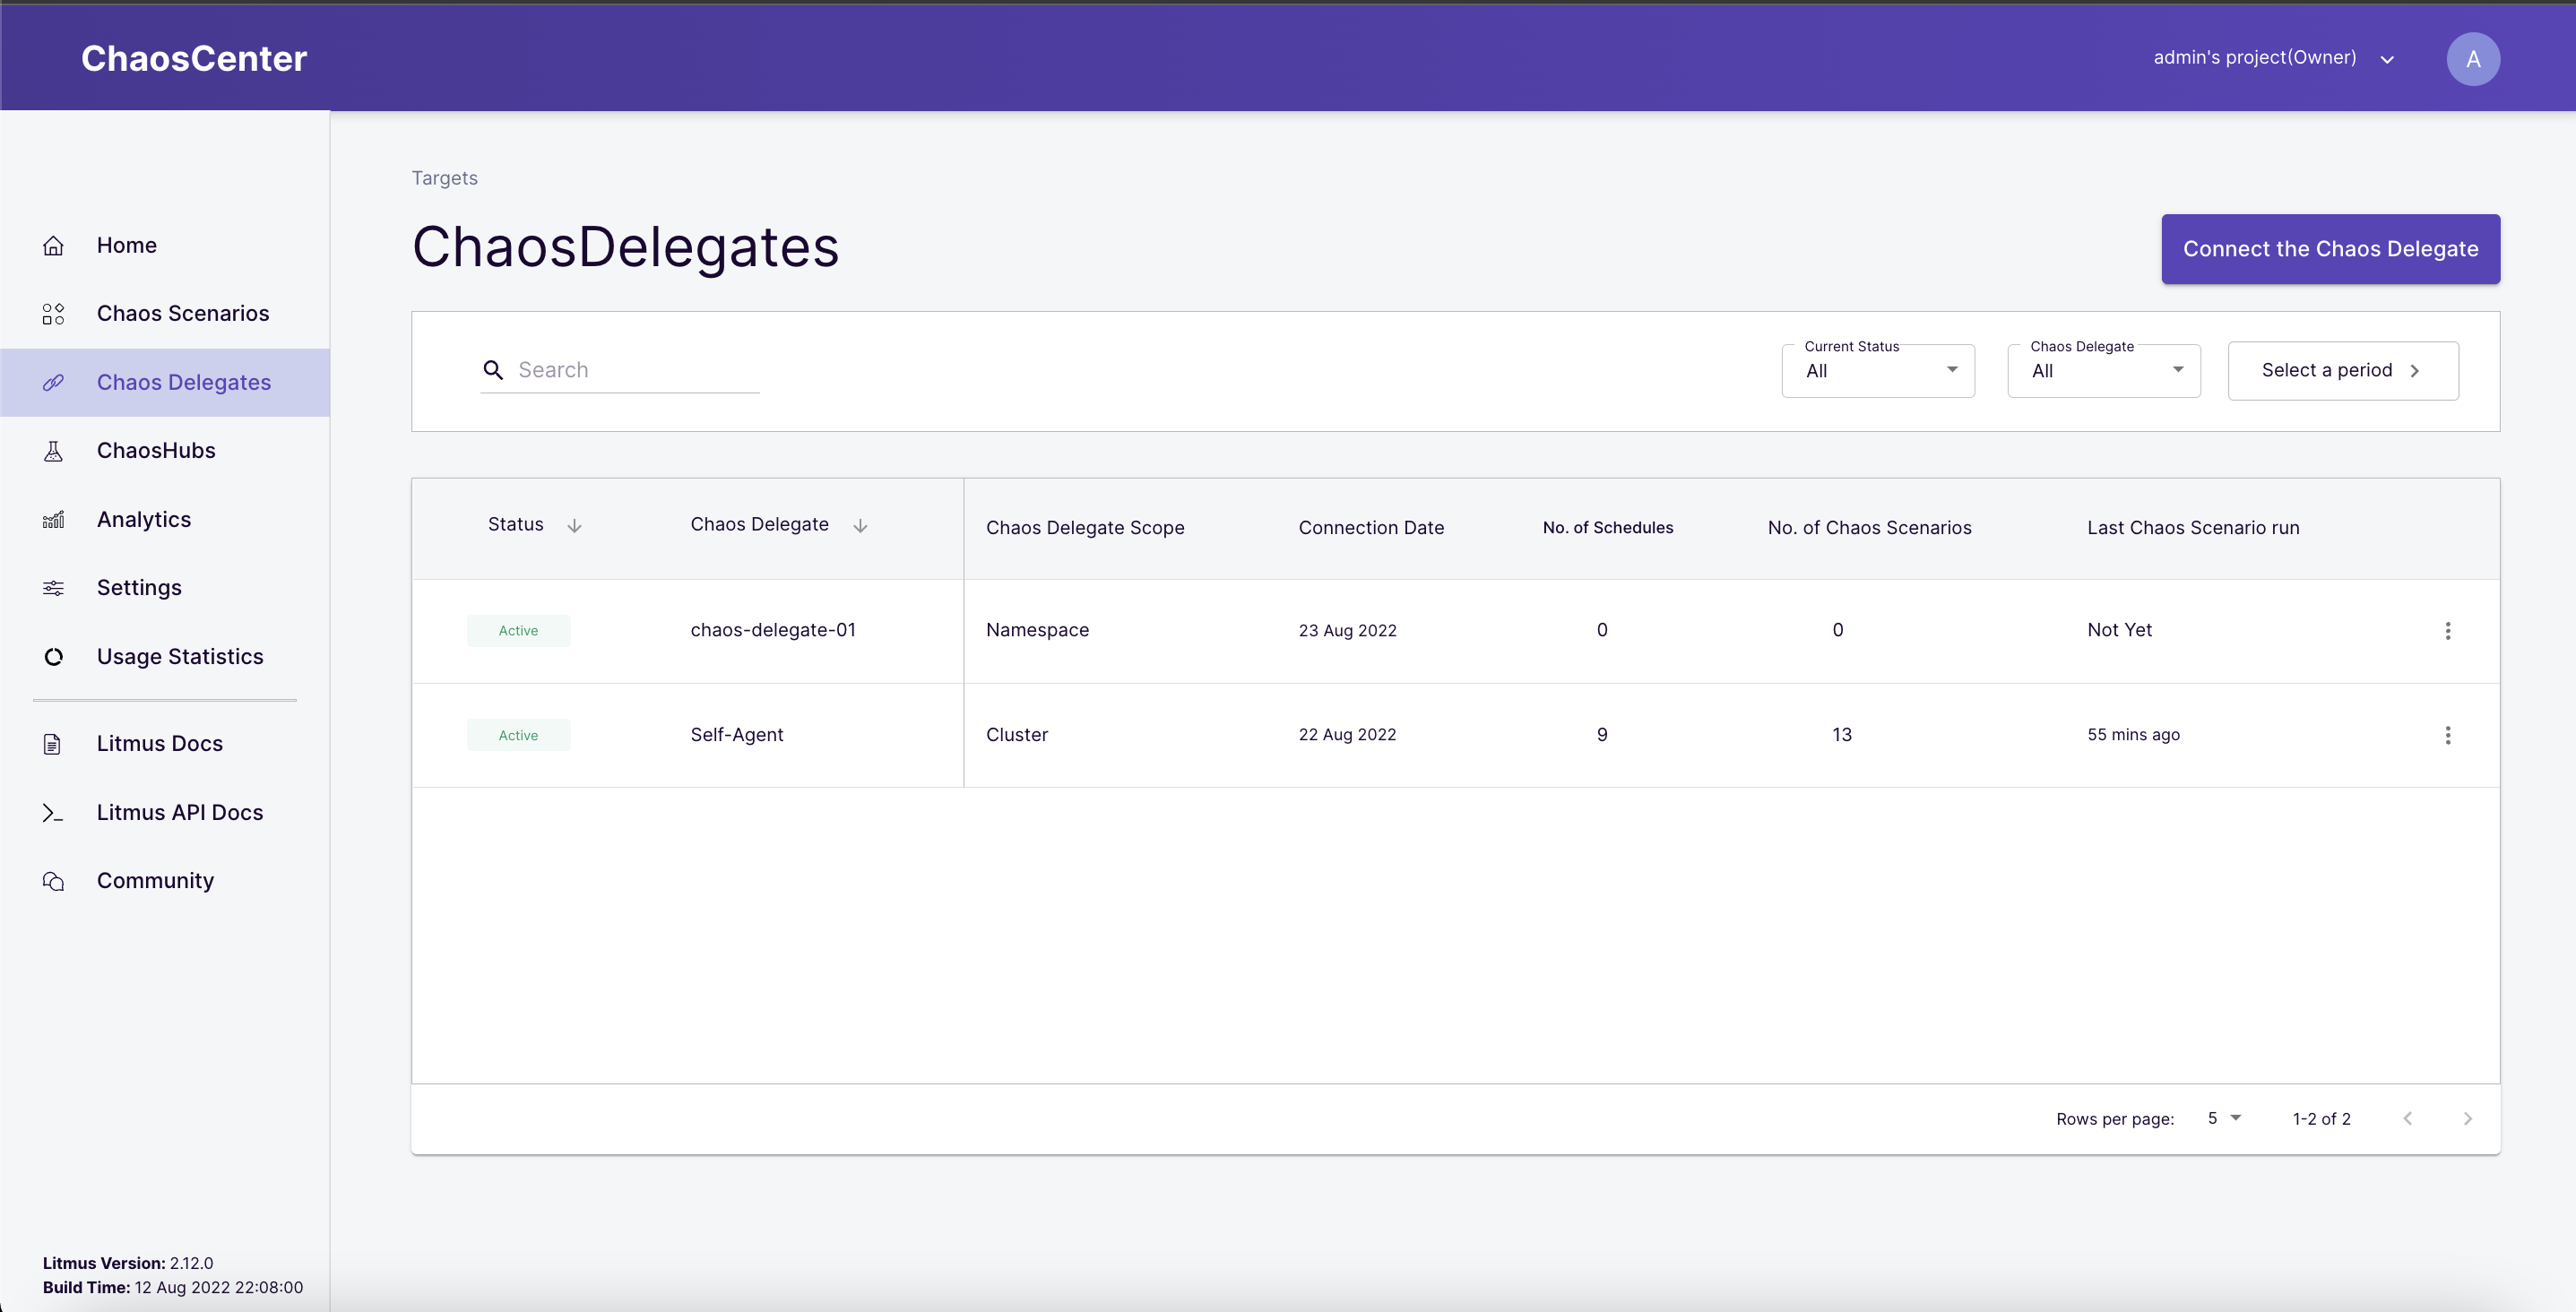
👉 Litmus chaos delegates can be accessed here: http://25.184.70.242:9091/targets
Navigate to the IP address printed in your terminal at the end, it should take you to the Chaos Delegates tab on your remote ChaosCenter. You should observe that your new Chaos Delegate has been added to your list of Chaos Delegates.
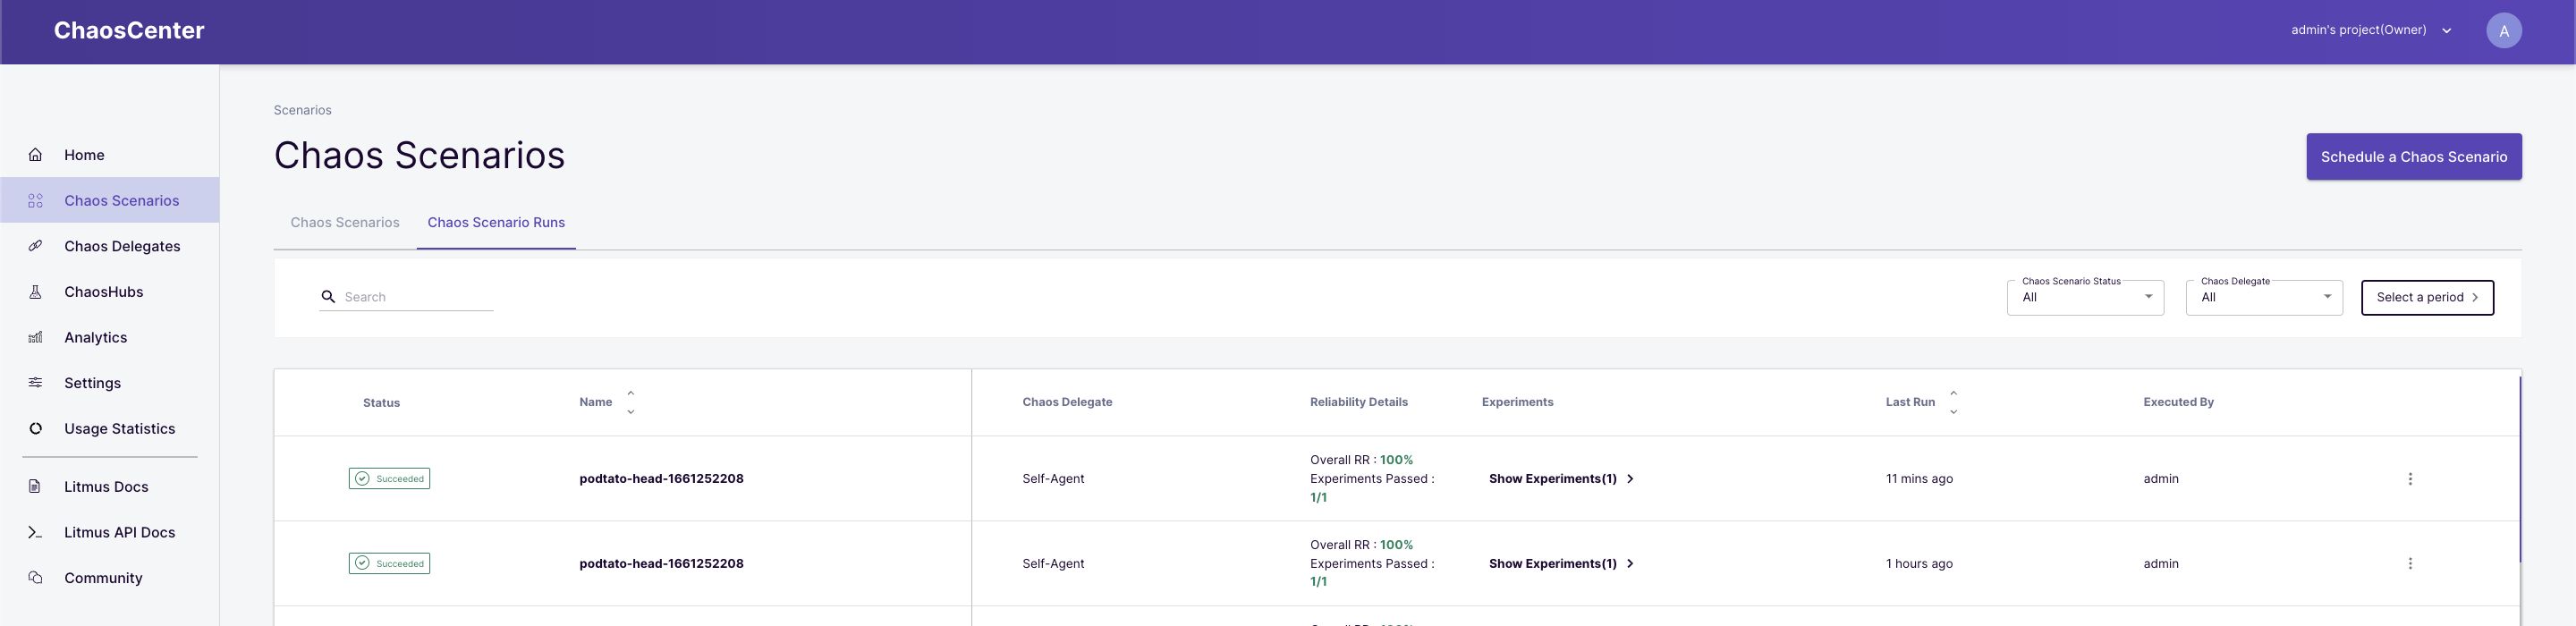
You can now proceed to schedule a scenario using the newly created Delegate on the remote cluster. Navigate to the scenarios tab on the sidebar, then click the Schedule a scenario button.
Select a target Delegate
You need to select a Target Delegate to proceed, you will see two options.
- Self Agent(Default)
- chaos-delegate-01(Newly created delegate)
Select the latter, then click on the Next button.
Note: You may have to wait for the delegate to be up and ready, after which you can move forward by again clicking on "Next"
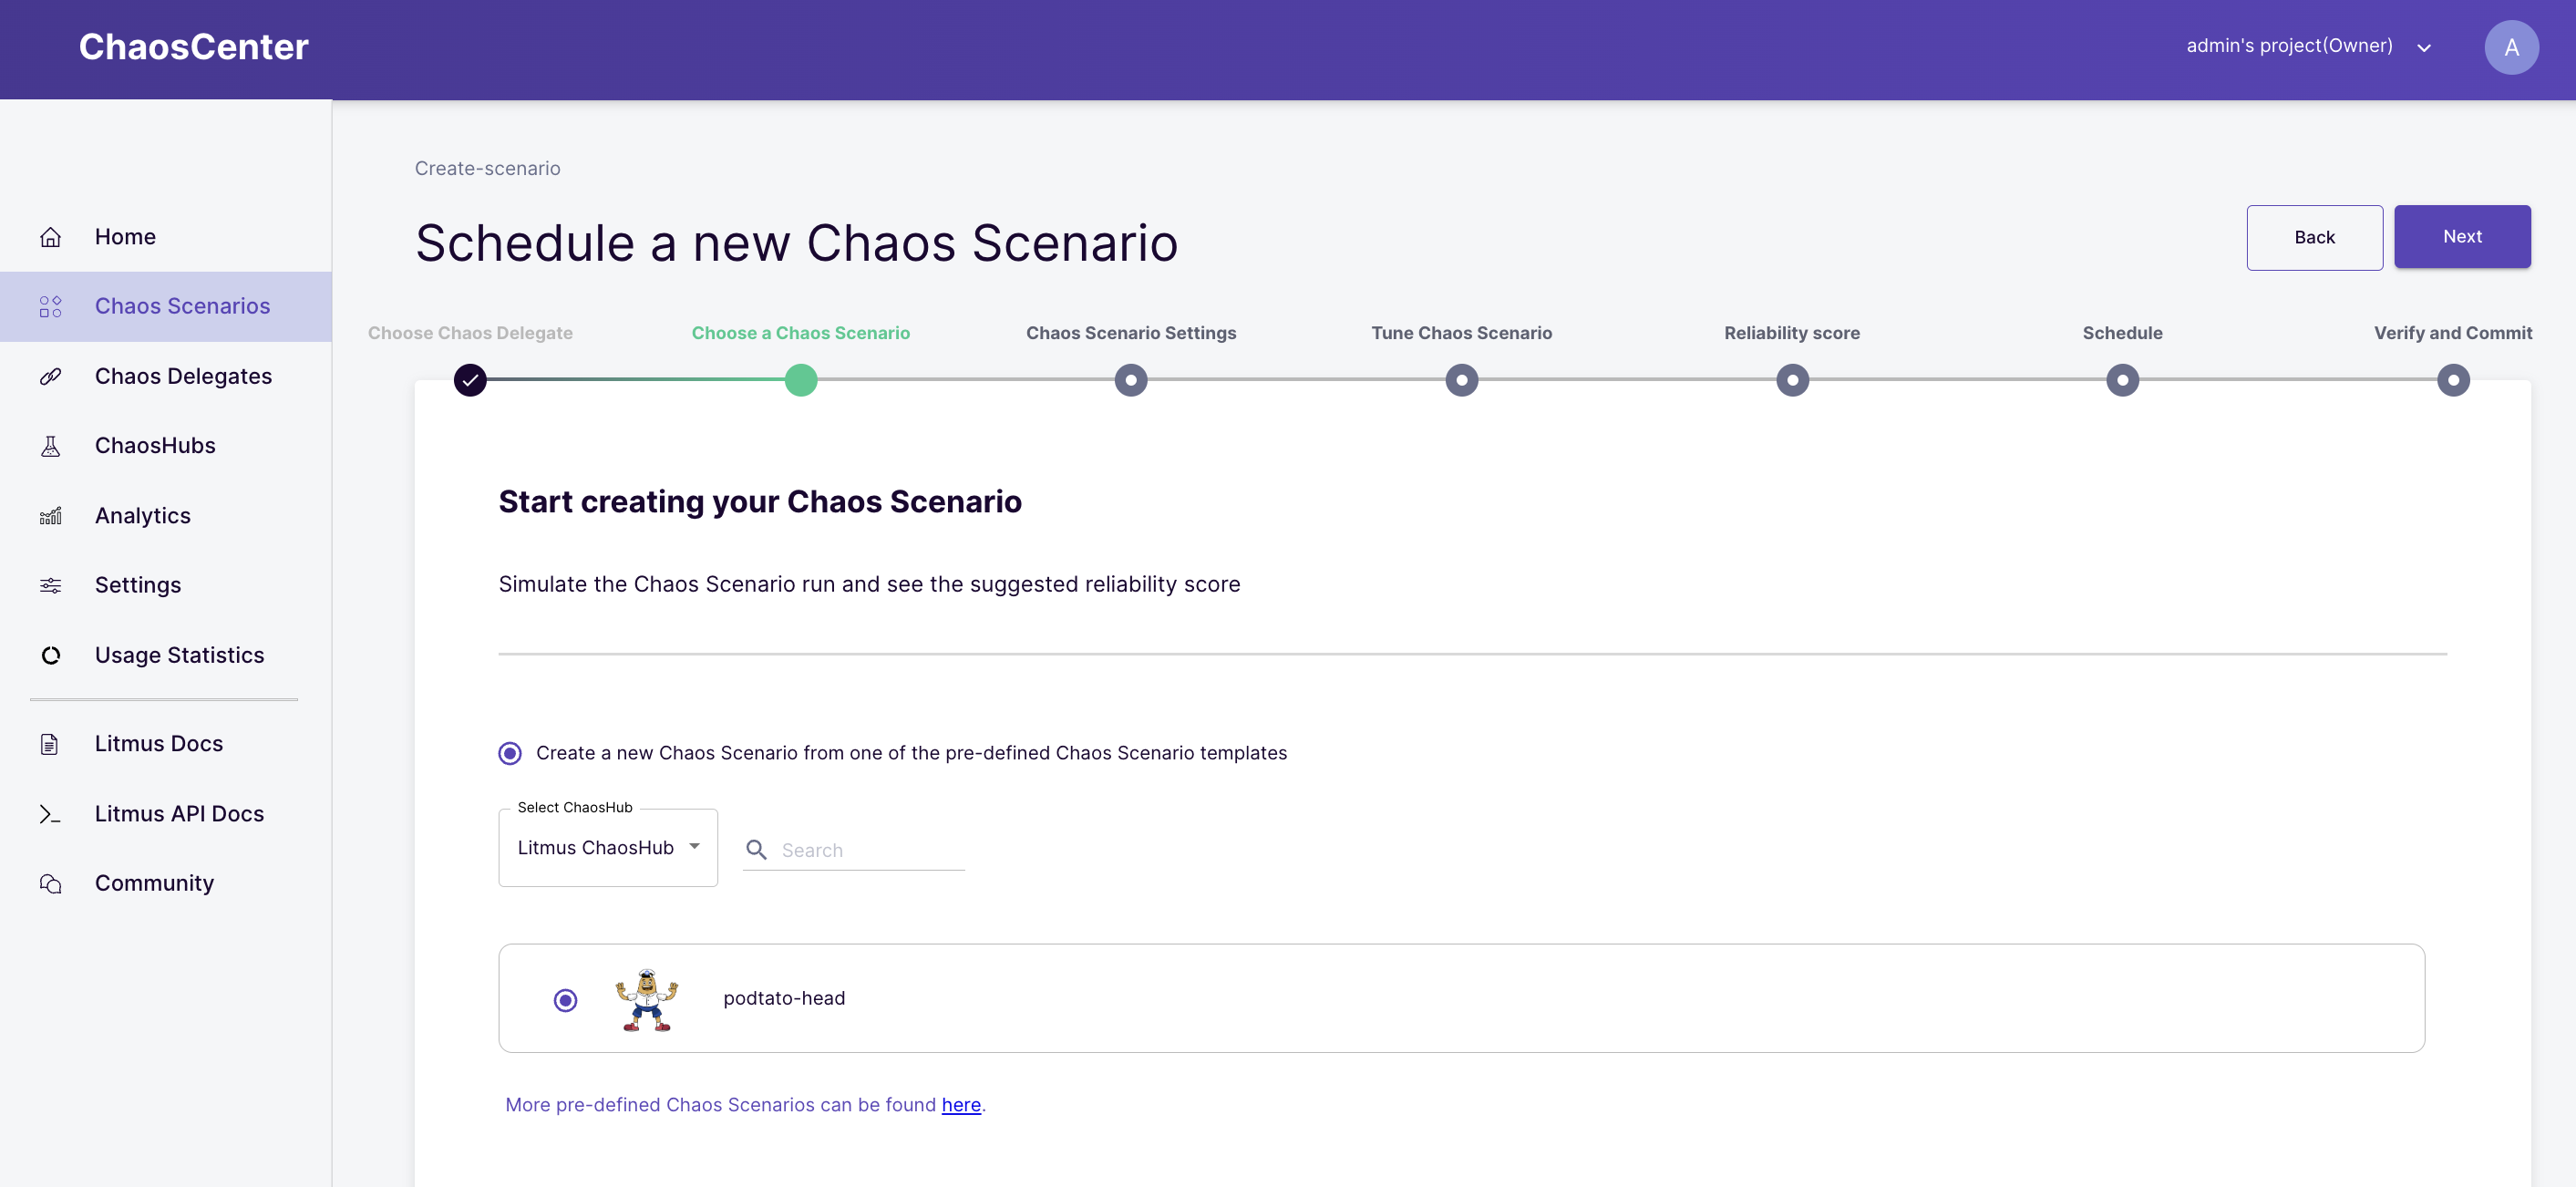
Select a scenario
Here, you will see four different options from which you can create a scenario. For this tutorial, you should select the first option which creates a scenario from a predefined chaos scenario template. Then select the podtato-head experiment, this experiment injects a pod-delete fault into a sample microservice application. Click the Next button when done.
Describe the scenario
Here, you can give this scenario a name and a description or leave the default ones. Click next when done. 
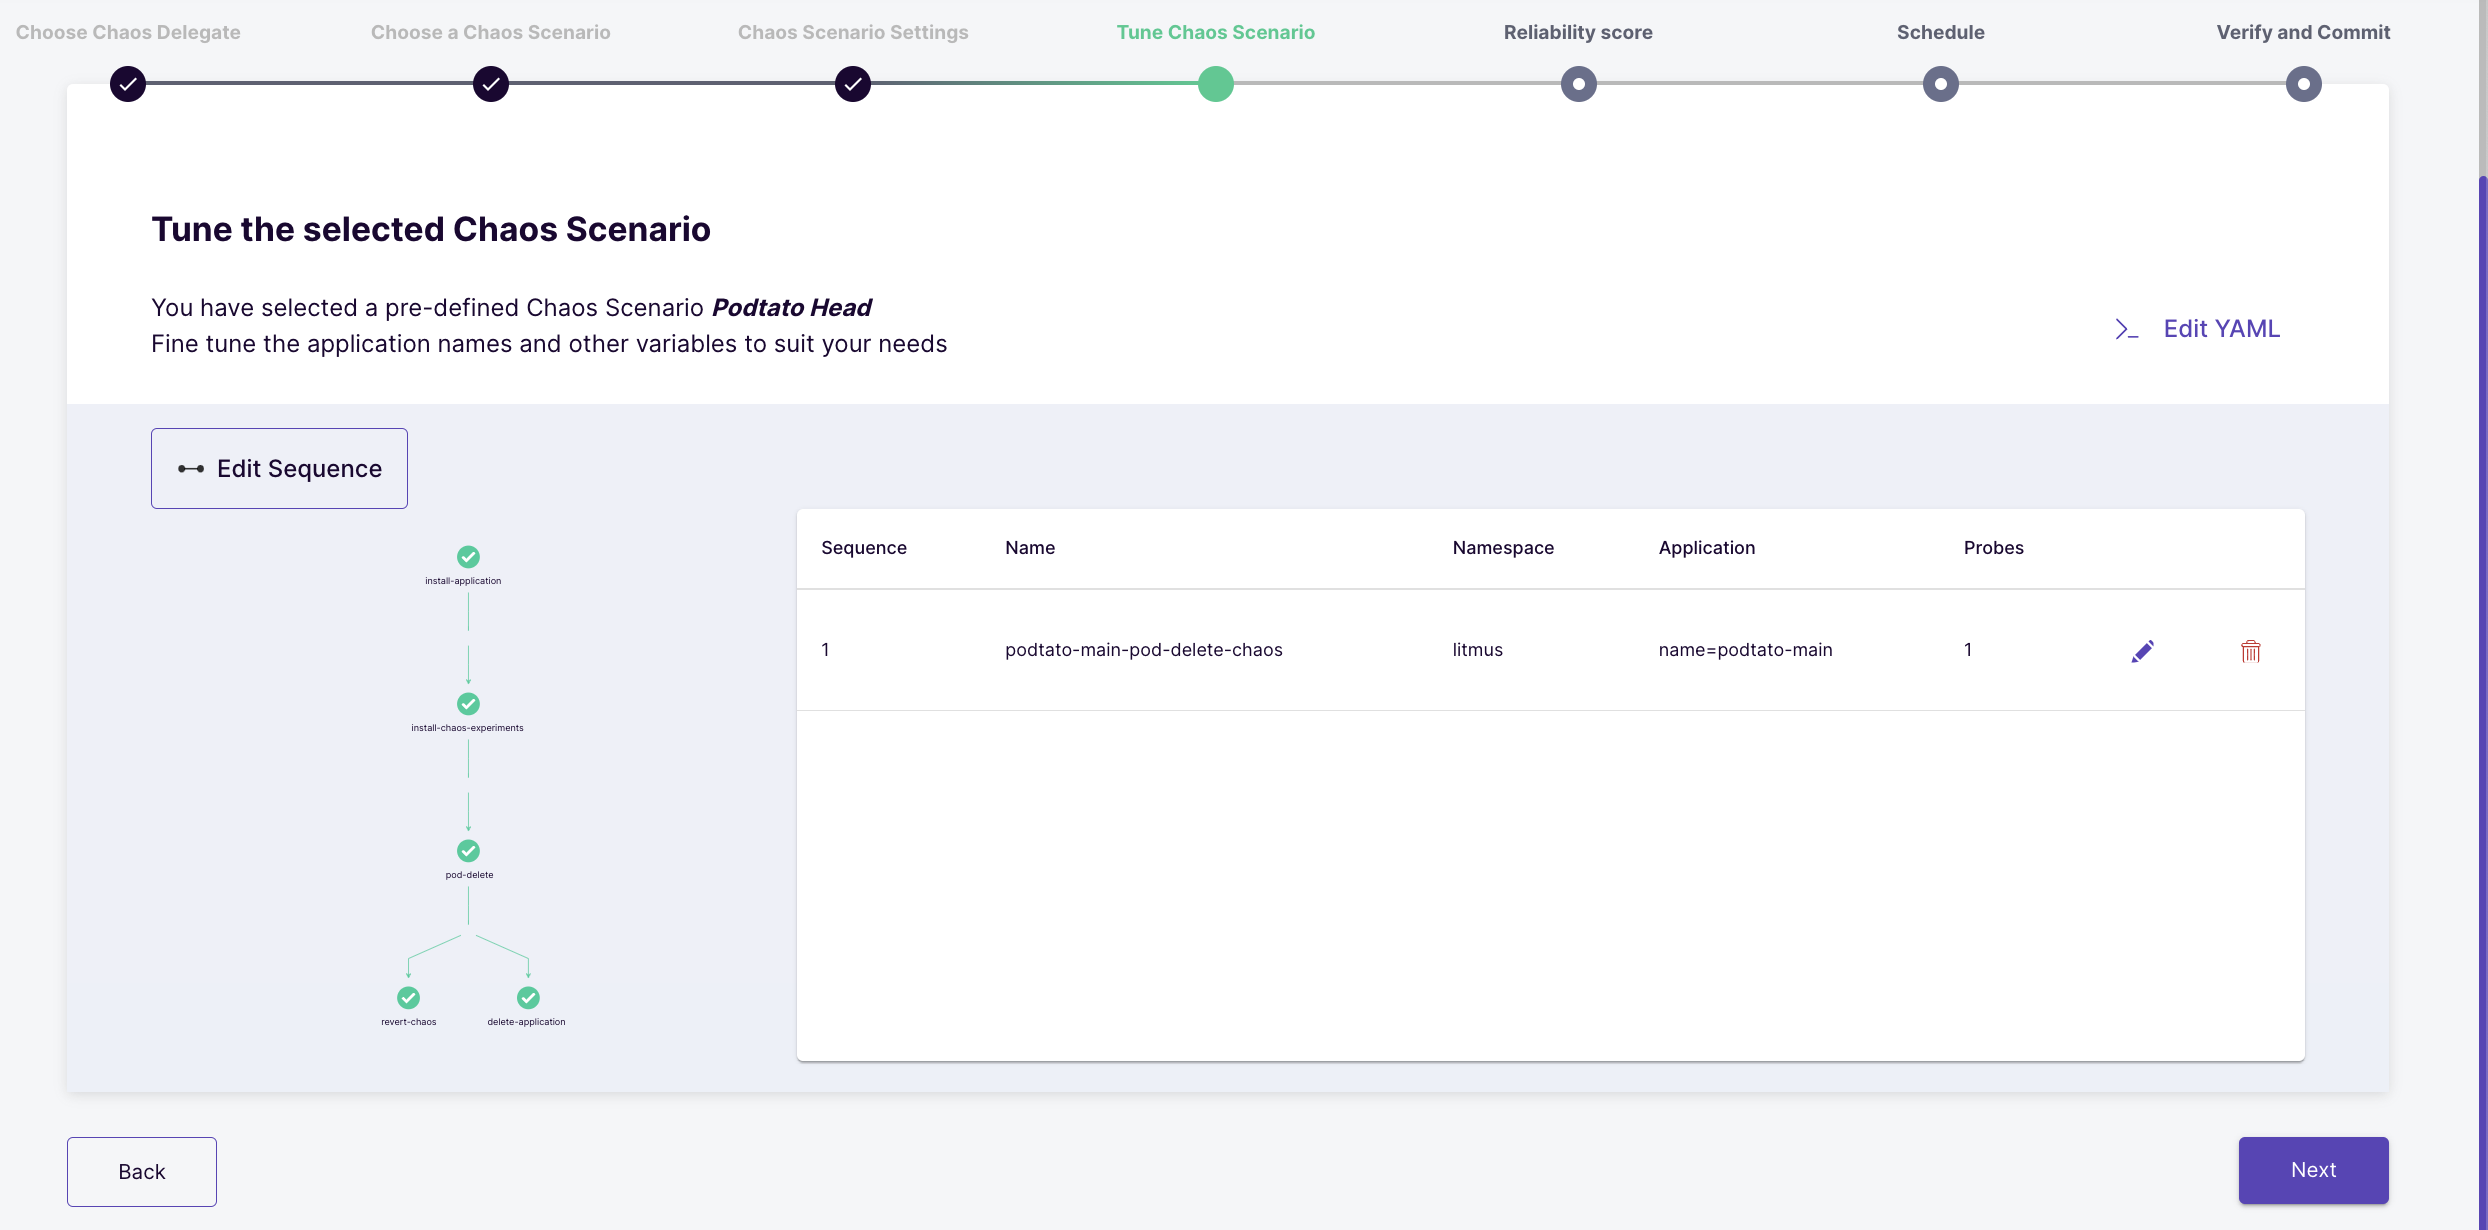
Tune the scenario
This section consists of all the information related to the chaos scenario. It contains a pictorial visualization of the scenario and an option to edit the scenario yaml file.
Reliability Score
You can assign weights to the experiments present in the scenario. These weights will be then used for the calculation of the resilience score after the scenario completion. By default, 10 points are assigned to each experiment. This can be altered as per your use-case. After selecting weights click on the Next Button.

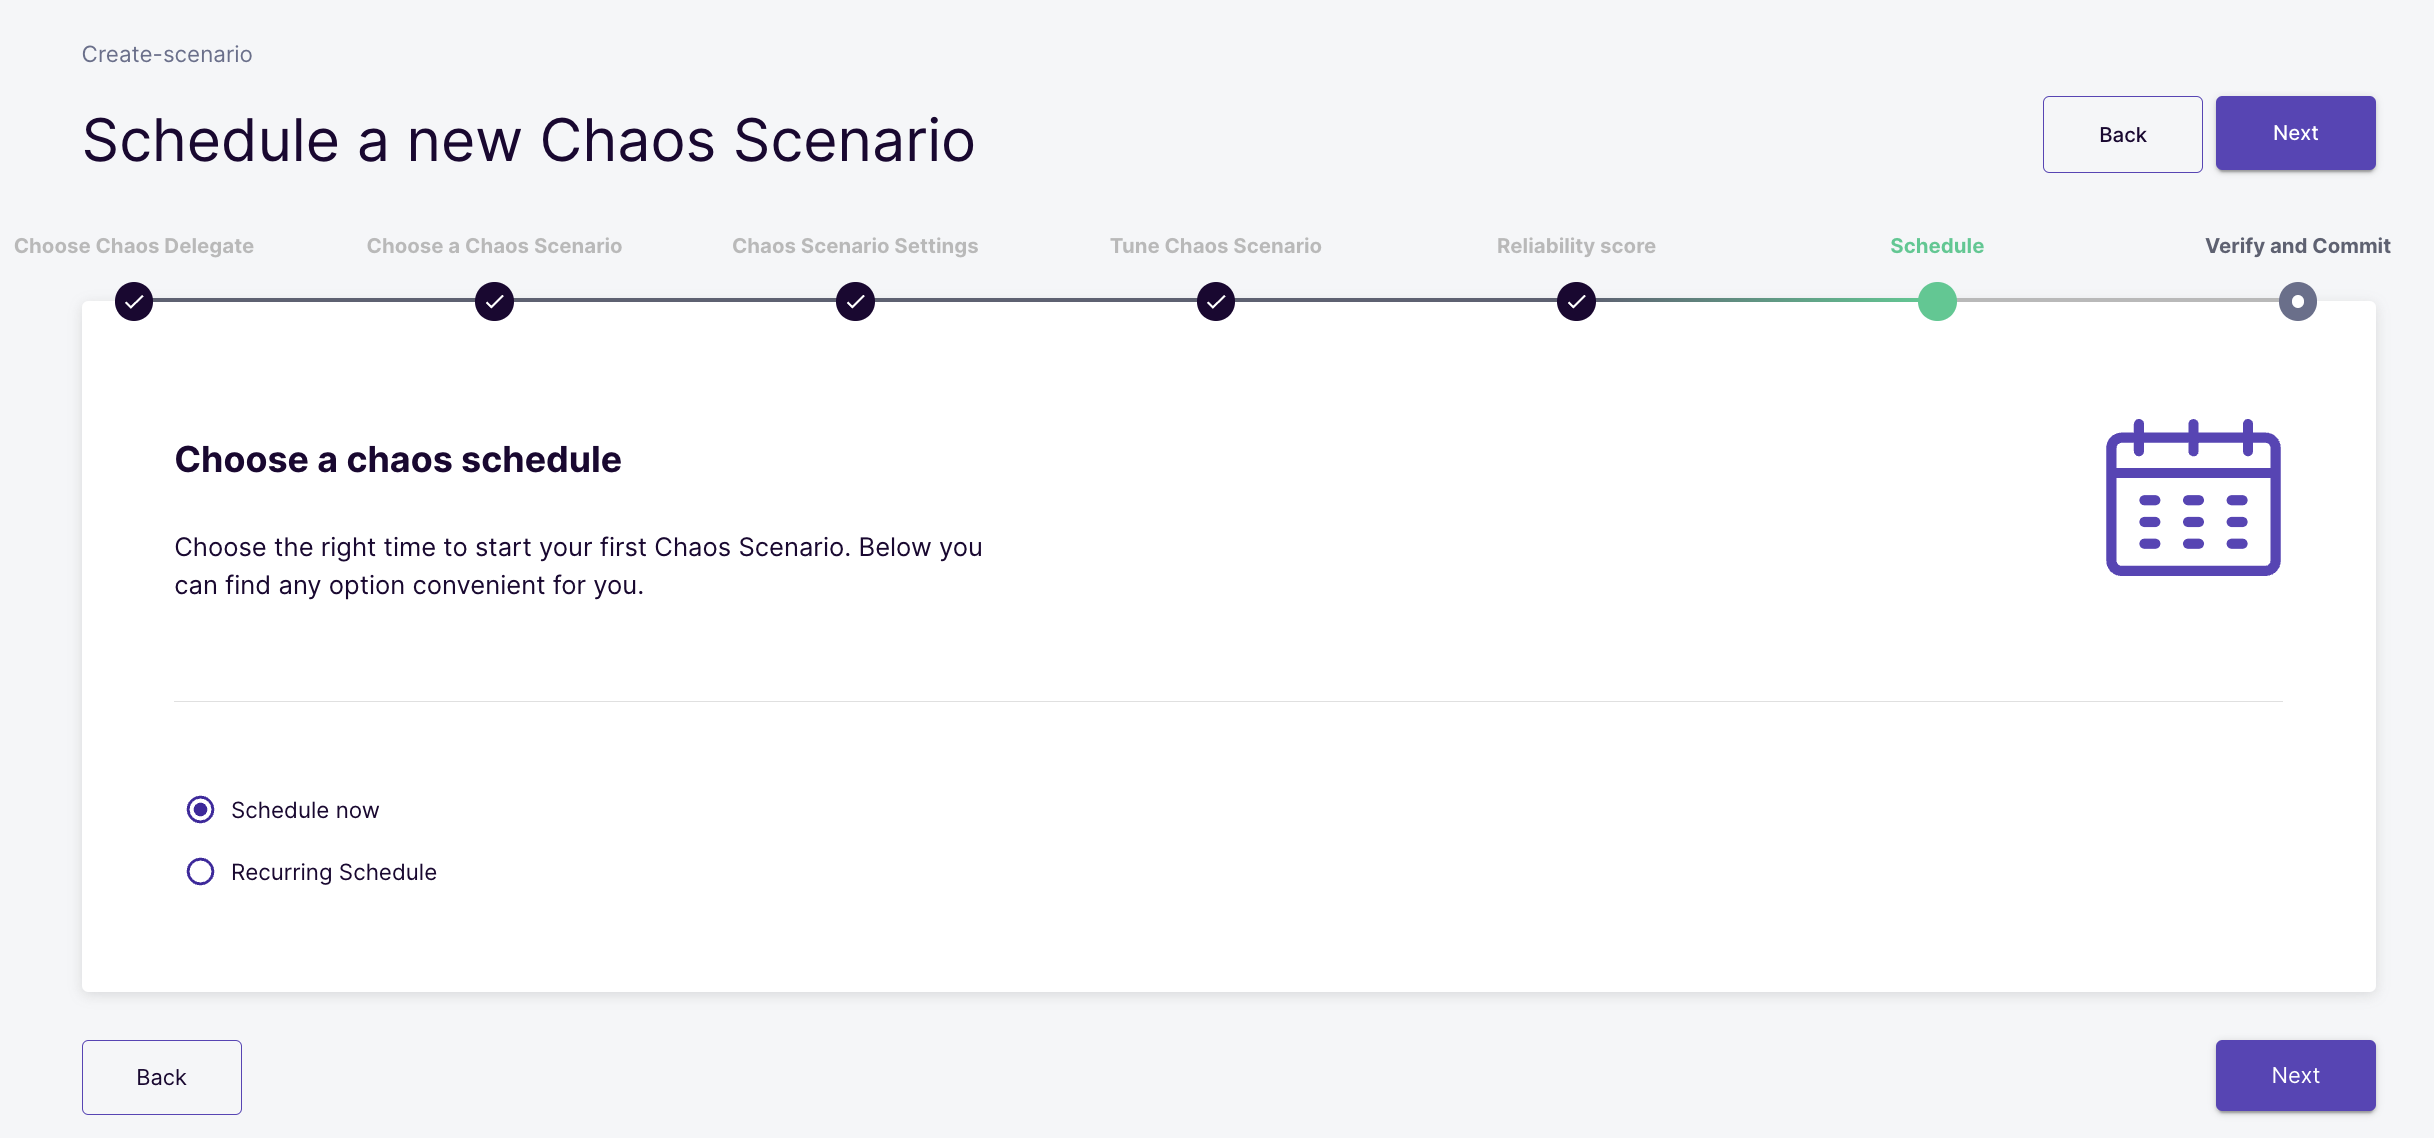
Schedule
scenarios can be scheduled in two ways;
- Schedule now: This option allows the scenario will start as soon as you schedule it.
- Recurring Schedule: This option will allow you to schedule recurring scenarios. It converts a normal scenario to Cron scenario by adding cron syntax in the scenario manifest. The following methods are available to schedule recurring scenarios:
- Every Hour
- Every Day
- Every Week
- Every Month
Select the Schedule now option and click next.
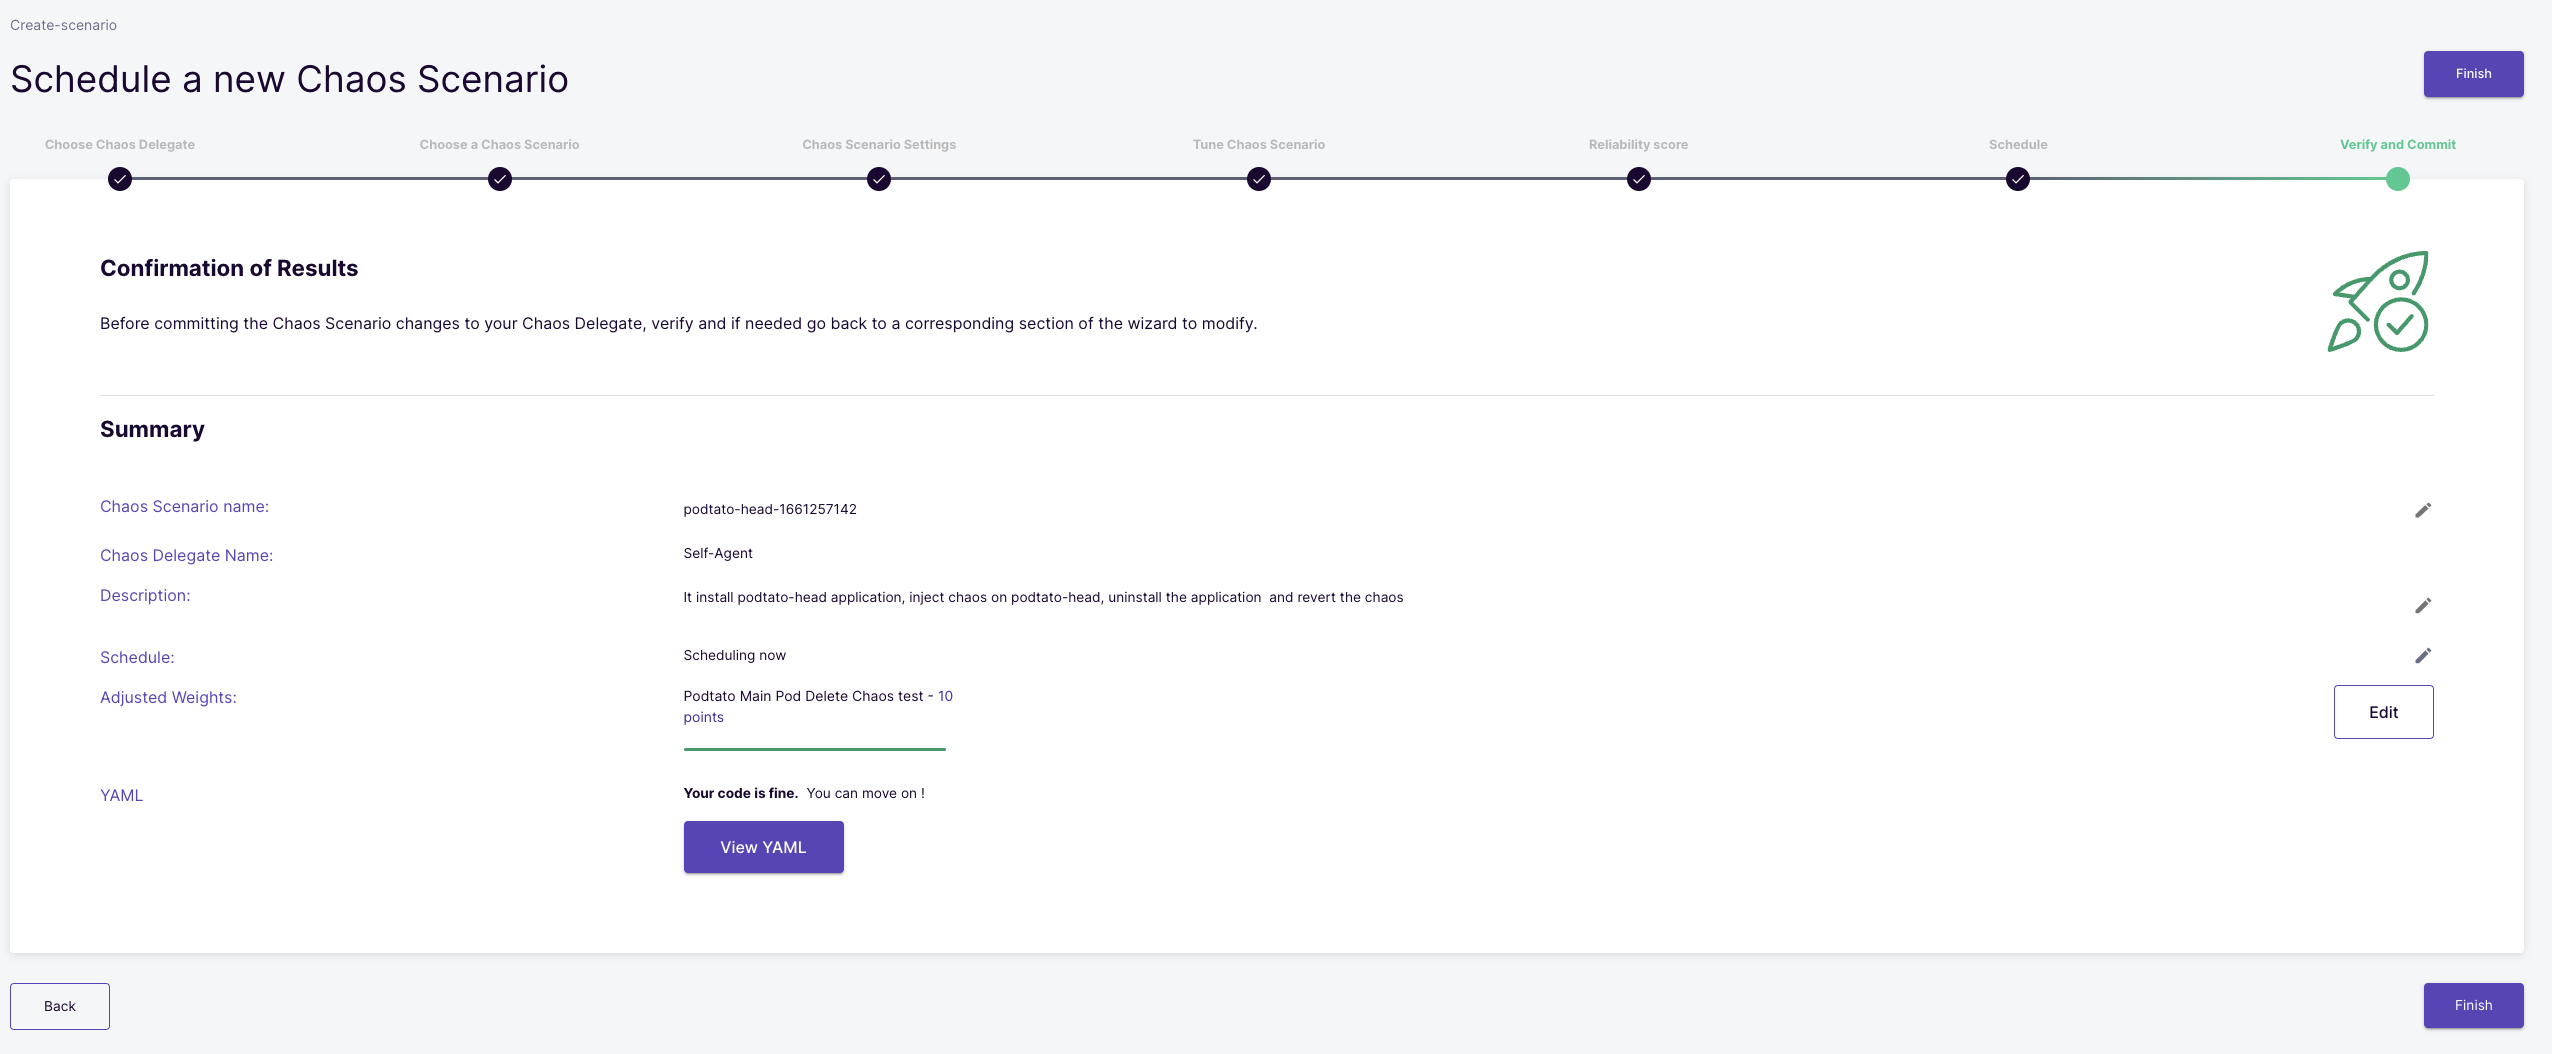
Verify and commit
Here, you can validate all the changes related to the chaos scenario like the chaos scenario name, the experiment weights, chaos scenario description, chaos scenario manifest, etc. Once you have verified all the changes, you can click the Finish button to start the schedule.
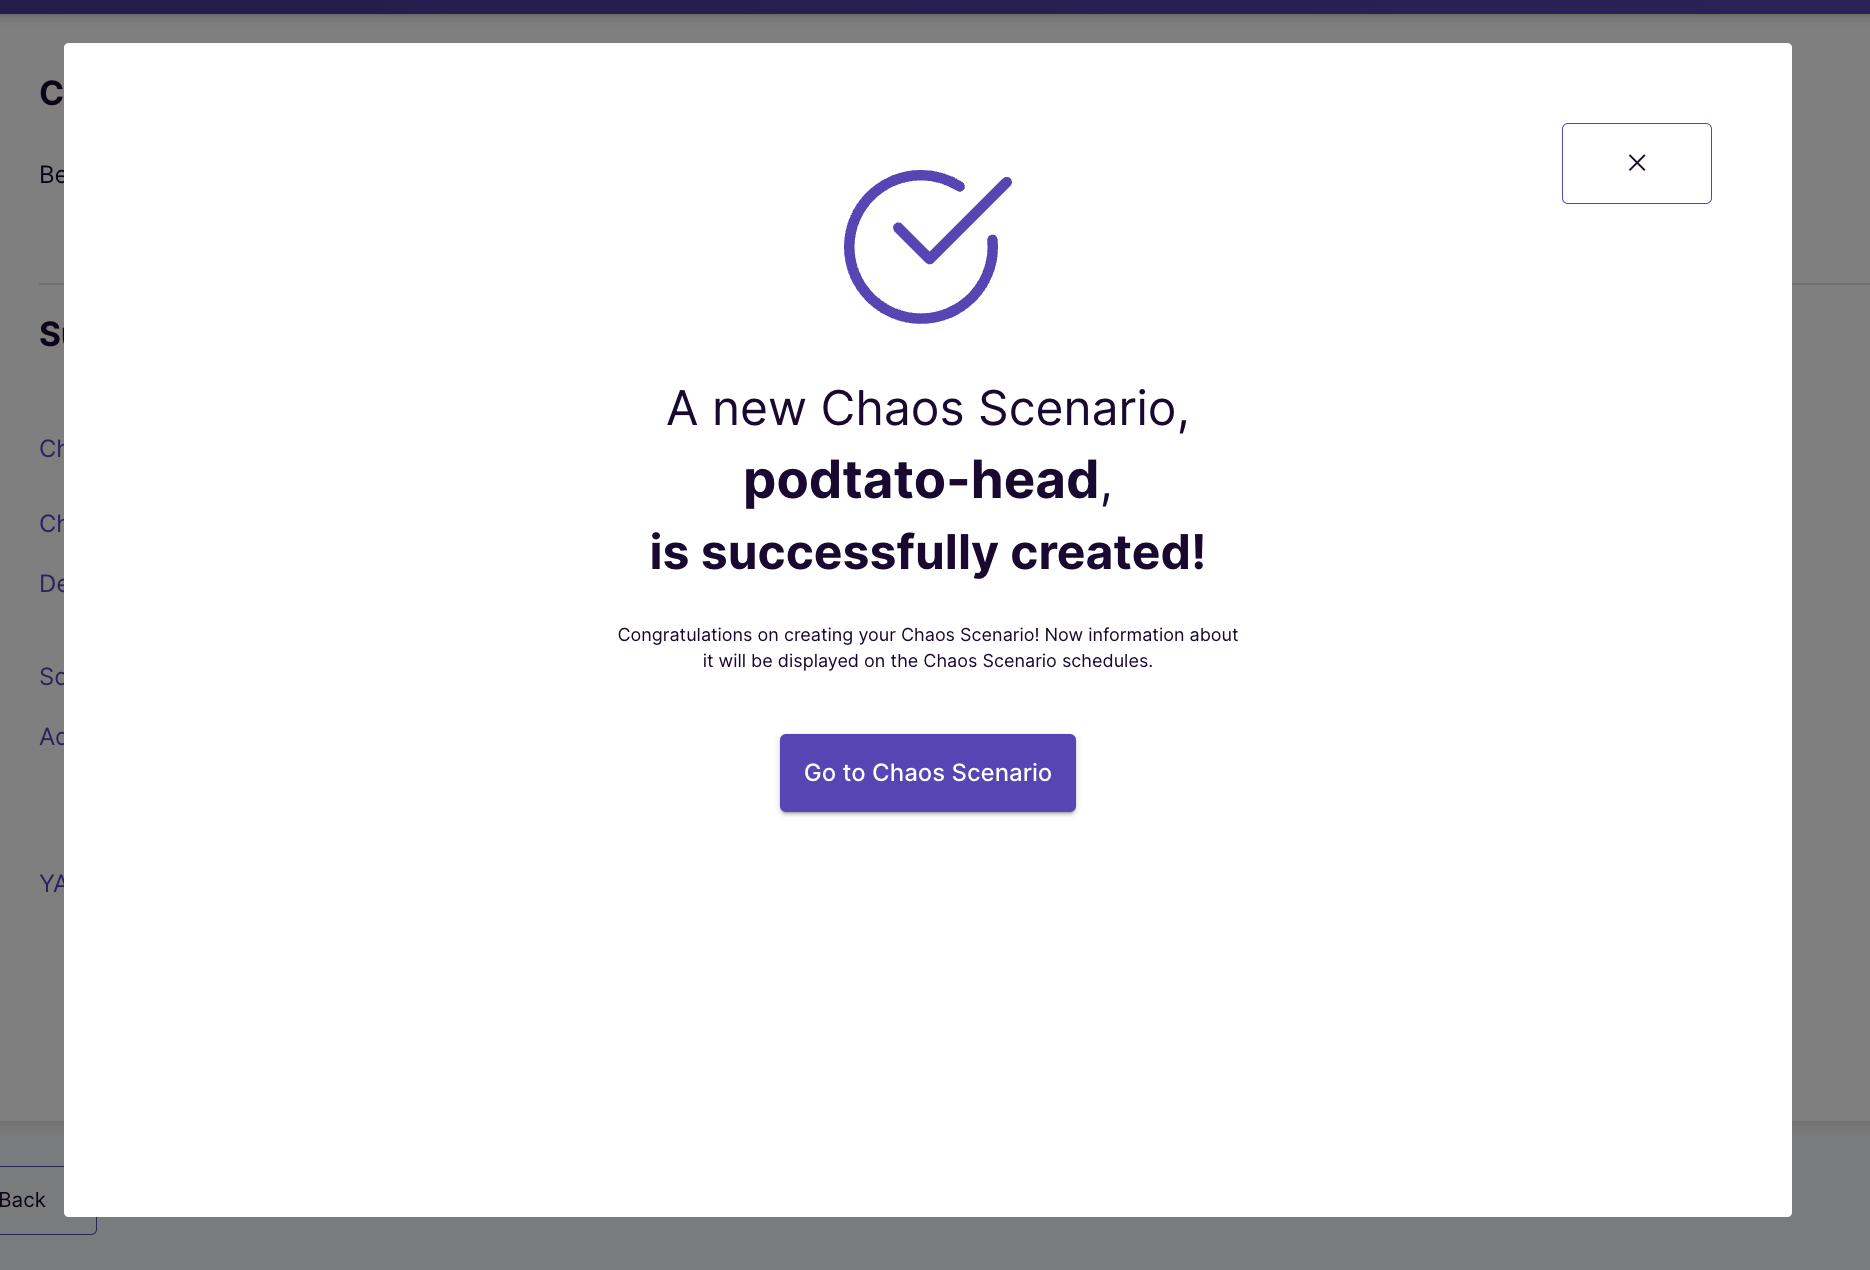
Click the Go to chaos scenario button to see the chaos scenario in action.
In this tutorial, you were introduced to how to create a remote cluster on Google Kubernetes Engine and deploy ChaosCenter on it. Them, you learned what litmusctl is and how to use it to create a new chaos delegate on a remote cluster. Lastly, you learned how you can schedule your own chaos on this remote cluster using the chaos delegate you created.
Please visit us in our LitmusSlack Channel (in Kubernetes workspace) and tell us how you like LitmusChaos and this tutorial! We are happy to hear your thoughts & suggestions!
Also, make sure to follow us on Twitter to get the latest news on LitmusChaos, our tutorials, and the newest releases!